
Intel has been working on some code to support its ISH (Integrated Sensor Hub) chips for motion detection and other localized data. Intel's code aims to provide a similar level of Linux support as other sensor hardware, but without changing the ABI (Application Binary Interface), so that existing code could run on hardware containing ISH chips, without needing to rewrite the source code.
Srinivas Pandruvada was the Intel engineer to send out the patches and request feedback. He offered the caveat that the code was still in an early state, and he wanted to make sure it was heading in the right direction.
Several kernel developers were happy to see these patches, though they all reported various problems with the code and difficulty performing tests. And while Srinivas wasn't able to produce updated patches during the conversation, it's clear that ISH support will be in the kernel soon.
Patching a running kernel without having to reboot is insanely cool. The way it works is that the patched code and the original code coexist on the system until nothing is using the old code. Then, the calling paths are updated to point only to the new code. Assuming the new code doesn't do anything fundamentally incompatible with the old, the system should experience no trouble.
One problem with this is that the new code has to wait until no other thread is running in the old code, and only then do the switch. This could take an arbitrary amount of time, during which the kernel must rely on the old code. Josh Poimboeuf recently submitted some changes to the live-patching code to make the kernel switch to newly live-patched code on a per-process basis. This way, as a given process exited the old code, the next time it needed that code, it would see only the new, patched version. Over time, more and more processes would switch over to the new code, until the old code wasn't used at all.
There are various insane elements to the whole issue. Live patching is nuts. For instance, Jessica Yu pointed out that if a process was sleeping in an uninterruptible state, it might never be able to let go of the old code, so that code could never be removed after a patch. And as David Laight pointed out, such a process would need special handling by the kernel, so that the normal ways of dealing with hung tasks wouldn't trigger anything bad with the live-patching procedure.
Resource locking is crucial for a multitasking, multi-user system, but it's difficult to get right. Locks need to be as fast as possible, or they risk slowing down the system significantly. They also need to lock only the specific resource they want, or they risk making other processes wait around. That was the problem with the Big Kernel Lock (BKL) that has since been replaced with a variety of smaller locks.
Peter Zijlstra recently noticed that some kernel code would check a lock too early and potentially miss important state changes. He posted some code to fix it, but his proposed interface apparently relied a little too heavily on the user understanding the inner workings of those locks. Linus Torvalds objected very strongly, saying, “NAK. We don't start adding more of this 'after_ctrl_dep' crap. It's completely impossible to understand, and even people who have been locking experts have gotten it wrong. So it is completely unacceptable to have it in drivers. This needs to be either hidden inside the basic spinlock functions, or it needs to be a clear and unambiguous interface.”
Fortunately, as Tejun Heo pointed out, the whole question might turn out to be moot, since the portion of code that contained Peter's problem might not be needed anymore and simply could be removed from the kernel. Peter replied that this would be perfectly acceptable to him, and the thread petered out.
Virtualization is one of the hairiest parts of kernel development. It's the effort to make the kernel appear to be running user code on multiple separate systems, all the while running everything on just one. And, since the virtual systems need to communicate their needs and the users' needs to the real system underneath, it can be hard to give users absolutely every privilege they expect.
Serge E. Hallyn recently tried to address one of these sorts of issues. If users untar a tarball, the extended attributes (xattrs) of the extracted files need to be preserved, according to the security privileges of those users. And if the users are on a virtualized system, they may have privileges on that system that appear to be greater than the privileges they'd have on the real system underneath. For example, regular users can be root on their personalized virtual systems, but they're still just regular users underneath.
Serge sent in some patches to prevent users from giving files more powerful xattrs than they deserved, by spoofing the real xattr with an alternative that had lesser security privileges. However, as Eric W. Biederman put it, creating alternative xattrs actually would have the effect of letting otherwise identical file repositories get out of sync with each other.
Eric suggested simply keeping the xattrs as stored in the tarball (or anywhere else), but having the kernel keep track of the true security level of the user who unpacked it. The kernel could, therefore, prevent the user from improperly gaining any extra security privileges.
Serge probably will implement Eric's idea, although Mimi Zohar (and Serge himself) particularly appreciated the sneaky way Serge's original patch would detect the attempt to gain improper security powers and use alternate xattrs to prevent it. But, sometimes the simpler idea is better.
I love cruising the internet looking for amusing videos. I'm pretty sure everyone who works at a computer finds themselves down weird YouTube rabbit holes from time to time. Unfortunately, I never can seem to find the videos I like the best when I'm trying to show someone else. Thankfully, if you're on an Android device, you can save YouTube videos locally.

(Screenshot from https://www.videoder.net)
Mind you, an app for ripping YouTube videos is not something you'll find in the Google Play store. But, if you're okay with violating YouTube's terms of service, or if your country doesn't have legal issues with downloading a copy of YouTube videos, check out Videoder (https://www.videoder.net). It's a downloadable APK installer that will allow you to save a local copy of any YouTube video you happen across!
In my Open-Source Classroom column this month, I talk about an add-on card for the Raspberry Pi called the ControlBlock. It allows game controllers to be connected as regular joystick devices, but it also has a really incredible power switch feature. The folks at blog.petrockblock.com have created an add-on board for the Raspberry Pi that strictly does the power feature for a cheaper price!
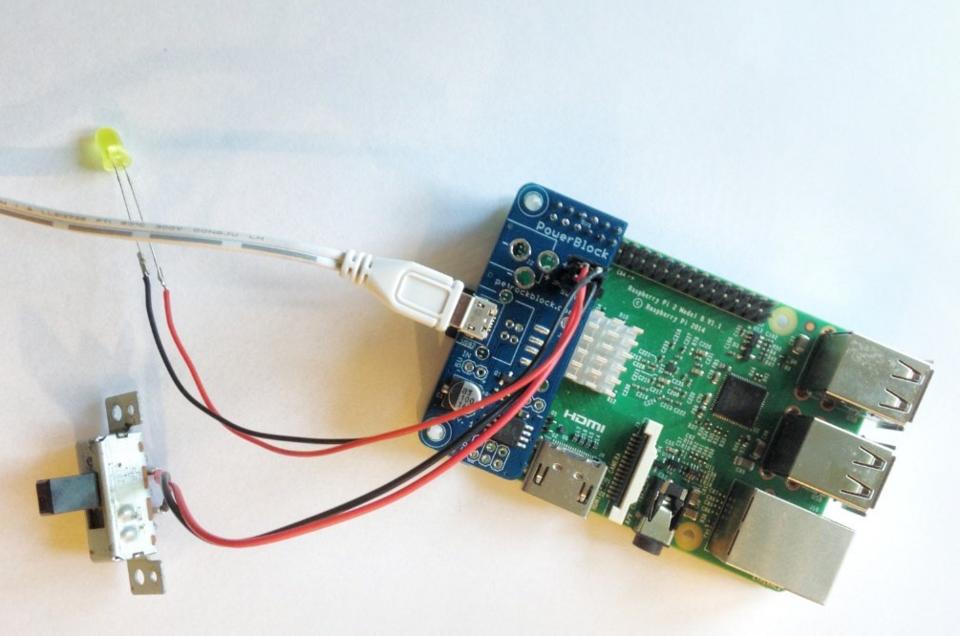
The PowerBlock is a tiny, $22 circuit board that provides a few useful features:
Power can be supplied to the Raspberry Pi via any 5V source, not just MicroUSB. (MicroUSB still is supported though.)
By connecting a toggle switch, the Raspberry Pi can be turned on. When the switch is turned off, rather than cutting the power to the Raspberry Pi, the PowerBlock initiates the shutdown command, and then powers down the system.
There are connectors for an LED (either embedded into the switch or separately, like in the photo) that show the progress of the power on/off process.
Basically, when switched on, the PowerBlock starts the Raspberry Pi. The LED blinks slowly until the RPi is completely booted, then the LED stays lit solidly. When the switch is turned to the off position, the LED blinks rapidly while it goes through the shutdown procedure. Then after the RPi is shut down, it powers off the device and the LED.
We typically give the Editors' Choice award to software, but this month, the award goes to the PowerBlock. We love Raspberry Pi projects so much that anything making those projects better deserves our attention. The PowerBlock doesn't do anything the more expensive ControlBlock doesn't already do, but if your project doesn't require the game controller support of the ControlBlock, the PowerBlock is perfect. For more details, head over to blog.petrockblock.com.
I like Pandora. I like it because it doesn't require me to know anything other than whether I like the current song. I'm sure other music services offer more features or a larger catalog, but Pandora is simple. So am I.
One of the frustrating things about using the web-based version of Pandora is that getting back to the proper tab can be frustrating. Thanks to an oddly named open-source tool for OS X, when I'm on a Mac, I can map keyboard shortcuts to the web player even if it's in the background.
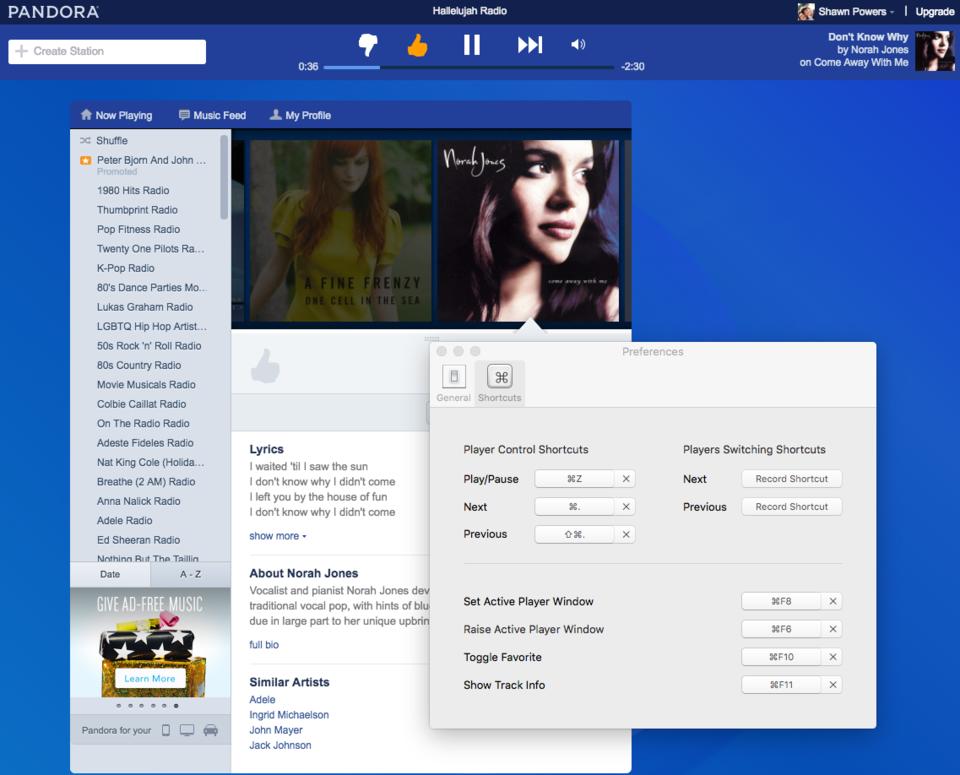
The BeardedSpice program is open source and available to download at beardedspice.github.io. At first, I wasn't sure how to configure it, but that's because there's very little to configure. Once I set the keyboard shortcuts I wanted, it's just a matter of pressing them while the music is playing! It's simple, effective and it's free (both kinds of free). If you use OS X, grab a copy today!
Minecraft is still a huge hit and loved by millions all around the world. I personally don't really understand its popularity, but I can understand a love for open-source software. The folks over at www.minetest.net have created a Minecraft-like software package that is fully open source.
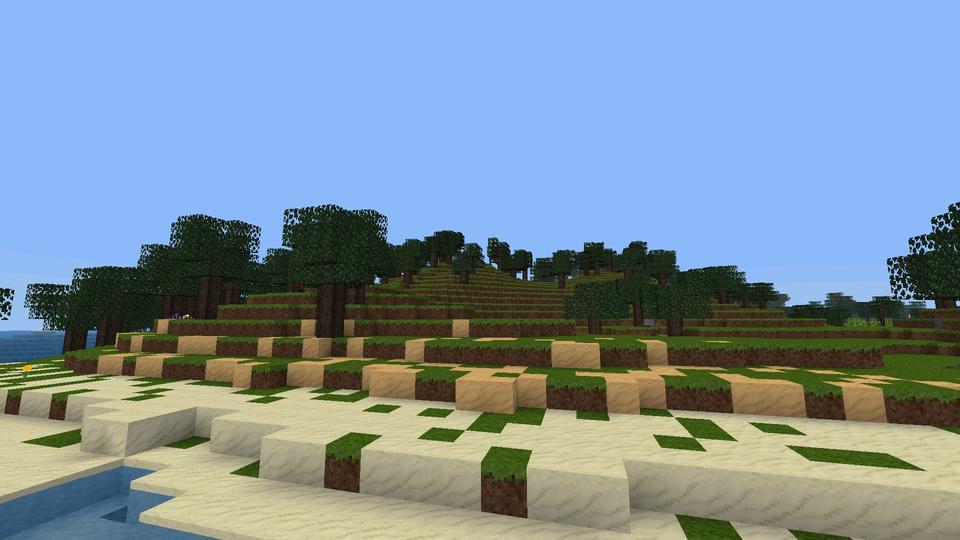
(Screenshot from www.minetest.net)
Minetest supports multiple players, single-player mode and also has tons of mods that are free to download. You also can make your own mods and implement them along with other mods. If you truly understand the passion people feel for Minecraft but are hesitant to use it because of its closed-source nature, check out Minetest. The graphics aren't very detailed, but that's by design!
Linux has several options available for handling CAD (computer-assisted drafting) projects. In this article, I cover OpenSCAD (www.openscad.org), which is available on Linux, Mac OS X and Windows.
Most Linux distributions should have it—for example, you can install it on Debian-based distributions with:
sudo apt-get install openscad
This will install all of the relevant binaries, along with several example files.
Many other CAD systems, such as Blender, are focused on the graphics of the rendering in order to produce very pretty pictures. OpenSCAD focuses more on the practical side of 3D modeling. It also isn't designed to do interactive model construction, but instead uses CAD specification files and then renders the final object, almost like compiling an executable.
You can start OpenSCAD from a menu entry in your desktop environment or by executing the openscad command from a terminal window. When it first starts, you'll see an initial window where you can select from a list of recent files or choose from the list of installed example files.
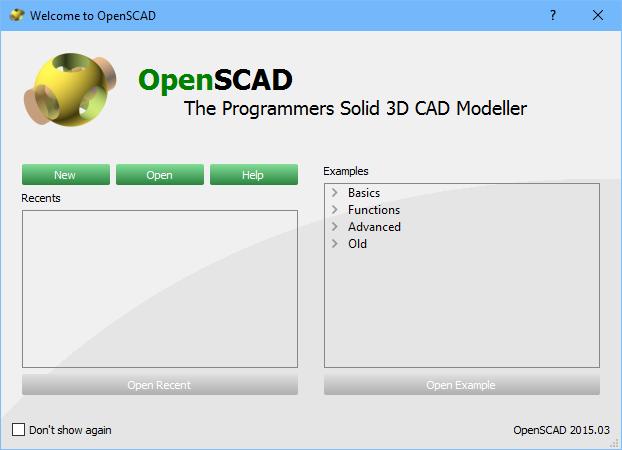
Figure 1. When you first start OpenSCAD, you'll see a listing of the most recent projects along with a selection of examples.
To get started, let's look at one of the example files—in this case, let's look at the first one: CSG.scad. The default layout consists of three separate panes. The main pane on the left-hand side is the main editor where you can define all the parts of your 3D design. The right-hand side is divided into two more panes. The top half is where the final 3D-rendered object is displayed. The bottom half is a console pane where messages are displayed. These messages could include messages from the rendering section. The viewing pane is a standard 3D viewing pane.
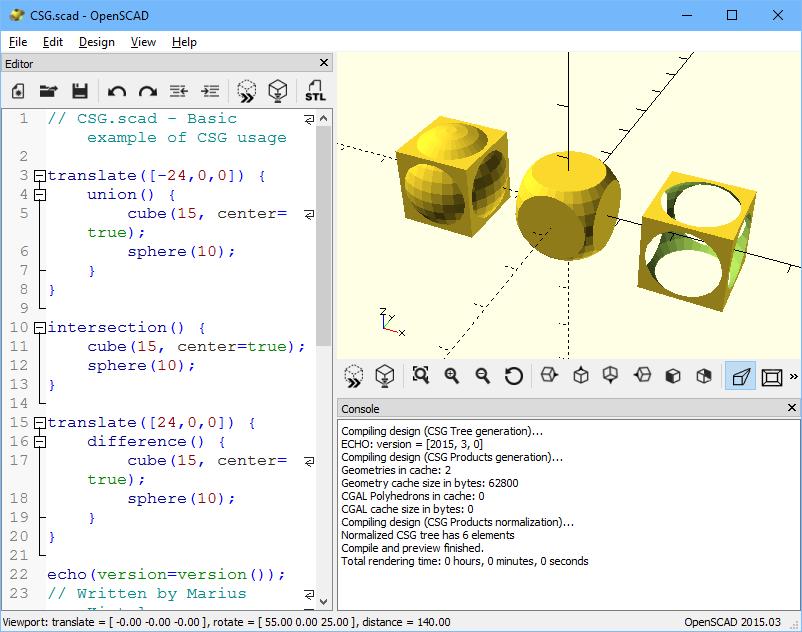
Figure 2. The main window for OpenSCAD, where you can define the objects to be rendered.
You can click and drag the display to rotate the view of your 3D object. There is also a set of icons at the bottom of the viewer where you can zoom in or out, rotate or select one of the standard views. Additionally, a set of icons at the top of the editor window gives you access to the most common functions. Here, you can open or save projects, as well as preview or render your object.
When you are ready to start a new project, you can click on the menu item File→New or press Ctrl-N. This will pop up a new window with an empty editor. Unlike many other CAD systems, OpenSCAD doesn't include a toolbox of objects that you can click and drag to build up your object. Instead, you need to type in the specifications for each of the elements for your design. As a simple example, you could add a cube with dimensions 2x3x4 by typing:
cube([2, 3, 4]);
You won't see anything at this point within the viewer pane. In order to trigger a rendering, you can do a preview by clicking the menu item Design→Preview or pressing F5.
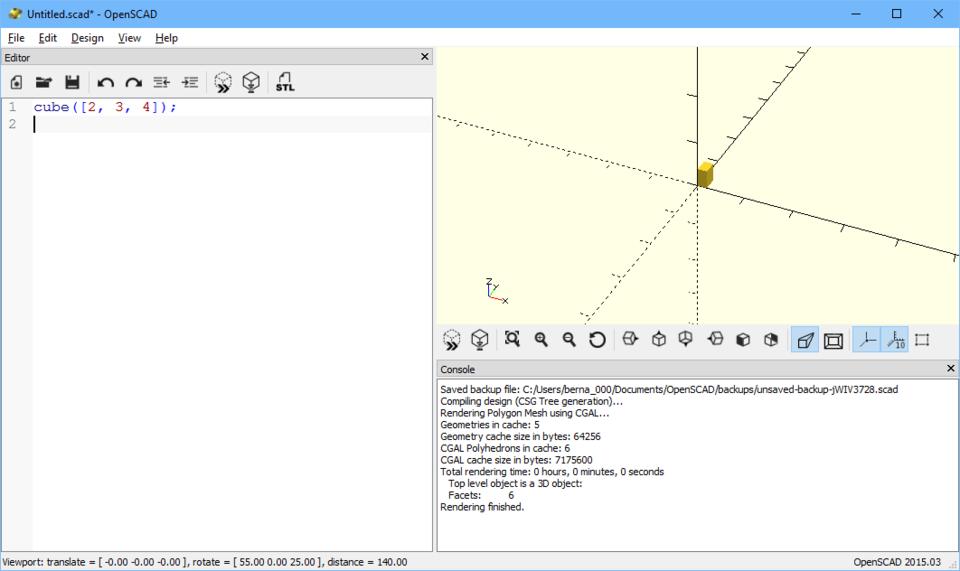
Figure 3. As a “Hello World” example, you can draw a basic cube with a single command.
A number of basic objects are available, such as spheres, cylinders and polygons. In order to do things with those basic units, OpenSCAD provides a number of transformational functions that you can apply to them. For example, you can move an object with the translate function:
translate([5,0,0]) {
    sphere(1, center=true);
}
OpenSCAD projects are based on a tree structure. So transformational functions, like translate, apply to the children of the function. These children are all grouped together within curly braces.
You also can apply a number of other transformations, such as mirroring, scaling, coloring, rotating or offsets. You can combine multiple transformations simply by adding them one after the other on a single line. For example, you could move and then rotate a cube with this command:
translate([2,2,2]) rotate([45,0,0]) cube(2);
In this case, you also could place the cube command on the same line, since there is only one child.
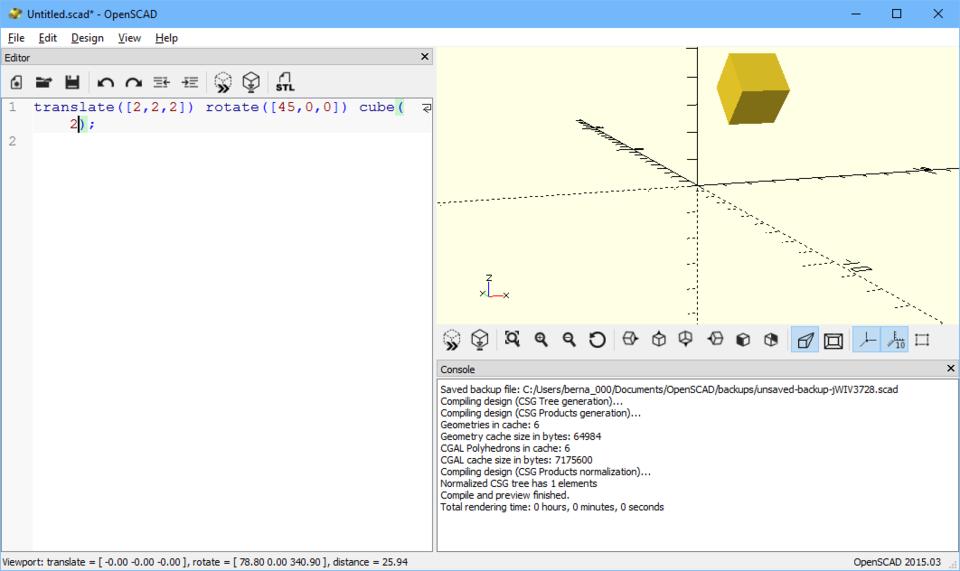
Figure 4. You can apply transformations to your project elements.
Along with 3D elements, you can build your object out of 2D elements. Several basic elements are available, such as circles, squares, polygons and even text elements. You can use them to build up the surfaces of your project directly.
A second way of building 3D objects from 2D elements is through the process of extruding. Extrusion essentially takes a 2D shape and extends it through the third dimension. An example would be getting a cylinder by extruding a circle. This is called linear extrusion. Rotational extrusion takes a 2D object and rotates it around some axis in order to generate a 3D object. Taking the circle example, you could rotate around one of the axes in order to generate a donut shape, or torus. You can apply the same types of transformations that I described for 3D objects too.
Using just the above examples, you already could build rather complex objects, but another class of functions is available that allows you to combine multiple objects in other ways. You can merge multiple overlapping objects together with the union transformation. You can get only the parts that overlap with the intersect transformation. You even can slice away pieces by using the difference transformation to remove any overlapping sections. There even are program control structures, such as for loops and if-else conditionals. Using all of these available combinations can lead to rather complex behaviors.
Once you have a project properly defined, you can try rendering it fully. There are a few different ways to initiate this. You can click on the Design→Render menu item, or more directly, you can press the F6 key.
The console window will give you diagnostic information about what was done during the rendering, including data like the number of edges, vertices and facets that were used.
If you're happy with the way it turned out, you can export your project a few different ways. You can export an image of your project as either a PNG file or SVG file by clicking File→Export and selecting the file format. You also can export it into one of several different formats used in other CAD systems. One of the formats, STL (STereoLithography), is used in several different systems including 3D printing. Because of its ubiquity, it has earned its own button at the top of the editor pane.
Although OpenSCAD isn't designed to generate the prettiest rendered images, hopefully this article has shown you enough so you can see where it might fit in your workflow. It is a very good program for handling more practical designing of real objects in a simple way. I was able to cover only a small amount of the available functionality, so don't be afraid of digging into the OpenSCAD manual to see all the other things you can do with this software.
He who would travel happily must travel light.
—Antoine de Saint-Exupéry
In the absences of a decent time machine, fiction remains the most sturdy vehicle for visiting other eras.
—Tom Nolan
Never help a child with a task at which he feels he can succeed.
—Maria Montessori
If the universe is bigger and stranger than I can imagine, it's best to meet it with an empty bladder.
—John Scalzi
If the wind will not serve, take to the oars.
—Latin Proverb
