
In the quest for ever-larger systems, the Linux kernel has to keep retooling itself. It's not like other software where you can just build a data structure that can keep growing without bound. At the OS level, access to RAM must be as fast as possible. Any unnecessary slowdown will be multiplied by however much work the system tries to do.
So, when Liang Li wanted to raise the x86-64 limit of 46-bit physical addresses to 52-bit, he couldn't simply fix the whole problem by making address size limitless. He had to implement a highly efficient stop-gap that would tide us over until the next time it needed to be increased.
In fact, his patch cranked the limit up to 56 bits, which was what the upcoming hardware would support.
The code hit a snag, however, when Paolo Bonzini pointed out that Liang's implementation might interfere with migrating virtual machines from one hardware setup to another. The problem, it turned out, boiled down to a hardware bug that may be difficult to work around. In particular, using LA57 mode to access high memory addresses would work on newer systems but not older ones. Thus, doing even one write with LA57 mode would make a virtual system impossible to migrate.
This normally would be solved by catching the LA57 calls and rerouting them to a workaround on older systems. But in this case, that would reduce efficiency on the older systems, which would make that particular change very unattractive.
It's possible that this hardware bug may slow down the adoption of Liang's patch for quite a while. There'll definitely be support for larger address spaces, but the question of how to go about it has not yet been answered.
Like security, data integrity is one of those things that trumps all other considerations. In fact, data integrity might even rank higher than security in overall importance. Fortunately, I don't think that choice has ever had to be made.
Security and data integrity do often go hand in hand, however. Recently, Yi Zhang described a security exploit that could allow a hostile user to corrupt data in the ext4 filesystem. Unsurprisingly, Yi's patch is on the fast track to get in the kernel tree.
Andreas Dilger and Valdis Kletnieks both liked Yi's patch and had some feature requests. In particular, Valdis wanted the patch, in addition to preventing the corruption, to alert the user to exactly which filesystem had been attacked.
Yi had bigger ambitions though. He said that the ext4 exploit existed in similar form across many other filesystems. He proposed building the solution into the virtual filesystem (VFS) code itself, where all filesystems had to pass in order to communicate with the user.
Al Viro's the VFS guy, and he seemed open to the discussion. At that point, the conversation moved offline, but clearly, this fix will be going in somewhere very soon.
The RCU code in Linux (short for read/copy/update) makes sure that certain data is available to all CPUs during the boot process, before any filesystems have been mounted. It's part of the Narnia that is boot time.
Paul McKenney recently posted some patches to make sure that RCU really made the data available all the way through the boot process, instead of only at certain specific times. In particular, data is generally transferred between CPUs at Synchronous Grace Periods, which couldn't be induced properly at a certain phase of the boot process. Meanwhile, the code that typically induces Synchronous Grace Periods had begun to activate during that phase, which was leading to occasional crashes.
Paul posted a patch to make Synchronous Grace Periods work throughout the whole boot process, and a variety of folks offered comments.
There was some talk from Rafael J. Wysocki, Borislav Petkov and Lv Zheng of possibly writing a separate version of Paul's patch for ACPI. The general consensus, however, was that it would overly complicate the ACPI code in exchange for not much actual benefit. So that was that.
Kirill A. Shutemov recently posted a patch to allow Linux userspace to access up to 56-bit memory addresses. This dovetails nicely with Liang Li's work mentioned previously. However, it is apparently much more controversial. There are many ways to give userspace this ability, and the impact could affect code all over the kernel. In addition to speed and security, it's important to make sure that the semantics—the ways user code can interact with the kernel—remain consistent, or at least clear.
After Kirill's patches, there was a long and wide-ranging implementation discussion, with Linus Torvalds ultimately weighing in on the side of an implementation that was quite different from Kirill's initial conception. There were a variety of complex proposals on the table, involving exactly when and how user code could access high address memory. Predictably, Linus favored an extremely simple solution from the user perspective, in which anyone who wanted a given binary to access high address memory simply could compile that binary with the feature in place.
It's likely that the debate will continue, but at least now there's a clear baseline. Any prospective solution should present the user with a similarly simple interface. Any solution that favors elegance or completeness over that level of simplicity is likely not to make the cut.
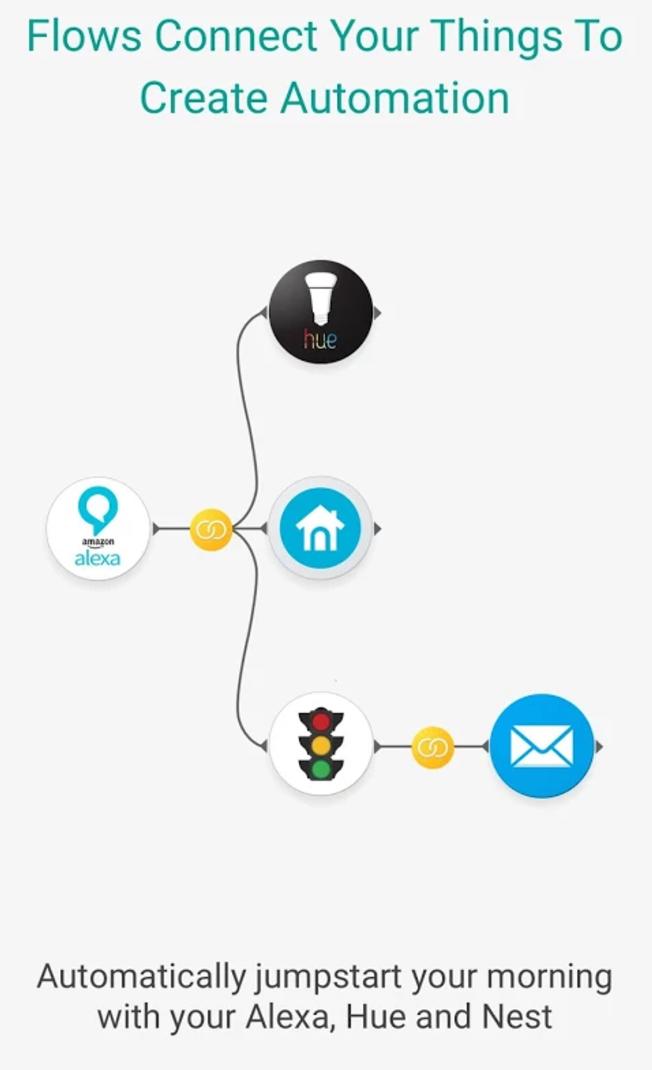
I love IFTTT (If This Then That: ifttt.com), but although it usually works well, it's more and more common for triggers to fail. Sometimes they don't fail, but take several minutes to activate. When you want a light to turn on as you enter a room, several minutes of delay clearly can be a deal-breaker. I'm not sure if the problem is capacity issues or individual API problems, but I no longer feel confident that IFTTT will fire reliably. Although it's still in beta, Stringify aims to be more reliable, but also more robust.
(Screenshot from Google Play Store)
With IFTTT, simplicity is king. You have a single trigger (If...) and a single action (then that...). With Stringify, you have “flows”, which allow multiple results along with conditionals. Basically, you write a logical flow of triggers and results using the same sorts of triggers and results IFTTT offers. Granted, the number of connected services is significantly smaller, but the number is growing all the time. There's also no web-based interface for the Stringify building process, which bums me out. I would rather have a big screen to build flows, but it's only possible to manipulate your account on a mobile device (Android or iOS).
It's not clear whether Stringify will end up being more popular and/or more reliable than IFTTT. It certainly has the promise to surpass the usefulness of IFTTT though. At the very least, the idea of competition likely will make both services strive for excellence. (Perhaps IFTTT will need to add another “T” and become “If This Then These Things!”)
Thanks to using the idea of building “awesomer” ideas on top of already awesome ideas, Stringify gets this month's Editors' Choice award. Give it a try, and see if you can push the service hard enough to stress its reliability. I'm hoping it proves to be a viable alternative to the already awesome IFTTT!
Several years ago, I wrote an article on using Elmer to solve complicated physics problems. Elmer has progressed quite a bit since then, so I thought it would be worth taking a fresh look at this simulation software (https://www.csc.fi/web/elmer).
The first step is to install Elmer on your system. It may exist within your package management system, but those are likely older versions. If you are running a Debian-based system, you can get the latest versions by adding the Elmer repository to APT and installing it from there:
sudo apt-add-repository ppa:elmer-csc-ubuntu/elmer-csc-ppa
sudo apt-get update
sudo apt-get install elmerfem-csc
Those steps will conflict with the Elmer packages that exist in the main Debian repositories, so be sure that they haven't been previously installed on your system. The meta-package elemerfem-csc also will install a number of sample files that I use here as part of my description of Elmer's functionality.
The first step is to start Elmer. Depending on your desktop environment, there may be an entry within the menu system. If there isn't, open a terminal and start it with the command ElmerGUI. This command opens the application and leaves you with an empty workspace.

Figure 1. Executing ElmerGUI starts the main application, which controls all the other steps involved in using Elmer.
Most programs that solve physics problems of this type follow three broad steps. The first, or pre-processing, step involves preparing the problem for solution. This includes defining any materials and their properties, along with any equations that describe the processes that will be taking place. This is also when you would apply a meshing function to break the geometry down into the subsections that will be used during the actual calculation phase. The second, or solver, step is when the input data is supplied to the actual solver functions that apply the equations to the materials described in your problem. The last, or post-processing, step is where you find the solution to your problem. Humans interpret graphical information most easily, so there are tools available in the post-processing step to visualize the final solution and help you see the results of your problem.
Since Elmer's installation includes a number of sample files, let's go ahead and use those to explore what kind of work is possible with Elmer. These files should all be available in the /usr/share/ElmerGUI/samples directory, subdivided by the types of files contained within the samples.
Let's look at the heat distribution across a pump section and see how the distribution happens. To start, you will want to open the pump_carter_sup.stp step file, which is located in the step subdirectory of the samples directory. When you open this file, it gets loaded into the ElmerGUI geometry viewer.
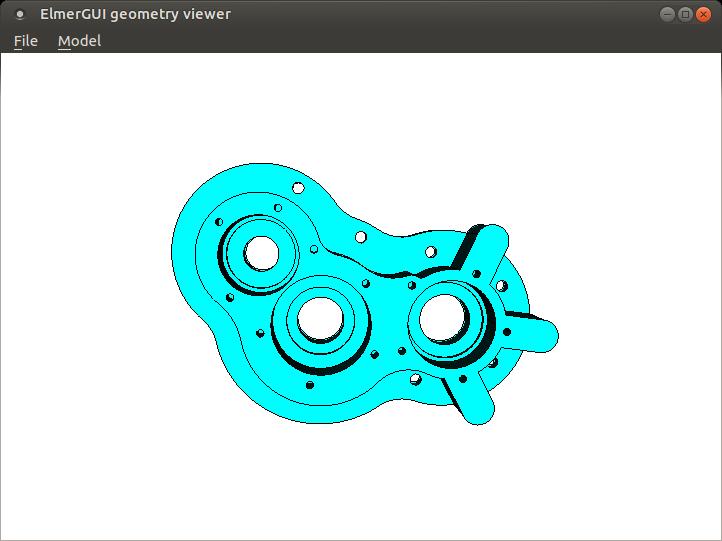
Figure 2. The ElmerGUI geometry viewer allows you to see the object you'll be using during your calculations.
This viewer allows you to grab the object with your mouse cursor and rotate it around, so you can get a good look at it and make sure it's structured properly. This object also is meshed automatically by ElmerGUI, so that it can be used in the solver stage.
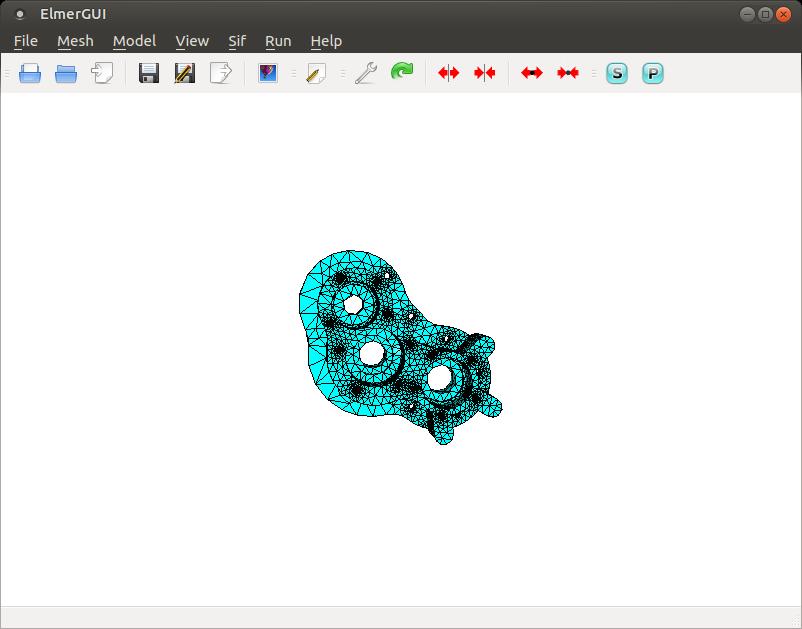
Figure 3. ElmerGUI also can handle meshing your objects in the pre-processing step.
Here, you can see the set of triangles that have been mapped onto your object to define the domains on which the solver should operate. You can verify the actual meshing by clicking the Model→Summary menu item, and look at the top of the output for the summary information.
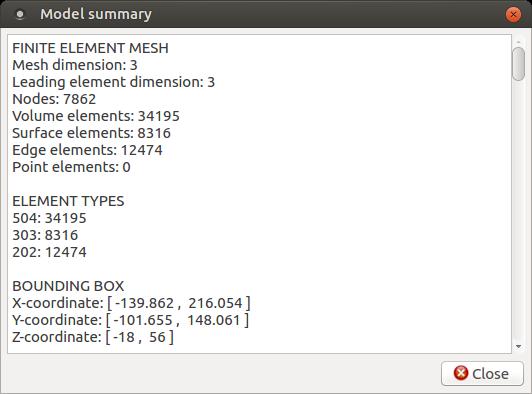
Figure 4. The model summary tells you things like the number of nodes, edges and volume elements within your model.
In this case, you can see that the meshing created 7,862 nodes and 34,195 volume elements. If this isn't fine enough to handle the accuracy you need, you can click the View→Cad model menu item to bring up the geometry viewer again and then click Model→Preferences. If you do make any changes, don't forget to click Mesh→Remesh to redo the meshing process. This may take some time if you are adding a significant number of subsections.
Now that the object is loaded, let's start setting some initial conditions. For this example, you want to set the temperature on the inside surfaces of the three holes. You can select surfaces by double-clicking on them. If you need to select multiple surfaces, simply hold the Ctrl key down at the same time.
Since you want to treat these three surfaces as a single unit, you'll need to unify them. You can do this by clicking the Mesh→Unify surface menu item. To set initial conditions for the entire problem, click the Model→Setup menu item.
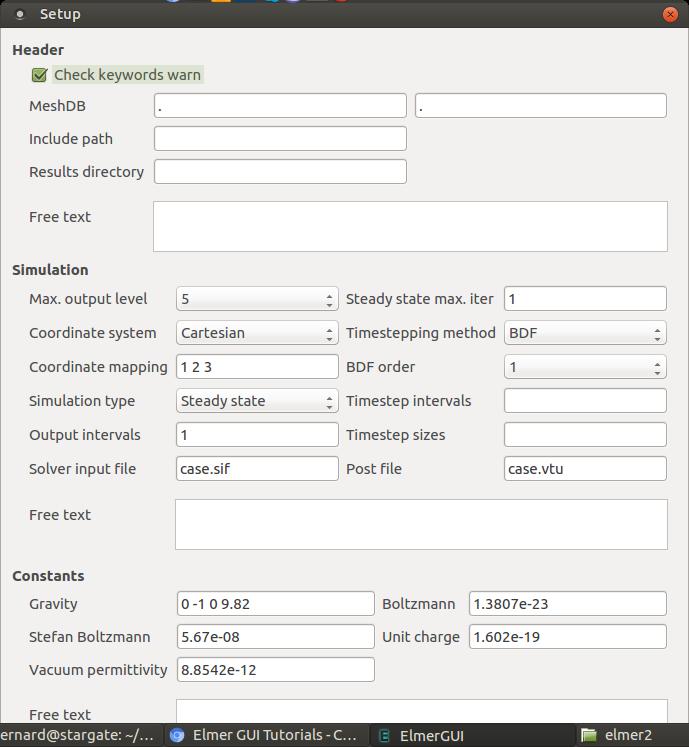
Figure 5. The model setup window allows you to set initial conditions for the entire model as a whole.
Here you can set input and output locations, constants, numbers of iterations or time step procedures, among many other options. You also need to add the equations that will define the physical processes you actually are trying to solve for.
Clicking Model→Equation→Add opens an editing window to create a new equation.
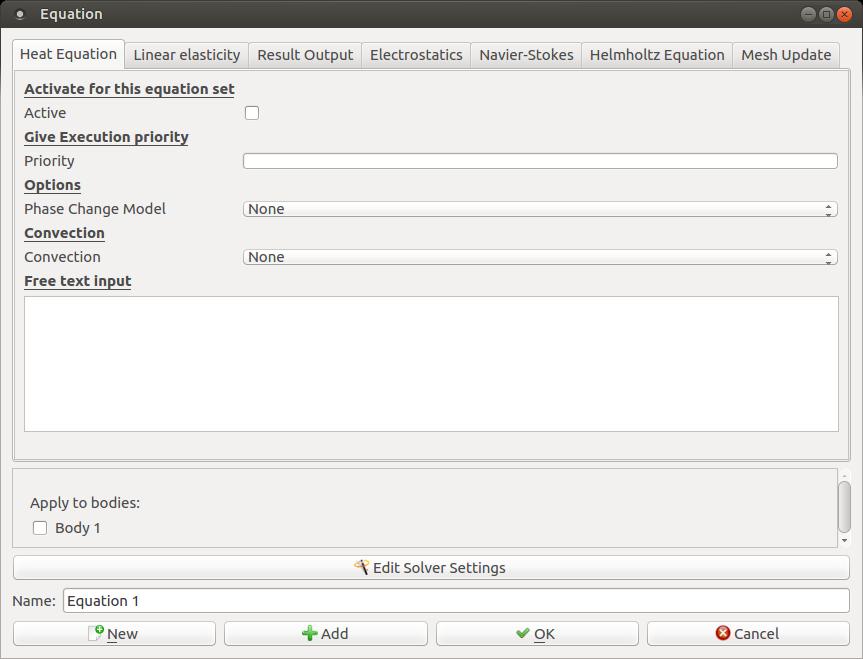
Figure 6. You can add equations to define the physical processes you are trying to model.
In this case, let's just add a heat equation to calculate how heat flows through this pump part. Since you need to apply this to the entire object, you can click the apply box for Body 1 here in the equation editor. But, what kind of object is this? Clicking Model→Material pops up a window where you can define all the physical properties of the object.
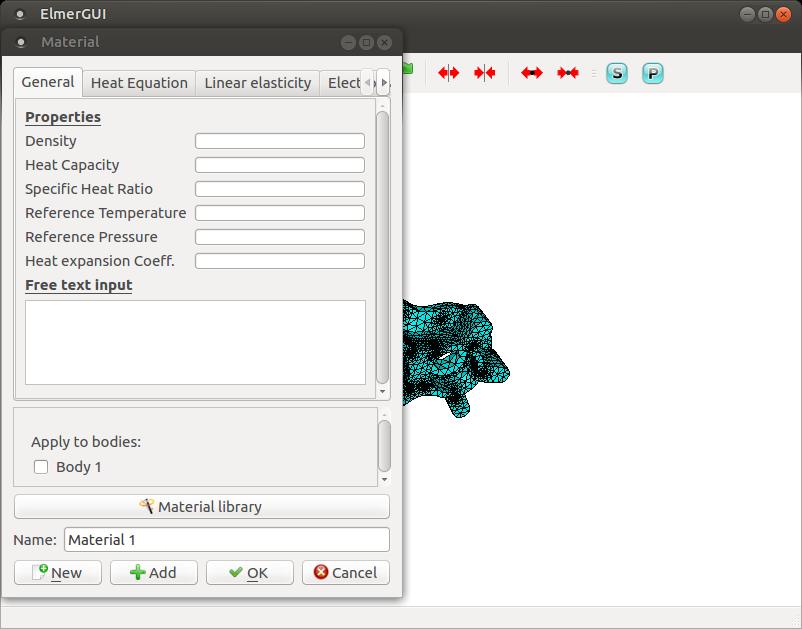
Figure 7. You can set all of the physical properties of the materials used within your object.
There also is a button called Material library that allows you to select from a set of predefined materials. In this case, let's set the object to be aluminum. As with the equation editor, you can apply the material type to the object directly here.
Clicking Model→Body Force pops up a window where you can enter values that would represent the right-hand side of the equations.
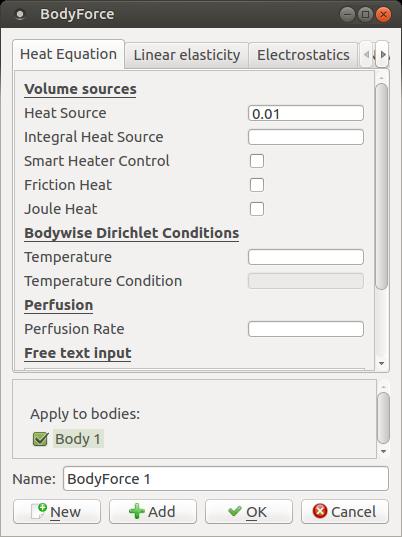
Figure 8. You can set body forces that define forcing values for the equations being used.
Clicking the Model→Boundary Condition menu item will pop up a new window where you can set boundary conditions for your equations.
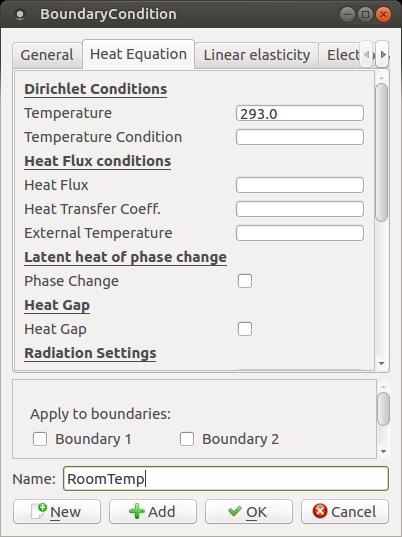
Figure 9. You can set boundary conditions for your equations to be used by the solver stage.
In this case, say you want to create a new boundary temperature of 293°Kelvin, which is named RoomTemp. To apply this boundary condition, go back to the main ElmerGUI interface and double-click the surface of the inside of the holes again. A small window will pop up asking you to set a boundary condition, where you can select the RoomTemp condition that was just set.
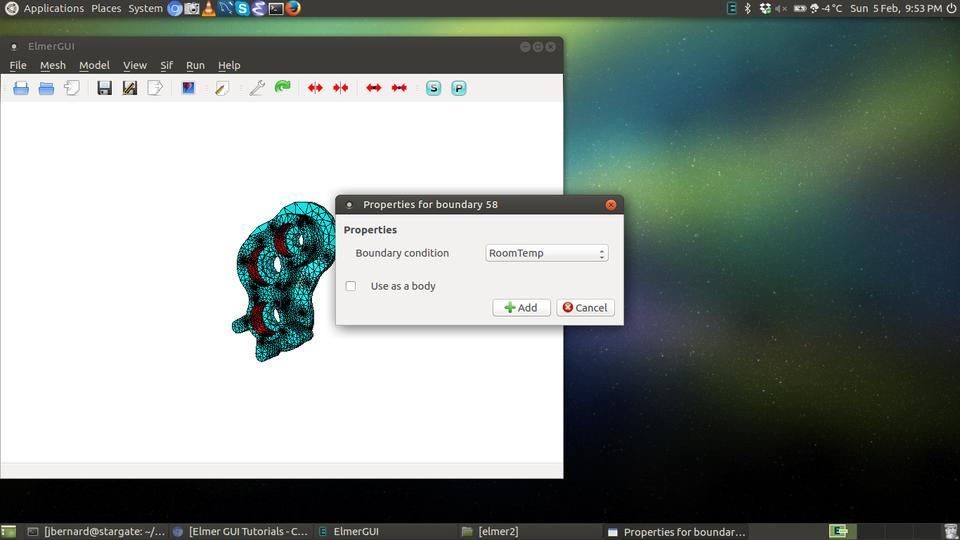
Figure 10. Select the sections that need to have a boundary condition applied to it.
In order to run the solver, you need to generate the final input file. You can do this by clicking the Sif→Generate menu item. If you want to take a look at it, click Sif→Edit to pop up an editor window.
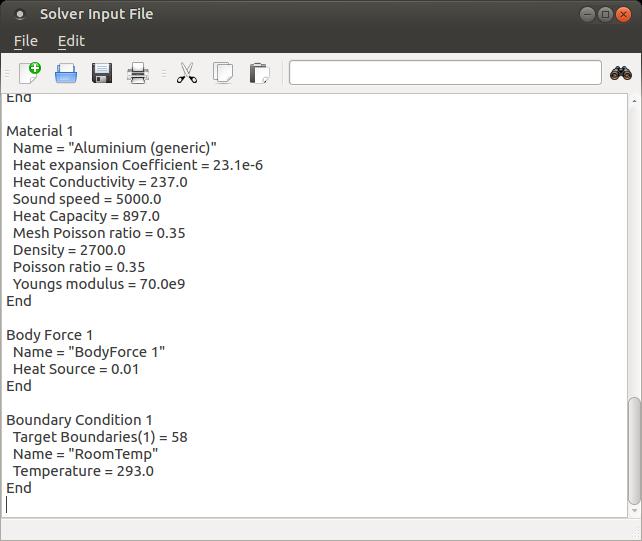
Figure 11. You can open an editor to manipulate the solver input file directly.
You also will need to save the entire project so that all of the required files are in a single location before starting the solver. Now, click Run→Start Solver to start the whole process. Once it's done, you'll see some new output windows. The top one is the convergence monitor, showing you how quickly the solver came to the final solution.
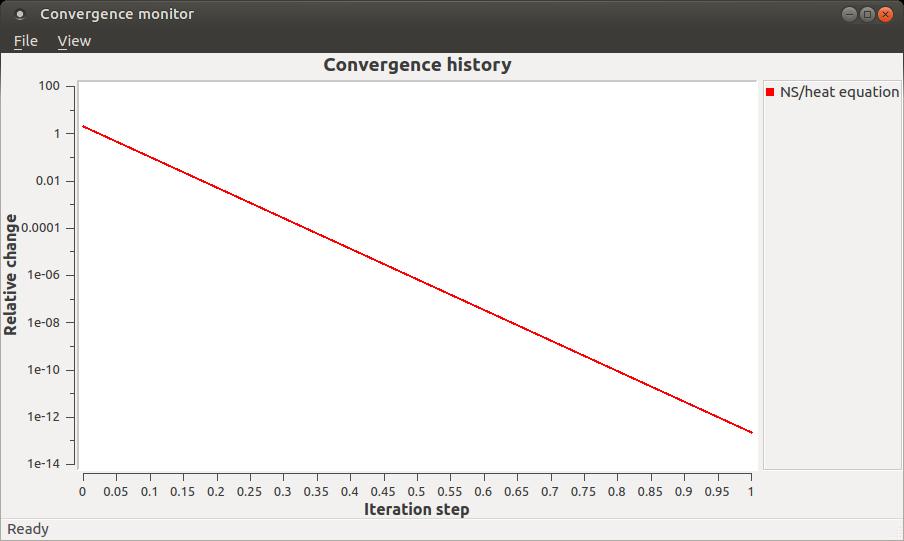
Figure 12. After the solver is done, you'll see a window showing how quickly convergence happened.
You can visualize the results in the post-processing step. In this example, click the Run→Start ElmerVTK menu item to get one type of visualization. If you also installed paraview, you can get a very sophisticated visualization application to look at your output files.
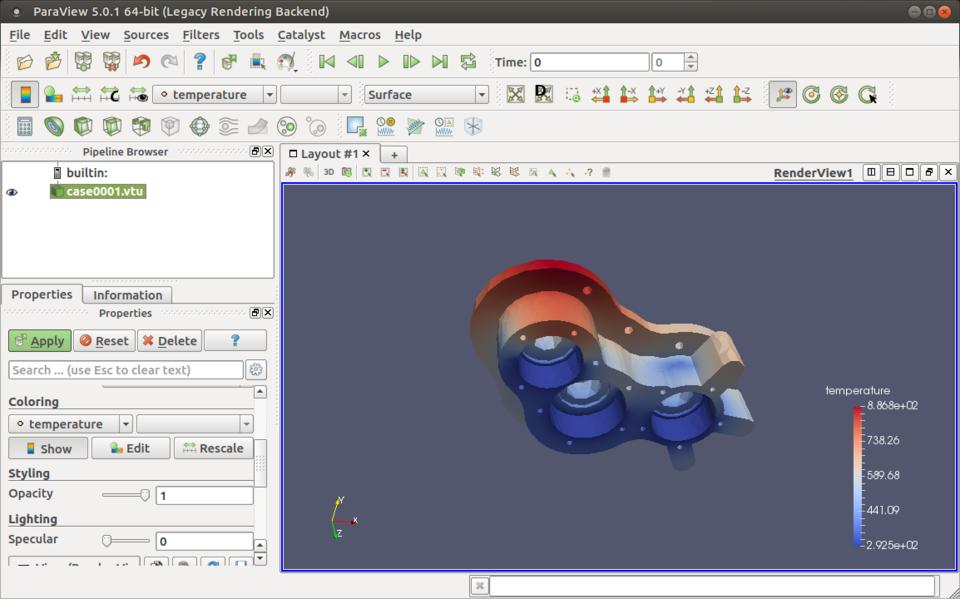
Figure 13. Paraview can provide sophisticated visualization tools for your output files.
This article was just a walk-through of one of the sample problems to show a small cross-section of the available functionality. I hope this article has whetted your appetite enough to look at the other sample problems and use them as a jumping-off point for your own research interests.
I love to share images with people quickly. They could be cat photos or screenshots. Usually I post those silly images to Twitter and Facebook using Buffer, but occasionally, I just want to send a quick image to a single person. (This is usually when I'm trying to show my computer via screenshot.)
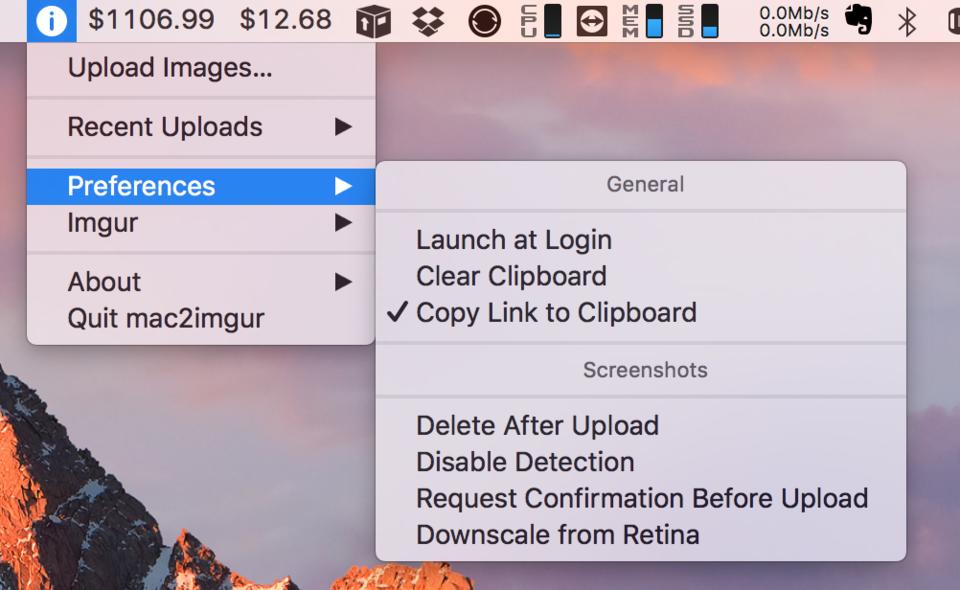
When I'm on a Mac, screenshots are really simple with the Command-Shift-3 keystroke. Sharing them used to mean dragging them to my Dropbox, and then finding the image and getting a public share link. It's cumbersome. But, there's a great utility for OS X called Mac2Imgur, which uploads an image to imgur.com and provides a link in the clipboard. It even has options to remove the image after uploading, so you don't have 100 screenshots on your desktop. It's an incredibly useful utility, and it's completely open source.
If you ever share images from a Mac, head over to https://github.com/mileswd/mac2imgur and grab a copy (and yes, this screenshot is also on imgur at https://i.imgur.com/wv28w31.png).
My day job pays me on the 15th and last day of every month, unless those days land on a weekend, in which case I get paid the Friday before. With those rules, creating a Google Calendar event is shockingly difficult. In fact, it's not possible to create a recurring event with those rules using Google's GUI scheduling tool.
Thankfully, you can import an event from an .ical file, and Google will understand the more complex schedules. In my case, I needed two separate events. For the 15th of every month, with weekends being paid on Friday, here is the .ical file:
BEGIN:VCALENDAR
BEGIN:VEVENT
DTSTART:20170101
DTEND:20170101
RRULE:FREQ=MONTHLY;BYDAY=FR;BYMONTHDAY=13
RRULE:FREQ=MONTHLY;BYDAY=FR;BYMONTHDAY=14
RRULE:FREQ=MONTHLY;BYDAY=MO,TU,WE,TH,FR;BYMONTHDAY=15
SUMMARY: Get Paid
END:VEVENT
END:VCALENDAR
The DTSTART and DTEND dates are set to when you first want the recurring event to start. I just started on January 1, 2017. If you read through the logic, basically the event is placed on Friday if Friday is the 13th, on Friday if Friday is the 14th and on any weekday that lands on the 15th. The rules are evaluated in order, so if Friday is the 13th or 14th, the event is scheduled then.
The last day of the month except for weekends was actually a bit more complicated, but still doable. That event looks like this:
BEGIN:VCALENDAR
BEGIN:VEVENT
DTSTART:20170101
DTEND:20170101
RRULE:FREQ=MONTHLY;BYDAY=MO,TU,WE,TH,FR;BYSETPOS=-1;WKST=MO;
SUMMARY: Get Paid
END:VEVENT
END:VCALENDAR
The logic is a little harder to follow, and I actually had to adapt a post on Stack Overflow (webapps.stackexchange.com/questions/10929/how-to-make-a-task-repeat-on-the-last-day-of-each-month-in-google-calendar/17531#17531) to get it to work. They both seem to work flawlessly, so I'm not complaining.
In order to add them to your calendar, you just save two text files with the above text. I'm not sure if the .ical extension is required, but that's the type of file it is, so I recommend using it. Then you “import” a calendar, and you'll be asked to which calendar to add the event. Unfortunately, if you need to make a change to the schedule, you'll have to delete the event and re-create/import it, because it can't be adjusted with the Google GUI. But, the whole point was to have the date figured out so I wouldn't have to edit it anymore.
Creativity is allowing yourself to make mistakes. Art is knowing which ones to keep.
—Scott Adams
Words, once they are printed, have a life of their own.
—Carol Burnett
I don't hire people who have to be told to be nice. I hire nice people.
—Leona Helmsley
We make a living by what we get, we make a life by what we give.
—Winston Churchill
I have learned that to be with those I like is enough.
—Walt Whitman
For years I've been jealous of folks with iOS devices who could just send their phone screens to their Apple TV devices. It seems like the Android screen-mirroring protocols never work right for me. My Sony Xperia has multiple types of screen mirroring, and none of them seem to work on my smart TVs or Roku devices.
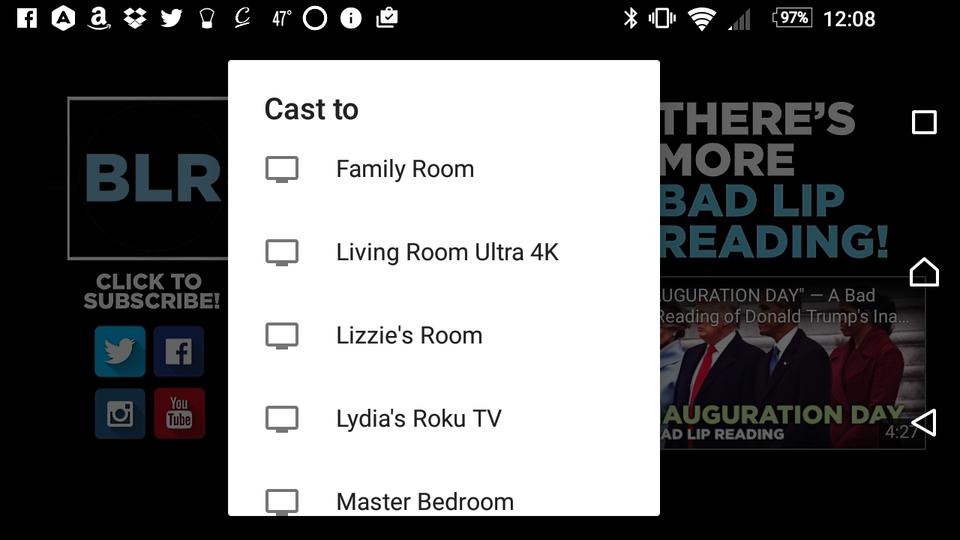
YouTube is a completely different story. It doesn't matter if I'm on a laptop, iPhone, Android device or Chromebook, I can “cast” the video to any of my Roku devices or smart TVs without any problems at all. It works and works well. The great part about casting is you can shut off the connection from the sending device, and it keeps playing! Because 95% of the stuff I want to display on the TV from my phone is YouTube videos, I couldn't be happier. Plus, I can check email on my phone while the family watches the latest “Bad Lip Reading” video on the big screen! Take that Apple TV!
