
How to turn your old PC from a dust magnet into a state-of-the-art media center.
At my wedding, I received an important piece of advice from a couple whose wedding we had attended a couple years earlier: get a second TV. The idea is that while she's watching America's Next Top Model, I can watch hockey or mud wrestling or something. However, a much better solution to that age-old problem (and many others) is to set up a DVR system using Isaac Richards' open-source MythTV software. That way, we can watch whatever shows we want at any time.
This article shows how to build a MythTV box on a budget and how to avoid some common pitfalls. The following is the hardware you'll need:
A computer: the first step is to get your hands on an old computer. You already may have one gathering dust in the basement. I bought one for $70 on Craigslist. I was cautious and chose one with a 1.6GHz AMD Athlon processor. You should be able to get by on much less by minimizing the load on your processor. Price: $0–$70.
Tuner card: you need a tuner card to take the digital or analog television signal and turn it into something your computer understands. The best ones for use with Linux are the Hauppauge WinTV-PVR series; the PVR-150 is a single tuner with a built-in MPEG encoder, the PVR-350 is a single tuner with built-in MPEG encoder and decoder, and the PVR-500 has two tuners with an MPEG encoder only. I bought my first PVR-150 for $85 (in Canada), including a remote and IR blaster (I'll explain what that is later). Regular prices in the US range to as low as $60. I bought my second one on sale for $25. I recommend starting with one PVR-150, and then buying another later if you feel the need. Price: $25–$85.
Hard drive: your computer likely already has a hard drive, but it's probably not larger than 8GB, and you'll need a bigger one. The size depends on how much of a library you plan to build. I bought a 250GB hard drive at first, then picked up a 500GB external drive later on. Price: $60–$80 for 250GB; $90–$150 for 500GB.
Video card: the choice of video card is very important, particularly if it's an older model. You may need to buy a new video card if your existing one doesn't have a TV-out connection. NVIDIA has the best Linux support, and you can run into a lot of problems with an older ATI card, as they haven't released proprietary drivers for them. Price: $0–$60.
DVD drive: if you want to watch DVDs or burn recorded programs to DVD, you need a DVD-ROM or DVD-RW drive. I definitely recommend this, as they are not too expensive these days. Price: $35.
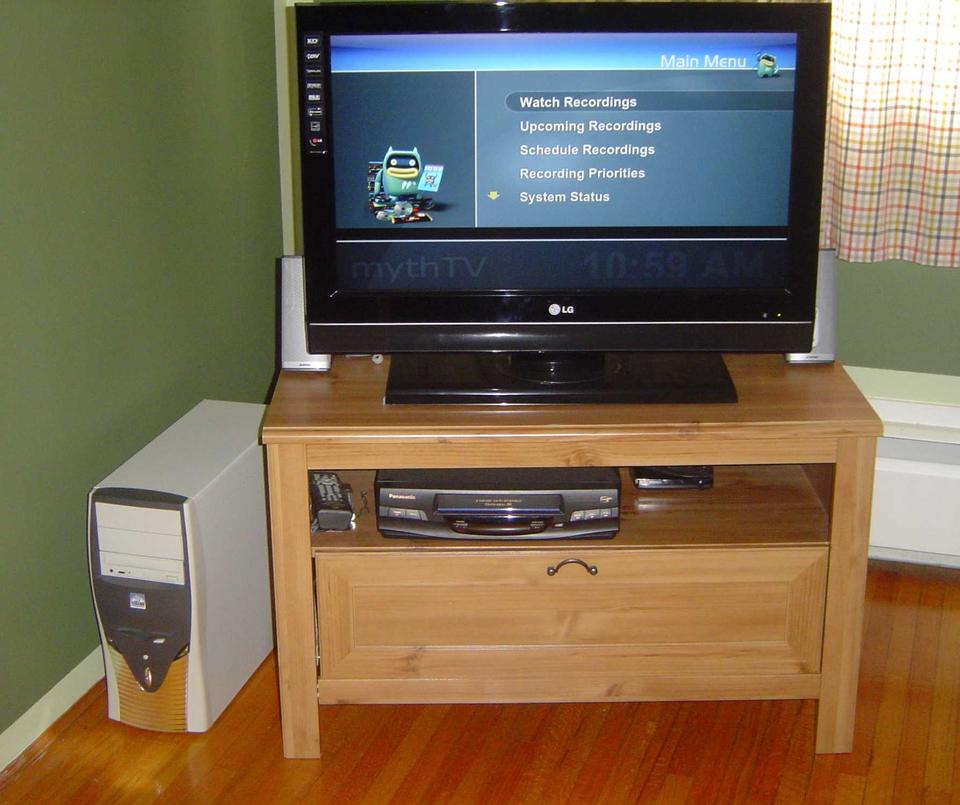
Figure 1. My MythTV Setup
I like Ubuntu and use it on my other computers as well, so I decided to install Mythbuntu—a MythTV-centered distribution based on Ubuntu. Unfortunately, I had trouble installing both Mythbuntu and Ubuntu itself—probably because of my RAM limitations—so I installed Xubuntu (a lightweight Ubuntu running the Xfce desktop manager) instead. The install was quite easy; however, one unexpected (but easily fixed) problem emerged. I couldn't boot after successfully installing the operating system. The GRUB bootloader would spit out “Error 18”. The problem turned out to be that on older computers, the BIOS can't handle partitions larger than 8GB. So, you have to partition the disk and create a boot partition (or root partition) that is smaller than 8GB.
A word on filesystems: I used the ext3 filesystem in the initial install, but used XFS (which is better at deleting large files) on an external drive that I bought later. I wouldn't recommend doing this unless you're familiar with XFS. I've had some issues with it—for example, it tends to become unmounted pretty frequently, requiring me to remount it, which is pretty annoying when you're trying to watch TV. The ext3 filesystem works just fine, but you should enable slow delete in the back-end settings (under General).
The next issue is connecting your MythTV box to the TV. If you have a new TV (particularly an LCD TV), you may have a VGA port in the back. If so, great—simply connect it as you would a monitor. If not, you'll need to connect the TV-out port on your video card (or PVR-350 tuner card) to the TV using an S-cable. You also need to add an entry to the /etc/X11/xorg.conf file. You may become very familiar with this file, particularly if you get a new TV or video card. Following the install, I added the following Monitor entry:
Section "Monitor"

Identifier "Samsung"

DisplaySize 400 300

HorizSync 35 - 50

VertRefresh 60 - 60

Option "DPMS"

EndSection
Your entry will depend on the make of TV you have. When I got an LCD TV, I changed it to the following:
Section "Monitor"

Identifier "LG 32LC7D"

UseModes "Modes[0]"

DisplaySize 1360 768

HorizSync 31.0 - 60.0

VertRefresh 60.0

Option "DPMS"

EndSection
I also had to add a new section:
Section "Modes"

Identifier "Modes[0]"

ModeLine "1360x768" 85.5 1360 1424 1536 1792 768 771 777 795
 ↪+hsync +vsync

ModeLine "1216x684" 74.2 1216 1356 1396 1650 684 704 709 750
 ↪+hsync +vsync

EndSection
If you installed Mythbuntu, you should be ready to go at this point. If not, use the Synaptic package manager to install MythTV and any plugins you want. Configuring MythTV the first time can be a daunting task, due to the large number of available options. You gradually will become familiar with many of them, but I'll walk you through the basic initial setup next.
MythTV is made up of a front end and a back end. The back end does most of the work: it records programs, resolves conflicts and controls access to the database. It always is running in the background. If you have a Hauppauge WinTV-PVR tuner card, recording programs takes very little effort by the processor, just a small percent. The front end is the interface for the back end. You use it to schedule and watch programs, watch and burn DVDs, play music and so on.
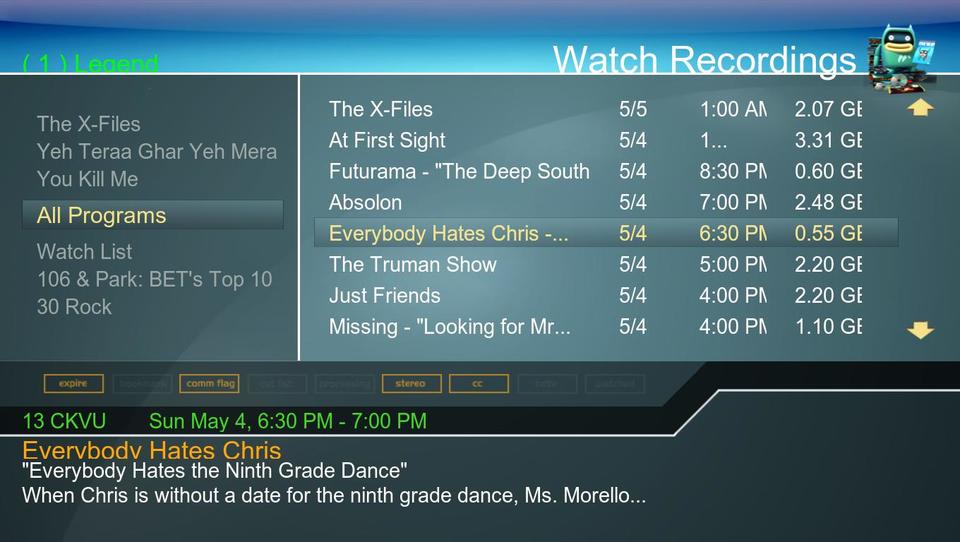
Figure 2. The Watch Recordings Screen of the MythTV Front End
When you install MythTV, you automatically are sent to the back-end setup. You can access it at any time by running mythtv-setup from a terminal. The first screen of the General setup menu allows you to set IP addresses for the back end. I recommend starting with one combined back-end/front-end machine, so just leave these as is (both local and Master should be set to 127.0.0.1 or localhost). You can skip the next screen unless you have high-definition cable. You also can skip the remaining screens for now.
Next, you need to set up your capture card. If you have a Hauppauge card, simply select the card type that mentions PVR-x50, and it should recognize the card automatically. Under Video Sources, indicate from where it should download television listings. The main one for open-source uses is Schedules Direct. Visit the Web site to create an account and set up your channel lineup.
Next, under Input connections, associate each tuner card with a listings source. Under Storage Directories, you can indicate where you want to store recordings. The latest version of MythTV allows you to specify multiple directories, which can be useful if you have multiple hard drives (and do not use a logical volume manager).
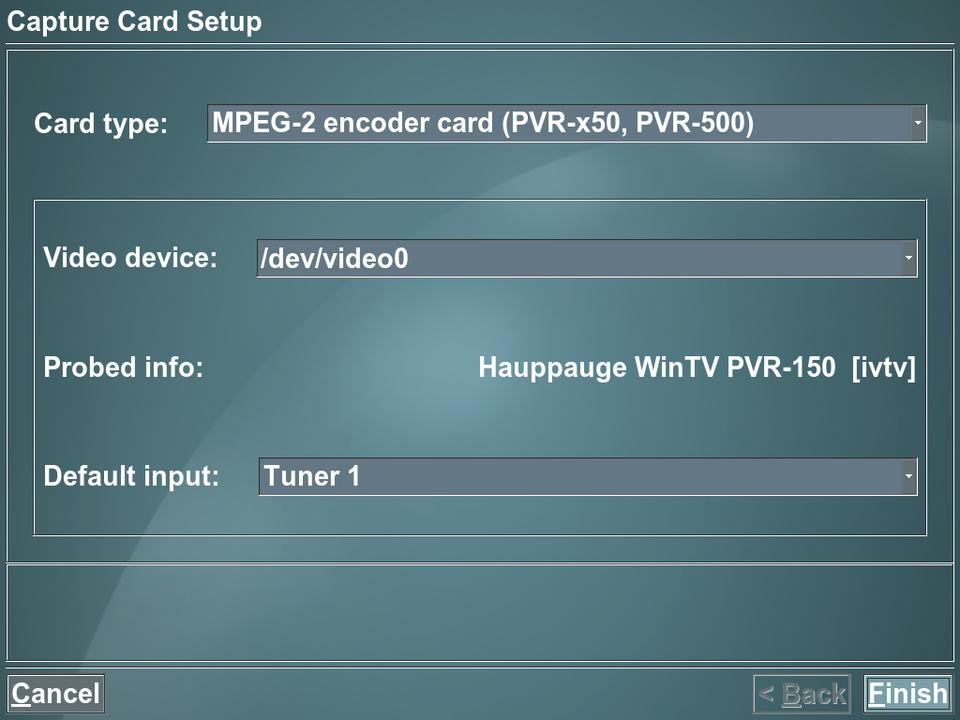
Figure 3. The Tuner Card Setup Screen
Now you should be ready to start watching and recording TV. There are two options for interfacing with your new MythTV box: using a keyboard and/or mouse (presumably Bluetooth) or using a remote control to navigate the MythTV interface and log in remotely with SSH to perform system administration tasks, such as installing and updating software. I recommend the latter. If you don't have an HDTV, you will find it difficult to read any text or menus on the screen. Setting up the remote is easy to do if you follow one of the many how-tos available on-line. In order to allow remote login to your system via SSH, you need to install the SSH server. In Ubuntu, this is the package called openssh-server. Start it with the following:
/usr/sbin/sshd
Before doing this, make sure you are using a secure password (especially for the mythtv user that is created automatically).
If you have digital cable, as I do, you'll run into some additional complications. In order to change the channel, you need to change the channel on the cable box. You can do this with an IR blaster, which should come with your Hauppauge remote. There is an excellent on-line guide on how to set this up (see Resources). Keep in mind that you need to use the lirc_pvr150 module and not the lirc_i2c module; the reverse is true if you have no blaster. You need to set up the blaster right in front of the IR receiver on the cable box; I just taped mine on. When I upgraded Ubuntu on my MythTV box, the remote and blaster support broke, so you may want to set aside some time for upgrades in case this happens to you too.
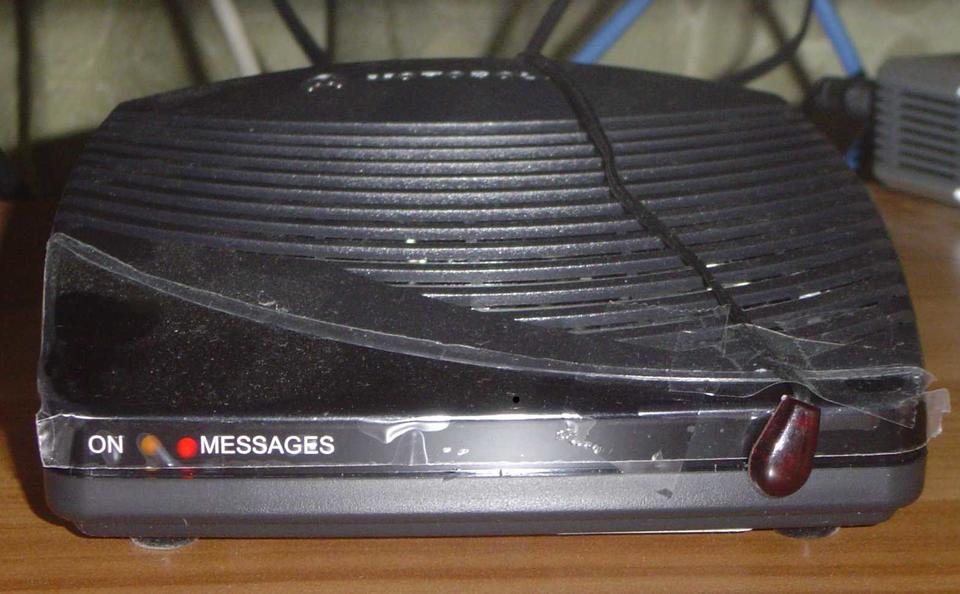
Figure 4. My IR Blaster Setup
MythTV isn't only a DVR. Through the plugins, it has the capability to be an all-in-one entertainment system. The plugins I use on a daily basis are MythMusic, MythVideo, MythArchive and MythWeb. The first two allow you to play music and videos in various formats (including DVD). MythArchive lets you burn recordings and videos to DVD, and MythWeb allows you to control your system remotely with an easy-to-use Web interface.
I dumped my music collection onto my MythTV box, and as I have a good set of speakers, I use it as my main stereo system. Watching and backing up DVDs are also a snap using MythVideo. If you have an HDTV, try downloading the HD video of the moon from the Japanese Kaguya spacecraft and watching it in your living room. MythArchive and MythWeb are helpful when you're not at home, because you can burn your favorite programs or movies and take them with you or download them remotely. MythWeb requires a little setup, but it's fairly easy. Make sure you enable authentication before opening it up to the outside world.
You may run into a few problems on your low-end system. The two main ones involve high CPU usage and insufficient RAM. You can operate MythTV with 256MB of RAM; however, I experienced frequent freeze-ups, so I upgraded to 512MB. You should keep an eye on how well it's performing and consider upgrading if necessary. Another problem I experienced early on was that playing recordings or DVDs consumed such a large fraction of CPU time (70%–80%), that running other processes tended to cause the playback to become jerky. In particular, commercial flagging and database accesses at the beginning and end of recording a program produced annoying jerkiness. I resolved this problem entirely by replacing my ATI video card, which does not have a proprietary Linux driver, with an NVIDIA card. The skipping stopped almost completely when I replaced the video card, as did the seemingly unrelated problem of slow menu scrolling. CPU usage dropped to around 40%–50%.
Another benefit of NVIDIA's superior Linux support is that part of the MPEG decoding work can be delegated to the video card using XvMC (X-Video Motion Compensation), reducing the load on the CPU. To enable XvMC, go to Utilities/Setup→Setup→TV Settings→Playback. On the third screen, change the Playback Profile to CPU--. XvMC didn't kick in on mine until I deleted the top line of the profile (referring to ivtv). You can tell if it's operating because the on-screen display changes to grayscale. You also can tell because the CPU usage will go way down. The Xorg process dropped to less than 10% during playback; the sum of Xorg and mythfrontend is always less than 30%. As a result, additional processes (including creating and burning DVDs) no longer affected playback.
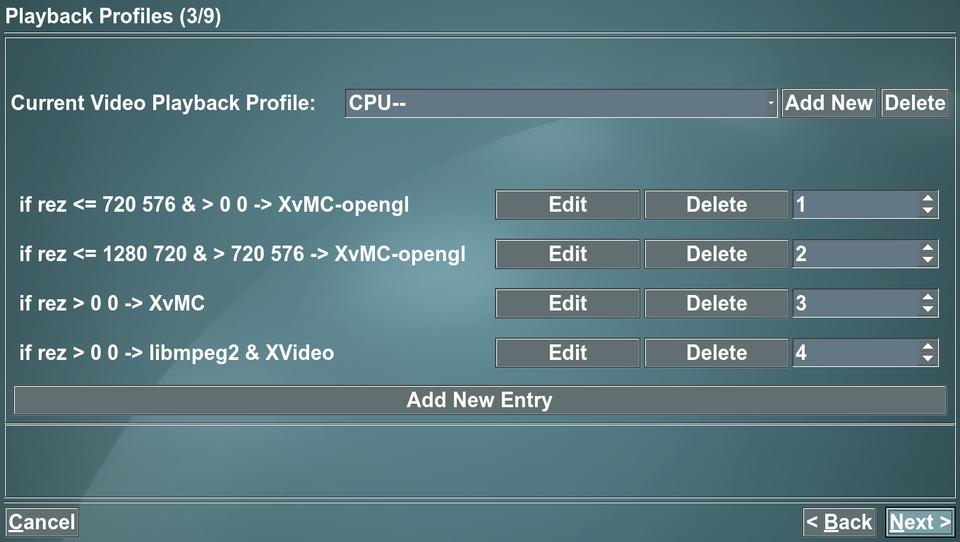
Figure 5. Enabling XvMC under TV Settings
For a pretty small sum—$85 if you get a tuner card on sale and already have a computer and up to around $500 for a multicard, multidrive system built from scratch—you can build a fully functional MythTV box. TV watching will never be the same.
Be warned: MythTV is an amazing piece of software, but it is free software that is constantly under development. Be prepared to get your hands dirty and tinker under the hood if something goes wrong or everything isn't working as you'd like. Have fun with it—test-drive different themes, tweak the settings and try the various plugins. After all, that's what Linux is all about.
