
You can't host the whole Internet yourself, but you can host entire distributions!
If you're the sort of person who installs Linux a lot, or if you have a large number of servers/desktops to keep updated, having a local mirror can be a real time and bandwidth saver. You may have a huge Internet connection and want to set up a public mirror, but for the sake of this article, let's assume you just want a personal mirror. I have a local mirror both at home and at work, and I've never regretted setting it up.
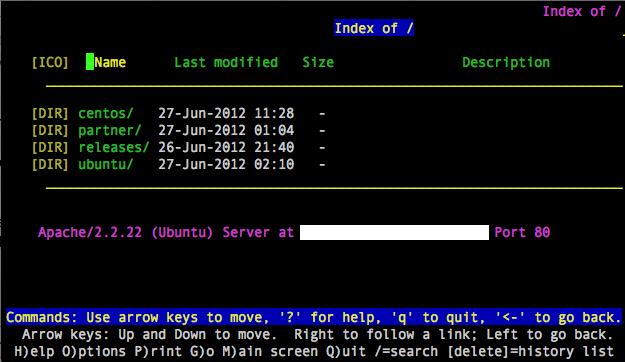
Figure 1. My local mirror is simple, but very useful.
Before setting up your local mirror, there are a few considerations you should keep in mind. First, mirrors tend to take a lot of space. My current Ubuntu mirror comes in at 550GB, which doesn't include the ISO images or the Partner repository. Granted, that has multiple architectures, but still, the hard drive space is significant.
Another issue with maintaining a local mirror is that it takes a long time to download initially. Depending on your Internet connection and the speed of the mirror you choose to replicate, it can take days or even weeks! With my 16Mbit connection at home, the daily updates take about 30 minutes on average, but that initial download took a couple days.
Before delving into the process of setting up and maintaining your mirror, if you're an Ubuntu user, you might be just as happy installing squid-deb-proxy. Using squid-deb-proxy effectively will share any previously downloaded updates any computer on your network makes. With the help of avahi, it can be done automagically! See the squid-deb-proxy sidebar for more details.
For the sake of simplicity, I recommend using HTTP to serve your mirrored files. You can add other protocols if you like (rsync, FTP or NFS), but at the very least, I recommend HTTP. Because most mirrors use a subdirectory for file storage, you generally can just add a folder or symlink to your current Web server and never touch the Web server's config files. For this article, I assume you're adding the mirror to your /var/www/default folder. If you're using a distro that is not Debian-based, adjust your folder structure as necessary.
Eventually, I'll explain how to automate the update process, but for the initial sync, I recommend watching to make sure it works right. The method for mirroring Ubuntu is similar to mirroring CentOS; it's basically a single rsync command.
In order to be a proper netizen, you should locate a mirror that is close to you. A list of Ubuntu mirrors is located at https://launchpad.net/ubuntu/+archivemirrors, and a list of CentOS mirrors is at www.centos.org/modules/tinycontent/index.php?id=13.
Once you've determined the mirror you want to use (make sure to choose one that supports rsync), create your local mirror directories:
sudo mkdir /var/www/default/ubuntu
sudo mkdir /var/www/default/centos
Again, you can adjust the location of your mirrors however you like, the above just creates folders in the default Apache server location in Ubuntu. Using your local mirror address, type the following to mirror the Ubuntu repository:
sudo rsync -a --progress \
rsync://your.ubuntu.mirror.com/ubuntu \
/var/www/default/ubuntu
Then make a pot of coffee—or 20. You should get screens full of text as your local mirror is created. Once that is finished, a similar one-liner will create your CentOS mirror:
sudo rsync -a --progress \
rsync://your.centos.mirror.org/CentOS/* \
/var/www/default/centos
This will take a long time too. You may want to switch to decaf for this second batch of coffee.
Assuming everything was done correctly, you should have a working mirror! Test it out by going to http://your.server.ip/ubuntu and http://your.server.ip/centos, and see if you get a listing that looks like a mirror. If you get a message about “forbidden” from your Web server, you'll need to add indexing options in order to see directory listings. Even without the indexing options added, however, the mirror itself should work.
Depending on the mirror you chose for CentOS, you may or may not have a mirror that includes ISO files. If you don't want the ISO files, or a particular release version, you can, of course, modify the rsync command appropriately. For example, adding --exclude isos will completely ignore the entire isos folder, saving you lots of room and lots of bandwidth. I encourage you to tweak the rsync commands to create a mirror that serves your needs.
Once you have your mirrors tweaked how you like them, I recommend giving them a good test. Install a system from your mirror. With Ubuntu, the best way to do that is by getting the minimal install CD from https://help.ubuntu.com/community/Installation/MinimalCD and booting it via CD or USB. When the installer asks you to choose a mirror, scroll all the way to the top of the list and enter your server address manually. If all goes well, the system should find your server and install Ubuntu completely over the network. It's really pretty cool to see.
For CentOS, you need to find a mirror containing ISO files and download the netinstall ISO. Look in the iso folder inside the version number folder for the iso file ending with netinstall.iso.
Booting from the netinstall ISO is simple, but knowing the mirror URL is a little tricky. You'll want to use your local URL for something like this: http://server.ip/centos/6.2/os/i386. Obviously, you'll need to replace the “6.2” with whatever version of the netinstall ISO file you downloaded. The installer should download install.img, and from there the installer should look just like an install using CDs or DVD.
Hopefully, you now have a fully working mirror on your local server. Of course, in the time it took you to read this far into the article, it's probably already outdated. That means you need some way to keep things updated, preferably without any work on your part. Thank you cron.
At the very least, the commands shown above to do the initial rsync will do the trick if you put them into cron. I recommend removing the --progress flag and adding --delete-after so that you don't get so much feedback and so obsolete files are deleted from your mirror. If you get tired of the nightly e-mail messages from the output, you might want to add > /dev/null to the end of the cron line, so you're notified only if there are errors.
Unfortunately, things often go wrong. Rather than putting the rsync commands directly into your crontab, I recommend creating a couple scripts with some error management. The script I use (Listing 1) is pieced together from several people, cobbled a bit on my own, and has been shared all over. Feel free to take from it and modify it as you like. After reading this article, it should be self-explanatory, and it can be adapted for Ubuntu or CentOS.
Once you have the basic mirrors on your server, you'll quickly notice a few things are missing. With Ubuntu, you won't have any ISO images. If you want to have a local copy of ISOs, you can get that with another simple rsync command:
rsync -a --progress \
rsync://rsync.releases.ubuntu.com/releases \
/var/www/default/releases/
Just like with the main archive, on subsequent rsyncs, I recommend removing the --progress flag and adding --delete-after. That will keep your mirror clean. It's possible to create a script for this process as well, but honestly, I just put the rsync one-liner in my crontab. There aren't too many changes to the ISO repository; it really changes only when there is a release.
The Partner repository is a little trickier to mirror. There is no rsync server set up for mirroring the Partner repository, and I suspect it is because the Partner repo contains commercial software and mirroring it violates distribution rights or some such thing. I'm not a lawyer, but as long as you're mirroring on your local network for your own personal use, I don't think you run any risk of breaking the law.
Because there is no rsync server for the Partner repo, the best way to create and maintain a mirror is by using debmirror. debmirror is a neat tool that uses the HTTP protocol to download packages and organizes them to match the remote repository. It can be used for mirroring the entire Ubuntu (or Debian) repository, but I usually use rsync for the main archive, because it's so simple.
Setting up debmirror requires some work with GPG keys and modifying a script to fit your needs. The folks at Ubuntu have outlined the process (although they don't mention it can be used to mirror the Partner repo!) here: help.ubuntu.com/community/Debmirror.
I've also created a quick little video outlining how I keep my mirrors in sync on the LJ Web site. Here is a video showing my setup: www.linuxjournal.com/video/mirror-partner-repo-canonical.
Hosting your own mirrors takes a lot of disk space. The initial syncs take a ton of bandwidth. If you run a network that would benefit from a local mirror, however, it really can be worth the effort.
Once you have a local mirror set up, if you can afford the bandwidth, I encourage you to become a public mirror. Canonical and CentOS have methods and requirements for becoming a public and official mirror. Although not everyone can do it, it's folks like you and me who make the Open Source community so strong. Even if you can't contribute code, perhaps you're in a situation to contribute bandwidth. I'm not, as neither of my locations has enough bandwidth to support a public mirror, but perhaps someone reading this article will!
