
Don't be shy, have some RPi.
I have to give Kyle Rankin all the credit for my Raspberry Pi collection. I never really felt geeky enough to do anything with an Arduino, and for some reason I mentally lumped the RPi into the same world. Boy was I short-sighted! Thankfully Kyle showed me the light, and I managed to snag some of the new 512MB model B units. You'll be hearing about the Raspberry Pi from Kyle as well, but this month, I want to introduce the RPi to those folks who have been hesitant to buy one, thinking they weren't geeky enough. I had to ask a lot of dumb questions when my Raspberry Pis arrived; hopefully, I can save you that embarrassment.
To be honest, “batteries not included” is true, but the Raspberry Pi literally can run with four AA batteries and a tiny little resistor. If your goal is to make a portable project, that might be a viable option for you. Just know the RPi needs five volts of consistent power, and it will suck about 700mAh. If you add USB devices, it will drain the batteries even faster. So while batteries will work, it's likely the Raspberry Pi will fail without warning when the batteries get too low. For that reason, it's recommended to use an AC adapter.
Luckily, the RPi is powered by a micro-USB port, which is the most common power adapter for cell phones and tablets. Chances are you have a dozen potential Raspberry Pi power supplies lying around your house. Like with the battery scenario, however, it's important to find a power supply that can provide at least 700mAh. Remember, when it comes to amperage, more is better, so don't worry about a one- or two-amp power adapter ruining the unit. It will draw only as much as it needs. If the power supply doesn't provide at least 700mAh, however, the Raspberry Pi will not be reliable. Most problems with the RPi tend to be related to a weak or faulty power adapter.
Once you connect power to your RPi, you'll quickly find that it's awkward to handle. I didn't bother talking about a case first, because we all know building a case is not the first thing anyone is going to do. Still, if you want to keep your Pi in good shape, protecting it with some sort of case is important. Thankfully, there are more case options than stars in Hollywood.
Case Option: Buy One
You bought the Raspberry Pi, and it was only $35. It seems only logical to spend an additional $10–$15 on a prebuilt case to house it. There are clear cases, colorful cases, expensive cases and cheap cases. Most of the commercially available cases are plain, square boxes, but the RPi is a little square device, so that makes sense. Buying a case also guarantees a snug fit and proper-fitting connections. If your Pi is going to be handled a lot, a fitted case is a very good idea.
Case Option: Steal from the Nursery
The Raspberry Pi is small, and it really lends itself to a LEGO castle motif. Seriously, when it first came out, there were more LEGO-based RPi cases than anything else. If you have access to the right sort of LEGO blocks, it's surprising how sturdy those little suckers can be when properly built. Plus, if you build a custom case out of LEGO blocks, you can add wings, rockets and LEGO dudes sitting on top. Besides, who wouldn't want to have a desktop computer system that can double as a toy space station?
Case Option: 3-D Printing
If you have a 3-D printer, I can't think of a cooler way to cover your Pi. Templates are available on the Internet, but even without a template, it's possible to make a case as tight-fitting or as ventilated as you want. Now with the different color options available for 3-D printers, the sky is really the limit.
Case Option: Regular Printing
I didn't buy a case. I don't have a 3-D printer. And, my kids no longer have LEGO blocks lying around for me to steal. For me, I wanted a case that was simple, cheap and did the job. Thankfully, the folks over at h2database.com/raspi have provided a printable template that folds into a Raspberry Pi case. The coolest print stock is a clear mylar sheet. Figure 1 shows how cool a foldable clear case can look.
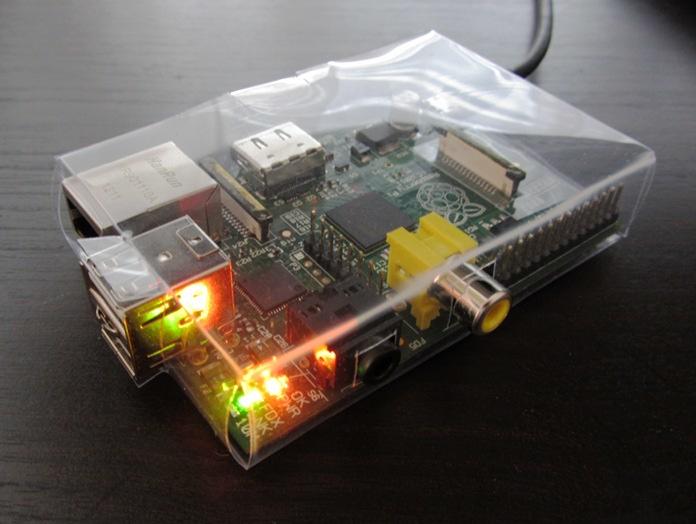
Figure 1. This foldable case is simple, cheap and pretty cool-looking (image from h2database.com).
Case Option: Crazy Go Nuts
You have a computer with a silly name, so why not compliment that with a silly case? The Raspberry Pi is small enough to fit inside a Pop-Tart box, an old shoe, a DVD case, a hollowed-out book or a carved Halloween pumpkin. Of course, any case that is wet likely will damage or destroy your Pi, but it's awful tempting to make a “Raspberry Pumpkin Pi”, isn't it? The possibilities are endless with RPi case mods, so let your creativity lead the way.
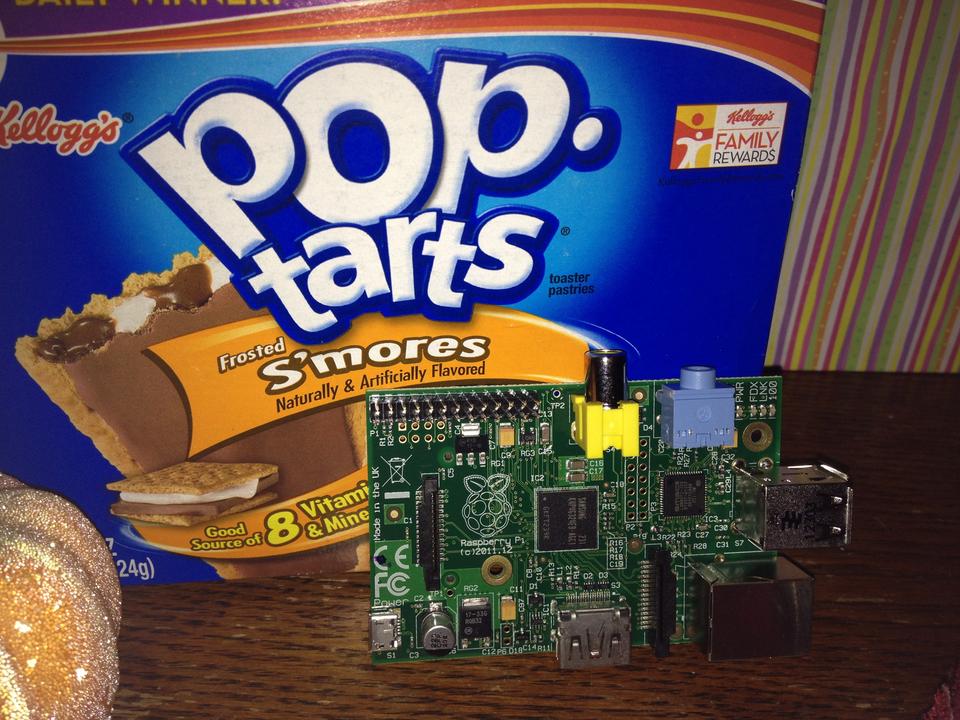
Figure 2. I am probably the only kid on the block with a bootable box of Pop-Tarts.
First off, the Raspberry Pi will not PXE boot. It also won't boot directly from a USB device. Both of those things really bum me out, but nonetheless, the RPi does boot quite nicely from the included SD slot. Because it won't boot from USB, installing an operating system is easiest from a second computer. Several Linux distributions are compiled for the ARM-based RPi, but the most popular by far is the Debian-based Raspbian OS.
For best performance, a class 10 SD card is recommended. Once you get the SD card, instructions for copying the Raspbian OS are available at www.raspberrypi.org. The good news is that even if your SD card is small and slow, once the unit is booted, there's no reason the OS can't live largely on a USB drive. If you want to experiment with moving the bulk of the OS off the SD card, the Raspberry Pi Web site has some great tutorials.
The Raspberry Pi comes with a shared system for system RAM and GPU RAM. Because the GPU is a powerful device capable of driving a high-resolution monitor and hardware rendering several types of video, if you're using the RPi in a multimedia setting, you'll want to be sure the GPU gets plenty of RAM. If you're running the Pi in a headless server mode, you'll likely want to use as little of the RAM as possible for the GPU, reserving the bulk for the system.
The absolute minimum the GPU needs is 16MB. That doesn't seem like a lot, but because the system maxes out at 256MB or 512MB, even 16MB can be significant. As the Raspberry Pi doesn't have a BIOS, the only way to allocate RAM is to put a binary file named start.elf into the /boot directory. Due to the proprietary nature of the GPU, those various .elf files are downloaded from www.raspberrypi.org. If you're running headless, you'll want to grab the .elf binary with only 16MB dedicated to GPU. Otherwise, you'll have to decide how much GPU RAM your application will require. Trial and error might be the only way to figure out the best split. The good news is that the new model B units come with 512MB of RAM instead of 256, so it allows for much more flexibility with the memory split.
SD cards are getting better every year when it comes to wear leveling and write cycles. The concern is always that excessive use of the SD card will wear it out, and it will become read-only. Because the RPi also suffers from limited and non-expandable RAM, the issue of swap space is highly debated.
Raspbian comes installed by default with a swap file active—not a swap partition, but a swap file. Whether this swap file will wear out your SD card is still up for debate. I tend to be paranoid about such things, so I searched for an alternative. Because I have the 512MB units, I have a little more RAM to work with, so I decided to use zRam to compress some of the system RAM and use it as swap space. How does that work? Basically, zRam allows the system to use RAM as swap space, but in a compressed mode that allows it to appear as more RAM+swap than the system actually contains.
zRam already is compiled into the Raspbian kernel, so if you want to try my method, it just takes a little scripting. I absolutely love the script I found at the eXtremeSHOK.com Web site. That site is off-line at the time of this writing, so I've included the script below. Create a file called /etc/init.d/zram, which contains the following:
#!/bin/bash
### BEGIN INIT INFO
#Provides: zram
#Required-Start:
#Required-Stop:
#Default-Start: 2 3 4 5
#Default-Stop: 0 1 6
#Short-Description: Increased Performance In Linux With zRam
#(Virtual Swap Compressed in RAM)
#Description: Adapted for Raspbian (Rasberry pi) by eXtremeSHOK.com
#using https://raw.github.com/gionn/etc/master/init.d/zram
### END INIT INFO

start() {
    mem_total_kb=$(grep MemTotal /proc/meminfo | grep -E
    ↪--only-matching '[[:digit:]]+')

    modprobe zram

    sleep 1
    #only using 50% of system memory, comment the line
    #below to use 100% of system memory
    mem_total_kb=$((mem_total_kb/2))

    echo $((mem_total_kb * 1024)) > /sys/block/zram0/disksize


    mkswap /dev/zram0

    swapon -p 100 /dev/zram0
}

stop() {
    swapoff /dev/zram0
    sleep 1
    rmmod zram
}

case "$1" in
    start)
        start
        ;;
    stop)
        stop
        ;;
    restart)
        stop
        sleep 3
        start
        ;;
    *)
        echo "Usage: $0 {start|stop|restart}"
        RETVAL=1
esac
Then you need to make the init script executable and force it to start automatically. The following commands accomplish that:
sudo chmod +x /etc/init.d/zram
sudo update-rc.d zram defaults
Basically, as written, the script will use half the available RAM as compressed swap space. Again, all credit goes to the folks at eXtremeSHOK.com for creating the init script. I've been very happy with the performance, and it enabled me to get rid of the swap file altogether.
Hopefully this intro to the Raspberry Pi will make the device a little less intimidating for folks like me who were hesitant. With its ability to run XBMC, function as a complete desktop system and yet barely sip electricity, the RPi is a great device for countless projects. And at $35, it's absolutely dirt cheap.
We expect to see many, many Raspberry Pi projects around the Linux Journal offices. Hopefully you'll see a few around your place as well. If you have any particularly cool projects or case mods, send a photo to info@linuxjournal.com. We'd love to see what you're all up to.
