
This article is a bit different from my usual column in two ways. First, it's starting with a hardware and software combo—something I've not done before. Second, the projects are linked to each other and come recommended to me by Perth LUG member, Simon Newton.
Given the mostly hardware-based information for the project, here are some carefully selected bits of information from the Web site:
Arduino is an open-source electronics prototyping platform based on flexible, easy-to-use hardware and software. It's intended for artists, designers, hobbyists and anyone interested in creating interactive objects or environments.
Arduino can sense the environment by receiving input from a variety of sensors and can affect its surroundings by controlling lights, motors and other actuators. The microcontroller on the board is programmed using the Arduino programming language and the Arduino development environment. Arduino projects can be standalone or they can communicate with software running on a computer.
The open-source Arduino environment makes it easy to write code and upload it to the I/O board. It runs on Windows, Mac OS X and Linux. The environment is written in Java and based on Processing, avr-gcc and other open source-software.
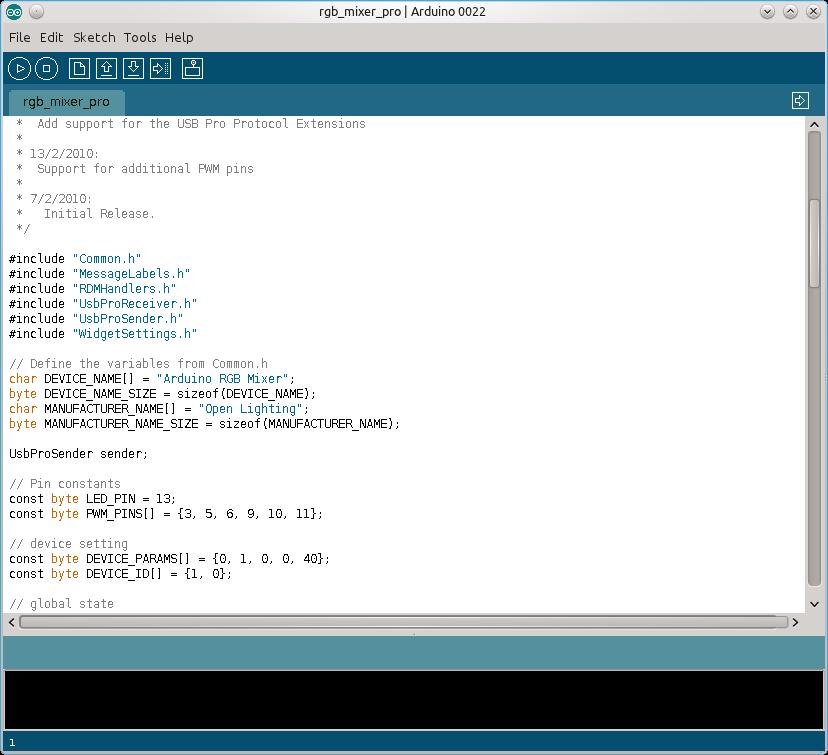
Arduino: this hardware/software combo allows you to program chips and test them on the fly—a real advantage of open hardware.
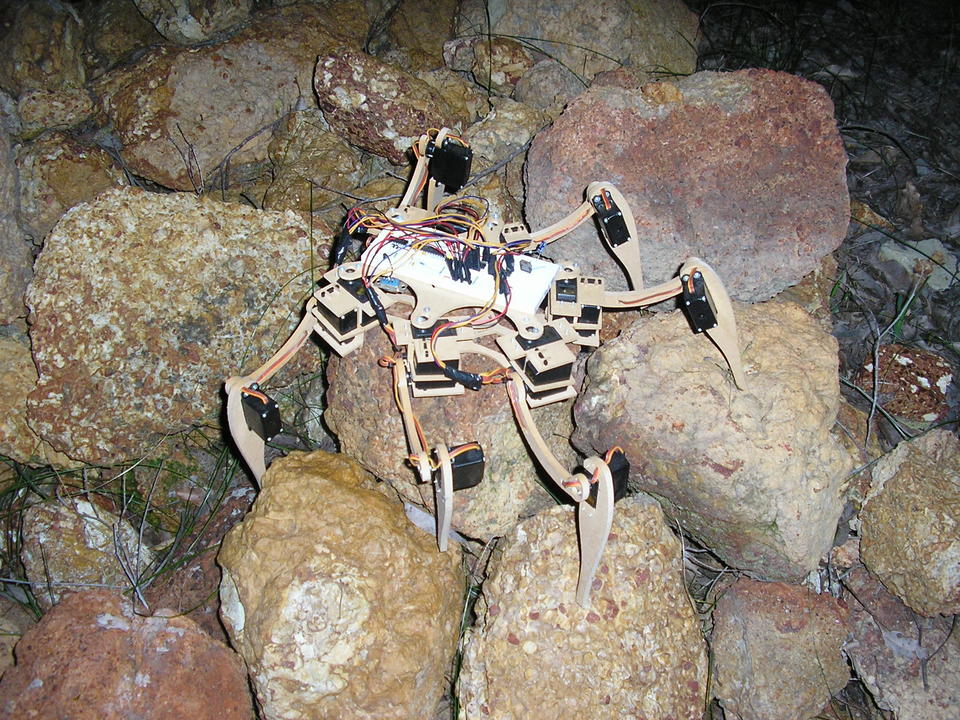
One of the wacky creations possible with Arduino, this spider-like robot is made by Curtin University student, Phillip Lawrence.
Installation
For those who are happy with a binary, the Web site makes things very easy with 32- and 64-bit binary tarballs at the download page, and if you're lucky, the Arduino IDE may even be in your repository. If you're going with the binary tarball, just download the latest from the Web site, extract it, and open a terminal in the folder. To run the program, enter the command:
$ ./arduino
If you're running from source instead, instructions are available on the Web site with a link from the Downloads page, although I don't have the space here to cover its somewhat unusual installer method. Nevertheless, it does recommend a series of packages that should help troubleshoot mishaps with both the source and binary tarballs. The Web site says you need the following: Sun Java SDK, avr-gcc, avr-g++, avr-libc, make, ant and git.
If you have a local repository version installed, chances are the program can be started with this command:
$ arduino
Under my Kubuntu installation, the Arduino IDE was available in the KDE menu under Applications→Electronics→Arduino IDE.
However, I must stop you here before actually running the program, and I apologize if I led you astray in the last few paragraphs (don't worry if you've already started it, you can close and re-open it with no worries). Obviously, before you can do anything with an Arduino board and the software, you first have to plug in your Arduino device. This will help in the configuration of your hardware, especially if you're using a USB connection.
Once that's out of the way, you now can start the program with any of the methods above.
Usage
With the program running and the device plugged in, let's set it up. Inside the main window, click on the Tools menu and navigate your way to the Board menu. From there, choose your Arduino device (I had the Arduino Uno). Now you have to choose your serial port, which is under Tools→Serial Port. If you had a USB device and the program found it, a USB option should appear here (in my case, /dev/ttyUSB0).
With all of that boring stuff out of the way, I'm sure you're keen to sink your teeth into this hardware/software combo. The IDE makes things simple with a series of examples in an easy-access menu. Look under File→Examples, and check out the impressive list of examples from which to choose. I recommend starting with Blink under the 1.Basics menu.
With Blink, you can start with the most basic of basics and come to grasp the syntax with well laid out code with documentation for each line. To try out this code, click Upload, which is the sixth button along in the blue menu, with the right-facing arrow. If all goes well, you should see your device start blinking from an LED, perhaps with a board reset in the process.
If your board has an enabled reset facility like the Uno I was using, you should be able to make code changes by uploading them, watching the board next to you reset and start again with the new program. In fact, I recommend you try it now. Change one of the lines, perhaps one of the lines dealing with the delay time, and then upload it again. Now this may seem lame, but to a hardware “n00b” like myself, changing around the program and updating the running hardware in a visible way was quite a buzz!
If you want to check out your code before uploading it, the start and stop buttons are for verifying the code, with the stop button obviously allowing you to cancel any compiling partway through. Although I'm running out of space for the software side, I recommend checking out more of the examples in the code, where genuinely real-world uses are available. Some highlights include ChatServer, “a simple server that distributes any incoming messages to all connected clients”; a reader for barometric pressure sensors; and a program for demonstrating and controlling sprite animations.
However, I've been neglecting one of Arduino's real bonuses, and that is the ability to use a board to program any number of chips, remove them from the main Arduino board, and use them to run external devices. The nature of open hardware really makes this a robotic enthusiast's wet dream, with examples like my close mate Phil's robotic spider showing some of the cool things you can achieve with this suite.
Nevertheless, I do have one specific use of Arduino in mind to tie this column together, and that is Simon Newton's Arduino RGB Mixer: a six channel color mixer that interfaces with OLA. Check out the following link for instructions on how to make this simple device that shows off both of these projects at the same time: www.opendmx.net/index.php/Arduino_RGB_Mixer.
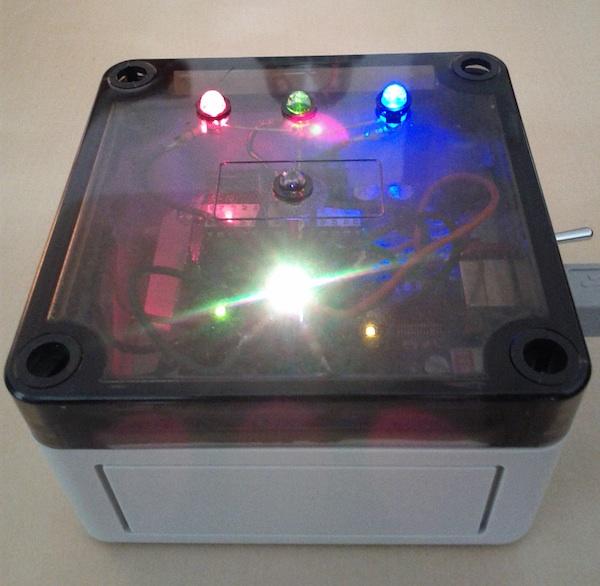
Simon Newton's RGB Mixer is a great way to use both Arduino and OLA together.
Whether you're into concert lighting, flashy display stalls or Christmas lighting, or maybe you take mood lighting a little too seriously, you'll want to check out OLA. Combined with Simon's RGB Mixer, hopefully we can explore this project with relative ease.
According to the Web site:
The Open Lighting Architecture (OLA) provides applications with a mechanism to send and receive DMX512 and RDM commands using hardware devices and DMX over IP protocols. This enables software lighting controllers to communicate with hardware either via Ethernet or traditional DMX512 networks.
OLA also provides C++ and Python APIs so it's easy to build your own custom lighting control software. The Web site contains documentation on the APIs and there are code examples provided in the repo (./examples/ for C++ and ./python/examples/ for Python).
OLA supports some of the newest lighting control protocols, including Remote Device Management or RDM. Like the name suggests, this allows lighting devices to be remotely configured, and information like temperature, fan speeds, power consumption and so on to be fed back to the lighting controller. The Arduino RGB Mixer implements basic RDM functionality allowing the user to set the DMX Start address and invert the output signals in order to support different types of LEDs. With the addition of a temperature sensor, it can report this information back to OLA.
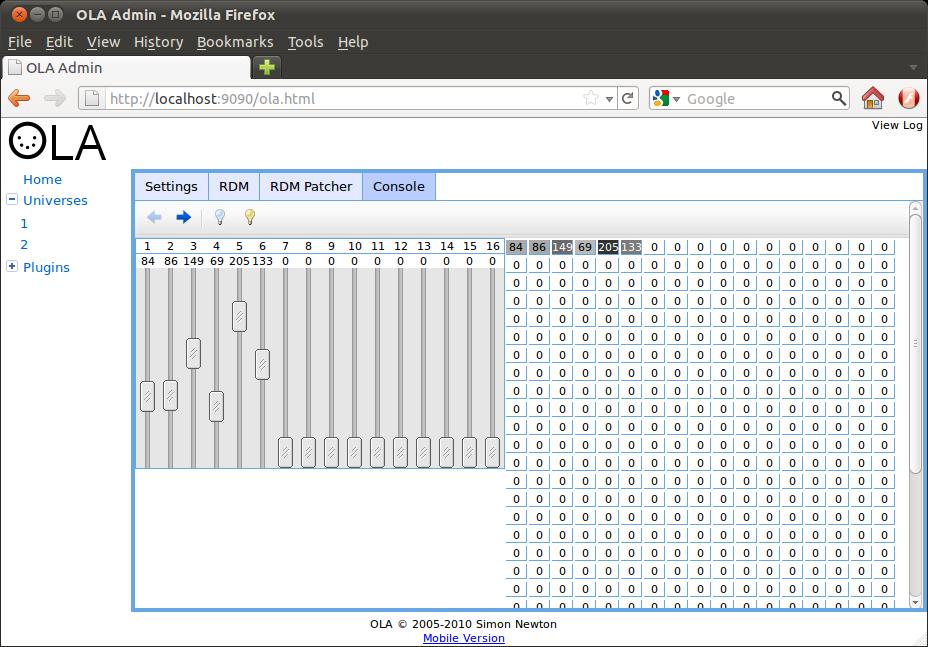
Inside the OLA Web interface, these sliders will let you control your lights in real time.
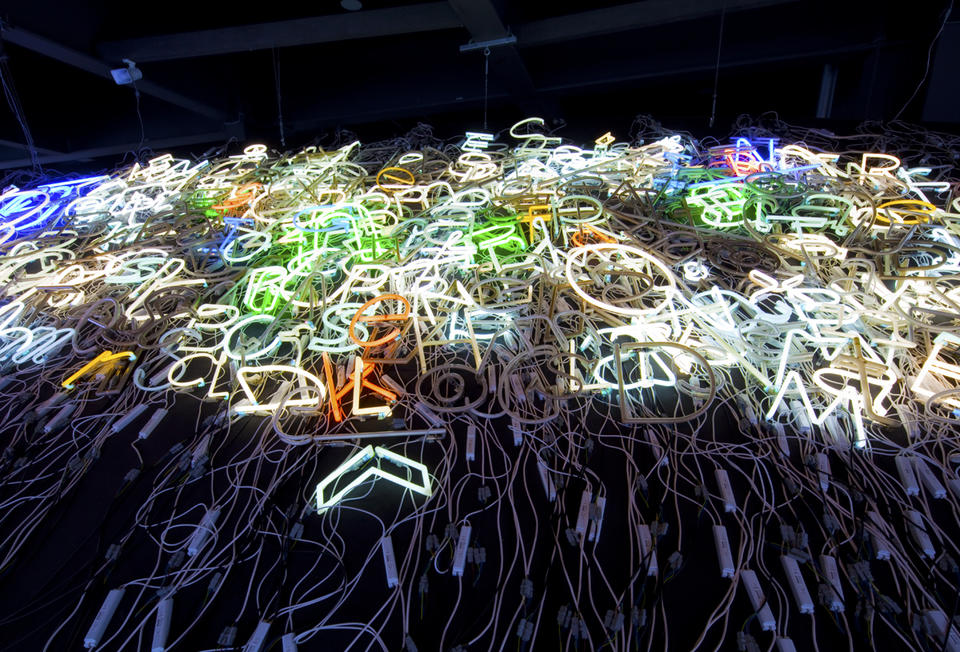
One of the jaw-dropping creations using OLA: the Nixie Mixie Matrix @ Gare St. Sauveur de Lille (FR) by Artist Boris Petrovsky (petrovsky.de). Photo: stereomorph.net (stereomorph.net).
Installation
Before I continue, I must forewarn you of a deviation from the official documentation. The official docs recommend you use a program called QLC; however, I simply couldn't satisfy the library dependencies. Because of the library issues, I had to stray from the recommended applications in the Linux how-to and use some recommendations, amusingly, from a Windows how-to—a how-to that consisted of using VMware to run Linux under Windows (perhaps one of the more bizarre troubleshooting methods I've employed). And, may I also give a big thanks to the authors of this guide, most of which will be guiding the following process.
Anyway, this guide still uses Linux in the end, and it gave the following helpful command for installing the needed libraries:
$ sudo apt-get install libcppunit-dev libcppunit-1.12-1
 ↪uuid-dev pkg-config libncurses5-dev git libtool
 ↪autoconf automake g++ libmicrohttpd-dev libmicrohttpd5
 ↪protobuf-c-compiler libprotobuf-lite6 python-protobuf
 ↪libprotobuf-dev zlib1g-dev
Apologies for any “Ubuntuization” with that command, but the package names should point you in the right direction for your own distro, and if your distro doesn't use sudo, with any luck, you might be able to log in as root and simply drop the sudo from the start of the command. Depending on how your distro works, you may need to run ldconfig manually at this point (note, this requires root privileges to work properly).
From here, let's download the source code with git and compile it. To save time and space, I combine these steps into one stream of commands. From your console, enter the following:
$ git clone https://code.google.com/p/linux-lighting/ ola
$ cd ola
$ autoreconf -i
$ ./configure --enable-python-libs
$ make
$ make check
(Note: if you have errors after that last command, you still may be able to continue regardless.)
If your distro use sudo:
$ sudo make install
$ sudo ldconfig
If your distro use root:
$ su
(enter password)
# make install
# ldconfig
Usage
OLA uses a dæmon that various programs then can interact with, the easiest of which is a localized Web interface. To get started, most people should be able to get away with using this fairly simple command:
$ olad -l 3
If all goes well, your device should be named at the bottom of the text output (if not, see the basic documentation for more information on switches). Again, going with the best-case scenario, and what most users will be getting away with, let's now look at the Web interface for controlling the Arduino RGB Mixer.
In your favored Web browser, enter “localhost:9090” into your address bar. If all goes well, a local OLA Web page should appear with a redirected URL that resembles something like http://localhost:9090/ola.html.
To start interacting with your Arduino device, click the Add Universe button. This brings up a list of device ports, with “Open Lighting—RGB Mixer” most likely at the bottom. Check its box, and assign a number and name of your choosing for the Universe Id and Universe Name fields, respectively. And presto, you now can play with your device.
Click on the Console tab, and you'll see the vertical sliders. These turn the brightness of individual LEDs up and down in real time. Again, perhaps it's a bit lame, but it gave me the same thrill of interaction I experienced with the Arduino examples.
Although this obviously is a modest example of OLA's potential, if you looks at the screenshots, there are impressive examples using OLA on a much larger and impressive scale. Hopefully, this is one of those projects that gains real development and maturity, becoming an underground hero. For a personal wish fulfillment, I'd like to see concert lighting become significantly cheaper, and if smaller independent bands can use this in particular to realize their artistic visions, OLA will make me a happy man.
