
Going above and beyond the widely known approaches to managing Nagios with Puppet.
Puppet has provided baked-in Nagios support for a long time now. When combined with Exported Resources, Puppet is well suited to manage an intelligent Nagios configuration where nodes are automatically inventoried and monitored. The excellent Pro Puppet, written by James Turnbull, provides a fairly complete rundown of the installation and configuration steps needed in order to progress in this direction, so I won't repeat the information here. Instead, this article highlights some less-than-optimal default behavior of the Nagios types and details my solution that results in a cleaner filesystem and improved performance.
Had it not been for Pieter Barrezeele's blog (pieter.barrezeele.be/2009/05/11/puppet-and-nagios), I may have ended up settling for Puppet's fairly inefficient approach to storing resources managed via its Nagios types. By default, these bits are maintained in hard-coded file paths according to type used. For example, all resources based on the nagios_service type are collected and stored in /etc/nagios/nagios_service.cfg and so on. For performance reasons, I want each collected resource to be stored in its own file path based on the following naming convention:
<base_directory>/<type>_<title>_<hostname>.cfg
Furthermore, I want my filenames to be composed of all lowercase letters and spaces replaced with underscores. For starters, let's add the bare minimum snippets of code into our manifests in order to export and collect resources using the nagios_host type (Listings 1 and 2).
Let's examine the good and the not-so-good aspects of what we've defined up to this point. On the positive side, all agents will export a nagios_host resource. The Nagios server, upon compiling its manifest, will collect each resource, store it in a unique file, and refresh the Nagios service. At first glance, it may seem like our work is done. Unfortunately, our solution is littered with the following issues and shortcomings:
Nagios will not be able to read the newly created .cfg files since the Puppet Agent will create them while running as the root user.
There is too much “coordination” needed with the target parameter of the nagios_host type. We should not have to work so hard in order to ensure our target points to the correct file and is void of unpleasant things like spaces and/or mixed case.
The address parameter is hard-coded with the value of the ipaddress fact. Although this may be acceptable in some environments, we really should allow for greater flexibility.
No ability exists to leverage Nagios hostgroups.
Puppet will be unable to purge our exported resources, because we are not using the default behavior of the target parameter.
In order to solve these issues, let's write a new definition to act as a wrapper for all of the Nagios types we plan to use. Before we begin, let's make sure we understand the most important problem—the issue of file ownership and permissions for the newly generated .cfg files. Because these files are created via the target parameter of each associated Nagios type, they'll be written to disk by the user Puppet runs as. This means they will be owned by the root user/group, and Nagios will not have permission to read them (because I know you are not running Nagios as root, correct?). Although some people have chosen to work around this problem by chowning the files via Puppet's exec type, we're going to do something far cleaner in order to maintain Puppet's greatest attribute, abstraction.
After plenty of failed “bright ideas” and confusion on my end, it became clear that it would be quite simple to control the ownership and permissions of each newly created .cfg file if each was managed as a file resource. We can fold the creation of these file resources into our wrapper definition and export them just as we do with the Nagios types. Each file resource then can be defined easily with appropriate properties as well as requiring their corresponding Nagios type. When our Nagios server collects these resources, it first will create the file from the collected Nagios type before managing the file's attributes. Let's examine the new and refactored code.
The nagios::params class:
First, let's define a few variables in a central location. Doing so will aid us in our quest to be “lazy” and not have to match values in various areas of our manifests (Listing 3).
The nagios::resource definition and friends:
Our custom resource definition will serve as a wrapper for all Nagios types. Due to space considerations, the included code covers only the nagios_host and nagios_hostgroup types. Of course, this definition can and should be extended to support every Nagios type we intend to use. Each supported type is represented in its own appropriately named definition 1 level under the nagios::resource namespace. Also included is a nagios::resource::file definition that is responsible for creating the previously mentioned .cfg file (Listings 4–7).
Listing 8 shows our refactored nagios::export class that is meant to be used by all nodes. Notice how we no longer leverage the nagios_host type directly. Instead, we call upon our newly created nagios::resource definition. Both the address and hostgroups parameters will use sane defaults unless they are overridden with node scoped variables. Also, notice how the target parameter is no longer required, as our nagios::resource definition performs the heavy lifting for us.
As you can see, the nagios::export class is ready to be extended with any kind of resource supported by our nagios::resource definition. Whenever we want all clients to export a particular resource, we just add it here so long as the following requirements are met:
The resource name must be unique.
The type parameter must be set.
The export parameter must be set to a value of true.
Now that all of our agents are exporting a nagios_host resource, we can focus on the collection side of things.
Tip: Short-and-Sweet Nagios Service Descriptions
Efficient Service Names in Nagios
When you get around to extending nagios::resource with support for the nagios_service type, you may want to consider using an inline ERB template to handle the service_description parameter. The following code removes the last word (which should be the hostname) from the description displayed in Nagios:
service_description => inline_template("<%= name.gsub(/\\w+$/,
↪'').chomp(' ') %>"),
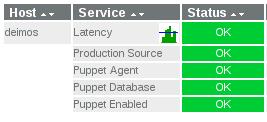
Now, a resource defined with a unique title, such as “Puppet Agent $::hostname”, is displayed as “Puppet Agent” in Nagios.
Up until this point, the job of our Nagios server simply has been to collect exported resources. In the real world, the nodes it monitors are retired for one reason or another quite routinely. When a node is retired, I want to be sure the relevant Nagios objects are removed and the corresponding database records are deleted. According to Puppet's documentation, these resources can be purged from the collector only when default target locations are leveraged (docs.puppetlabs.com/references/stable/type.html#nagioshost). Even so, I wasn't happy to see orphaned database records left behind and decided to address this issue with a few Puppet functions and some basic class ordering. Before we dive in, some work flow and terminology must be understood:
Expire: a Nagios resource is “expired” by setting the value of its “ensure” parameter to “absent”.
Collect: the resource is removed from the collector due to the value of its “ensure” parameter.
Purge: all database records associated with the expired host are deleted.
Ordering is obviously a big deal here. In order to ensure proper execution of each task, we will break out each unit of work into its own class and use a mix of “include” and “require” functions. Using Puppet terminology, we now can express this “expire, collect, then purge” work flow as follows:
The nagios class requires the nagios::expire_resources class.
The nagios class includes the nagios::purge_resources class.
The nagios::purge_resources class requires the nagios::collect_resources class.
Now, let's look at a few custom functions, expire_exported and purge_exported. These functions (written for PostgreSQL) perform the database operations that are required in order to expire hosts and their resources. They both operate on a node-scoped variable named $my_nagios_purge_hosts, which should contain an array of hostnames. If used, this variable should be placed somewhere in your Nagios server's node definition. For example:
node corona {
  $my_nagios_purge_hosts = [ 'foo', 'bar', 'baz' ]
  include nagios
}
With this node-scoped variable defined, your (affectionately named) Nagios server will reconfigure itself after dropping all resources for the three hosts mentioned above (Listings 9 and 10).
The basic building blocks are now in place. Extend nagios::resources, plug the classes in to your nagios module and kick back. If a node goes MIA and needs to be purged, toss it into your $my_nagios_purge_hosts array and be done with it. Until next time, may your Nagios dashboards be green and your alerts be few.
