
We all love Pi, but what if you could pack twice the power into half the size?
System administrators tend to be geeks. Our jobs are geeky, our hair is geeky, and even our hobbies are geeky. (My article from last month is proof. I can't even feed the birds without cron jobs and network streaming.) Although I've spent countless hours fiddling with Raspberry Pis during the past year, they're no longer the only kid on the block when it comes to tiny ARM-based computers. So in this article, I'm going to talk about my newest toy, the CuBox Pro from SolidRun (www.solid-run.com/cubox). The $159 device is more expensive than a Raspberry Pi, but it includes a case, an even tinier form factor and as much power as several RPi units. Plus, SolidRun is releasing the CuBox-i series, which is just as powerful and half the price.
I originally planned to review the CuBox like any other product, and if you prefer to see this as an extended review, that's okay. The folks at SolidRun have made such a neat product, however, that I'm really more interested in showing you the cool things it can do than just giving you a list of specs and opinions. That said, giving you the specs makes sense, so I'll start there and move on to the more fun stuff afterward.
The CuBox is a 2" plastic cube. Although that sounds boring, its cool look (Figure 1) is one of the things that makes it so attractive for computing projects. I love the Raspberry Pi as much as the next guy, but my wife never has liked the dangling little circuit board hanging off the back of the television. The CuBox looks great. Inside that simple case it has:
System board based on Marvell Armada 510 SoC (Figure 2).
800MHz dual-issue ARM PJ4 processor, VFPv3, wmmx SIMD and 512KB L2 cache.
1080p Video Decode Engine.
OpenGL|ES 2.0 graphic engine.
SPDIF (optical audio).
HDMI 1080p Output (with CEC function for TVs that support it).
1GB DDR3 at 800MHz (2GB in the Pro model I have).
Gigabit Ethernet (bootable via TFTP).
eSata 3Gbps (bootable).
2xUSB 2.0 (bootable).
MicroSD (bootable).
Micro-USB (console).
Standard infra-red receiver for 38KHz-based IR controllers.
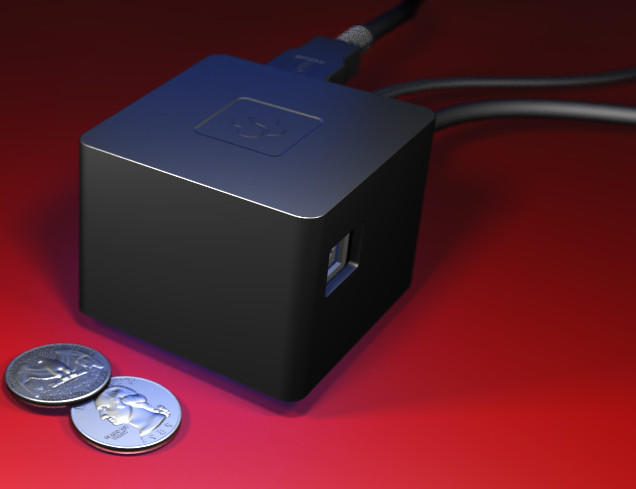
Figure 1. The CuBox is almost too small to look real.
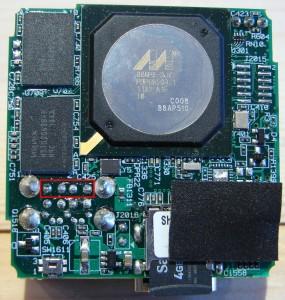
Figure 2. The Marvell system on a chip is tiny, even by cell-phone standards.
The little system comes with a DC power adapter and draws a whopping 3 watts of power while in use. 3 watts. That's not a typo. Regardless of the use case you find for your CuBox, power consumption shouldn't be an issue. In fact, 3 watts really lends itself to battery power and a solar panel for those computing projects off the grid. That might have to wait until next month for me, however, because I already have more indoor projects than I have CuBoxes. Check out how well they've crammed the ports onto the back plane of the little thing in Figure 3.
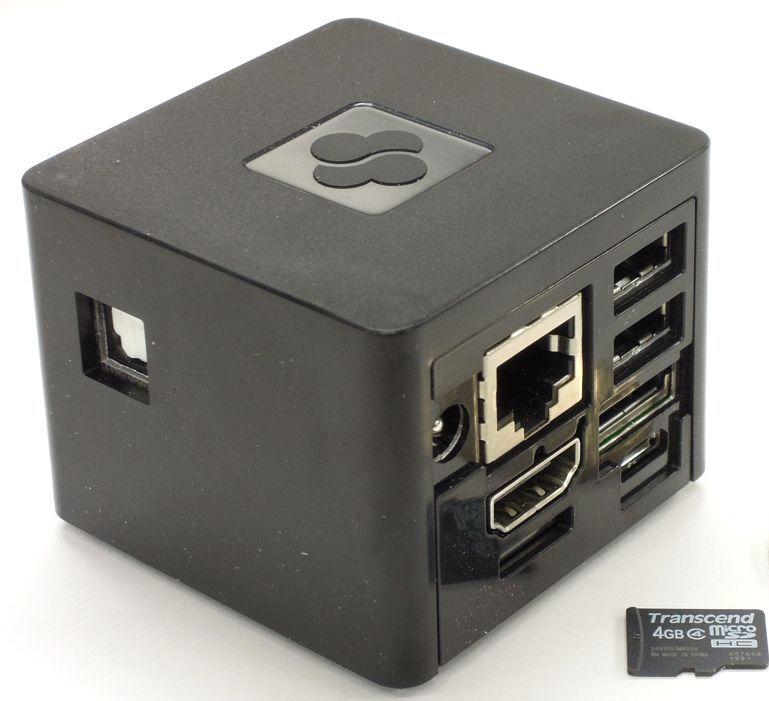
Figure 3. The only strange port placement is the optical audio port on the side. Thankfully, I've been using HDMI only.
My first 20 minutes or so with the CuBox were frustrating and intimidating. The instructions I had to configure the CuBox were written for an earlier revision than the one I received. Early on, to get the CuBox to boot, it was required to flash the U-Boot code into firmware, boot to a Micro-USB serial cable and figure out some way to get the firmware to the unit from the Internet. Thankfully, I discovered that the model I received (and all that ship now) came with a recent version of U-Boot and required nothing with a console cable. In fact, the CuBox boasts the simplest installation tools I think I've ever used. SolidRun has created an installer program that does all the heavy lifting, and it allows you to choose from a menu of CuBox-specific distributions and applications easily. The process is so simple, I thought at first I was missing something:
Get a FAT/FAT32-formatted USB drive.
Unzip the installer tool to a folder named boot on the USB drive.
Start CuBox with the USB drive in the top USB slot.
That's it—no Syslinux, no fiddling with the master boot record, no keyboard combinations. Just have the folder named boot with the installation scripts, and the CuBox will boot in to installer mode (Figure 4). From there, the installer scripts will download Ubuntu, XBMC, Debian or any custom installation scripts you can find elsewhere on the Internet. The CuBox installer will format the included MicroSD card and get your system completely ready to go.
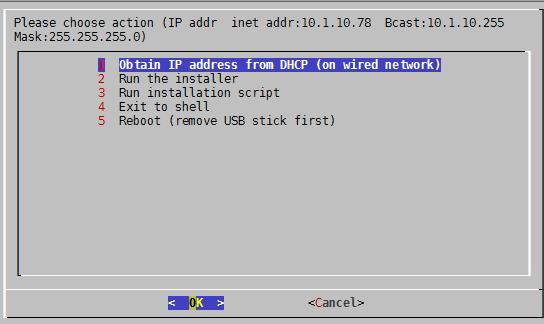
Figure 4. The installer is simple, but powerful. It downloads the latest software directly off the Internet during the install, so you always install the latest software.
The CuBox Pro I received came with Ubuntu preinstalled on the MicroSD card. I've used Raspbian as a desktop computer a couple times, and although it was cool to see the RPi power a fully graphical system, the experience wasn't exactly fun. Because the CuBox has a faster processor and 2 gigs of RAM, it makes sense that it would be better as a desktop replacement—a 3-watt desktop replacement! As it turns out, the CuBox does perform better than a Raspberry Pi, but it's still sluggish enough that I wouldn't want to use it for more than a little while. Plus, since it's ARM-based, there's no possibility of getting Adobe Flash working. Sadly, that's still a showstopper for some of the things I do on a regular basis. If you're looking for a teeny-tiny desktop replacement computer, however, I think the CuBox might fit the bill if:
Instead of booting from MicroSD, you connect an SSD via eSATA. The same installation program will install onto an eSATA drive instead of MicroSD, and that would remove what felt like the biggest bottleneck. Once programs were loaded into RAM, the system was quite usable. MicroSD as your main filesystem is just painful.
Rather than using Ubuntu proper, you use Xubuntu (the CuBox performs a bit better with Xubuntu). Although the GPU on the system is great for decoding video, it does struggle with dynamic GUI content. Ubuntu's overlays and eye-candy-rich interface make Ubuntu feel slow.
I forced myself to use the CuBox for an afternoon as my main writing computer. It worked, but if I was doing anything other than actual writing, the lag when launching programs really frustrated me. I wish I had an eSATA SSD to test the speed.
I've mentioned my Raspberry Pi colocated in Austria before. I'm still eternally grateful to Kyle Rankin for tipping me off to the opportunity. As I put services on the RPi, however, I have noticed that as a server, the Raspberry Pi can become overwhelmed fairly quickly. But, with a headless Debian install on the CuBox, I can see the difference 2GB of RAM can make.
The other big limitation with my Raspberry Pi server is storage space. I have a 32GB SD card and a 32GB USB drive in it, but not only are both of those media types rather slow, 64GB also isn't exactly massive cloud storage. With the CuBox, an external eSATA drive means the potential for terabytes of local storage.
Although I'll admit the CuBox as a desktop replacement was a little frustrating, as a server, I was very impressed with it. With Gigabit Ethernet, tons of RAM and visual appeal, it makes a great server for your office. Thanks to the ARM processor, it's perfectly silent and generates very little heat. I would continue to use the CuBox as a server in my office, except....
GeeXboX is a home-theater software system that at some point started utilizing XBMC as its software. That same awesome installer program that installs Ubuntu or Debian will install the latest version of GeeXboX on the CuBox, already tweaked and configured for the CuBox-specific hardware. At first glance, this doesn't seem like much, but under the hood, there are some cool modifications made to help with menu rendering speeds and screen blanking. Basically, if you use the CuBox installer, XBMC just works (Figure 5).
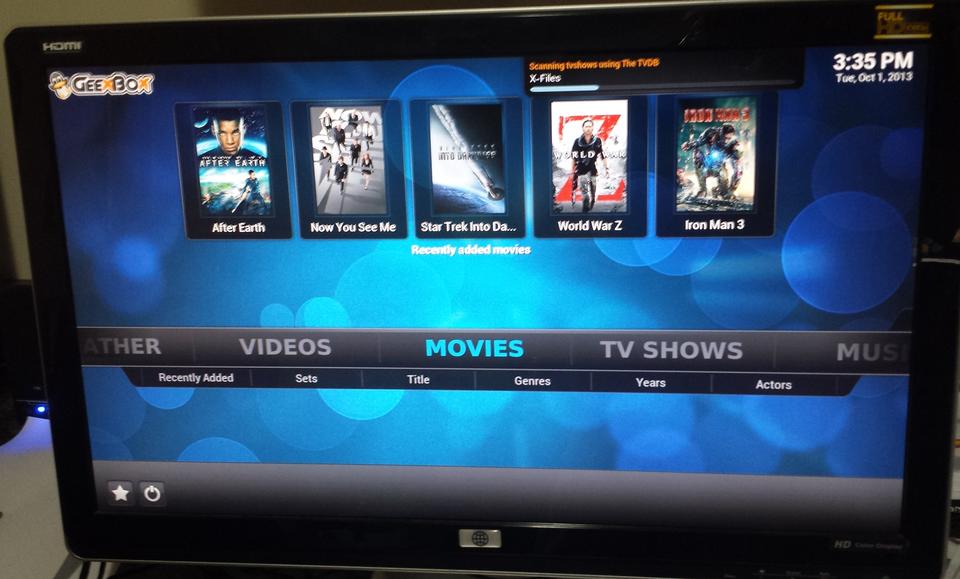
Figure 5. GeeXboX works flawlessly. Even the HDMI and SPDIF are detected correctly and function without additional tweaking.
Running GeeXboX on the CuBox is incredible. Admittedly, there are a few issues with slow menu response (especially while the library is being scanned). If you've ever used XBMC on a Raspberry Pi, however, this performs like a dream. But, that's not even the coolest part. Because the CuBox comes with an infrared receiver built in to its little cube, that means programming the old remote sitting in your junk drawer (an old series one TiVo remote in my case) is simple. Well, okay, maybe “simple” isn't quite true. Still, with a little bit of wiki reading and command-line tweaking, I was able to get my old TiVo remote to work with CuBox and GeeXboX in pretty short order.
If you do try XBMC (or GeeXboX, which is the same thing now it seems), I recommend playing network videos over NFS. There's less overhead than Samba, and high bandwidth media seems to stream better. If you don't have 1080p videos streaming over your network, it's probably not a big issue, but NFS seems to work better for those truly huge videos.
As I mentioned earlier, I'd like to try out the CuBox with an eSATA-connected SSD. I'd also like to explore booting via TFTP. The system supports it, but I haven't looked into how the boot process works. Running something like LTSP over the Gigabit Ethernet port with 2 gigs of RAM might make for an incredibly awesome thin-client environment.
The CuBox has found a semi-permanent home as a GeeXboX/XBMC media player in our home. I would like to see the Plex Home Theater system configured for the CuBox. Although we still use XBMC in our house, the central server-based model Plex offers has features I don't get with XBMC alone.
And of course, I've been trying to figure out how to use a CuBox to somehow capture better video of the various bird feeders around our house. The low power draw coupled with impressive hardware specs make the CuBox ideal for a battery/solar-panel-type solution. With a USB Wi-Fi dongle, I could put birdcams all over our woods. Please don't tell my wife. She still rolls her eyes when she sees the cell phones attached to my office window! (See my column in the October 2013 issue for details on BirdCam.)
