
For the final article in his series on ImageMagick, Dave shows how to add a fancy 3-D frame to images, resize them to fit a certain size and add a very attractive caption, all in a quick, succinct script.
I've come to the end of my journey with ImageMagick, and in this article, I show some really slick techniques for creating attractive frames around images, and then I'm done. I'm not done with the column—don't get too excited—but with this topic. Which means, yes, you need to communicate with me on ideas and suggestions for future columns (send e-mail via www.linuxjournal.com/contact).
Right. Now let's proceed.
For the past few months, I've dug into the many amazing capabilities of the ImageMagick command-line image manipulation suite, open-source software you can download from www.imagemagick.org.
I've described analyzing, resizing and even adding watermarks to existing images in bulk. All are useful tasks, particularly when you can apply the transformation to a set of images or even a folder (oops, sorry, “directory”) full of images too.
This time, I'm first going to look at simply pushing the edges of the image with empty space, then I explore some of the slick capabilities of ImageMagick's convert command. The basic image file I'm using is shown in Figure 1.
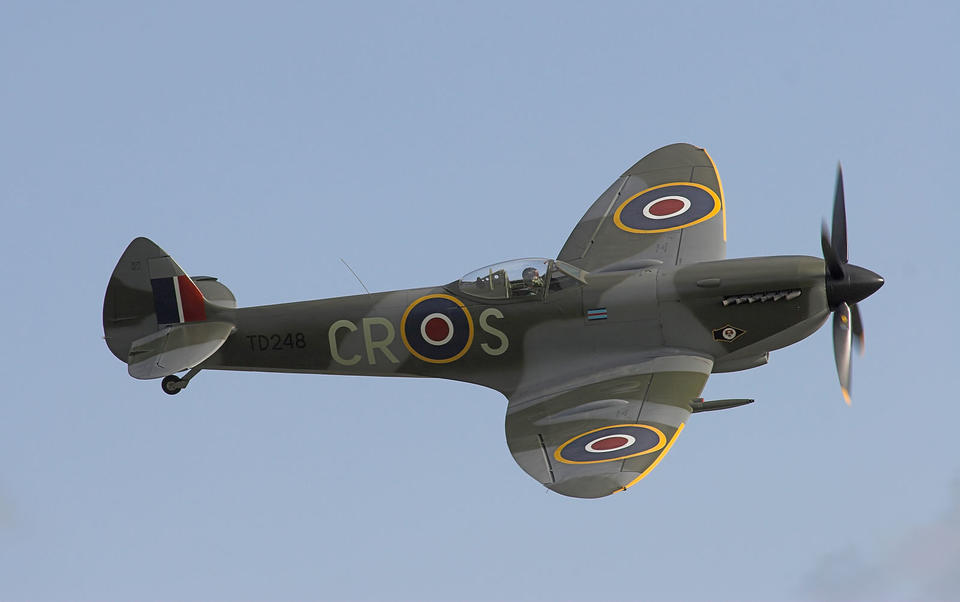
Figure 1. The Base Image for Manipulation
The image you're seeing, by the way, is the “Submarine” Spitfire MK XVI fighter plane from WWII. This particular image was taken in 2006 and is of a carefully restored replica featured on Wikipedia UK.
The most basic form of adding a border is to specify the size of the border in horizontal and vertical pixels and the border color. This is done like so:
$ convert spitfire.jpg -bordercolor black -border 10x10
 ↪spitfire-with-border.jpg
This creates a new version of the spitfire.jpg file with a black 10-pixel wide and 10-pixel high frame, as shown in Figure 2.
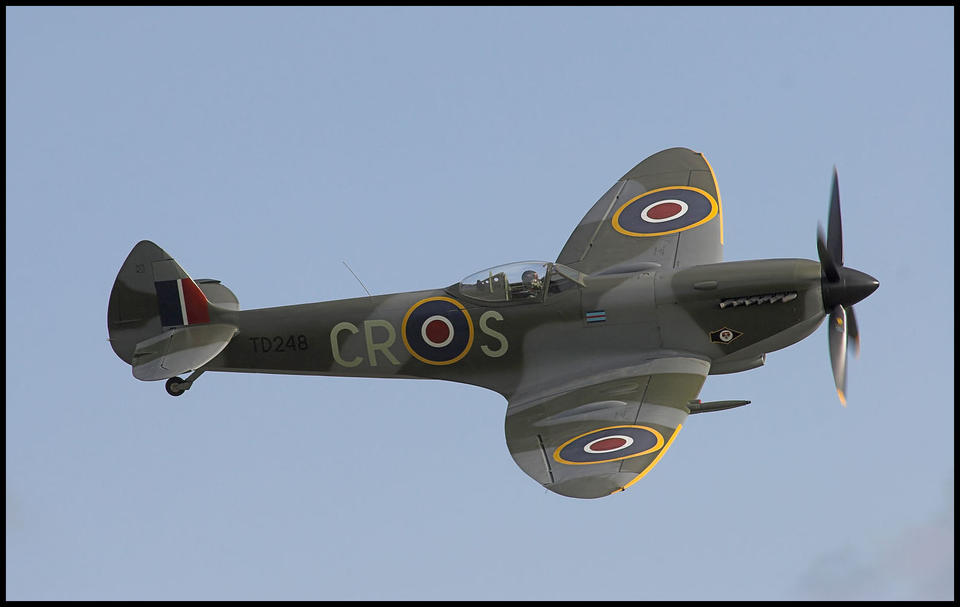
Figure 2. A black 10px frame has been added.
The only problem with what I've done here is that the 10px frame would be barely visible in a huge image, and it would overpower a tiny thumbnail. ImageMagick's got that covered though, because in addition to specifying pixel size for a border with -border 10x10, you also can specify -border 10%x10%. Neat!
But really, that is one boring frame, so let's do something more interesting and switch from the -border parameter to the -frame parameter.
For example, here's a nice framing effect:
$ convert spitfire.jpg -frame 25x25+5+5 spitfire-3d.jpg
The results are shown in Figure 3—very nice.

Figure 3. A 3-D frame greatly improves the image presentation.
Want to change the color of the frame from the default gray? Use -mattecolor followed by a color name. Try using -mattecolor DarkBlue as a parameter.
One more interesting combination lets you add a frame and a text caption. Name the file smartly, and you can use its name as the caption automatically too.
Here's a considerably more complicated example:
$ convert spitfire.jpg -mattecolor grey -background grey
 ↪-frame 20x20+0+3 -gravity South -splice 0x15 -pointsize
 ↪33 -annotate 0x0 "Spitfire MK XVI" -frame 6x6+3+0
 ↪spitfire-frame-caption.jpg
You've seen much of this already, but here's what's new: -gravity, which indicates where on the image the subsequent elements should be positioned; -splice, which adds the current background color into the image, making space for the label; -pointsize, which specifies using 33pt type, not the default (18pt, I believe); and -annotate, which as you can see takes the legend desired.
Then, there's a second frame to ensure that there's a beveled edge on the top of the area with the text and, finally, the output. The result is shown in Figure 4.
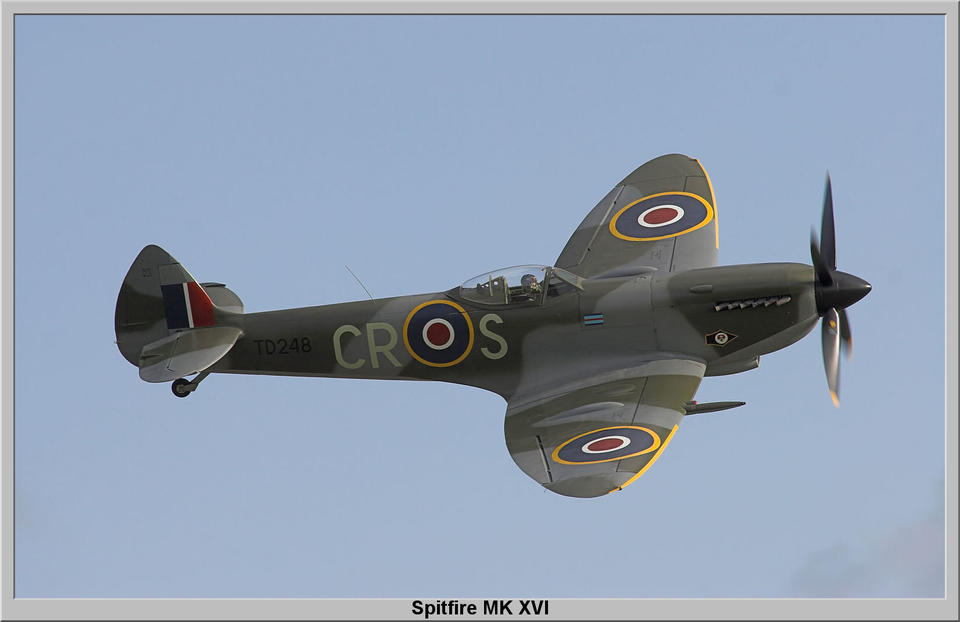
Figure 4. Image with 3-D Frame and Label Too
Confusing? Yeah, this stuff confuses me too, truth be told, but the good thing about ImageMagick is that tons of examples are available on-line that show all sorts of complicated transformations, and you can tap into those to get the formula you need for your own work.
With that last example in mind, let's write a script that creates a new version of every .jpg file it finds in a given directory that includes the name of the file too:
#!/bin/sh
for name in *jpg
do
  newname=$(echo $name | sed 's/.jpg/-new.jpg/')
  convert $name -mattecolor grey -background grey -frame
   ↪20x20+0+3 -gravity South -splice 0x15 -pointsize 33
   ↪-annotate 0x0 "$name" -frame 6x6+3+0 $newname
done
exit 0
That's pretty easy, but the resulting label isn't very attractive. What if the filenames were created with the intention of making useful and informative labels? So instead of “spitfire.jpg”, it could be “Spitfire-MK-XVI.jpg”? And, how about removing the filename suffix and any dashes or underscores in the filename as well? That's easily done:
label=$(echo $name | sed 's/.jpg//;s/-/ /g;s/_/ /g')
So, given a filename like “Spitfire-Mk-XVI.jpg”, the resulting image label will be the far more visually pleasing “Spitfire Mk XVI”. Now, what else could you do with this sort of script? Well, for one thing, you can combine a few months' worth of ideas and have a script that first normalizes the size of the image if it's bigger than, say, 800 pixels in width, then applies these transforms. That code snippet would be:
width=$(identify $name | cut -d\   -f3 | cut -dx -f2)
if [ $width -gt 800 ] ; then
  smaller=$(echo $name | sed 's/.jpg/-800.jpg/')
  convert $name -resize 800 $smaller
  name=$smaller
fi
Let's use the ImageMagick identify command to ascertain the width of the current image (with some fiddling to extract just the datum needed), then test to see if it's greater than 800. If it is, then you use convert to resize it to exactly 800 pixels wide, knowing that the program automatically will reduce the height proportionally at the same time. The challenge here is source integrity. As with most scripts, you never want to touch the original file. It's not only a smart policy, it's also a life-saver, because it's quite easy to mess up a script when you're developing it, and this way, you're sure that it's not completely destructive.
In the previous code block, notice that yet another temp version of the file is created in the $smaller variable, a version that has the “.jpg” replaced by “-800.jpg” to differentiate itself. Then, that's the one to which the caption is added, producing yet another file called “-new.jpg”. At that point, you really won't want three versions of your file, so the last step is to remove the $smaller interim version at the tail end.
All told, here's the resize-to-800px and add-filename-based-caption script:
#!/bin/sh
# Caption images, reducing to max 800px wide as needed

for name in *.jpg
do
  newname=$(echo $name | sed 's/.jpg/-new.jpg/')
  # first, let's shrink it if it's more than 800px wide
  width=$(identify $name | cut -d\   -f3 | cut -dx -f2)
  if [ $width -gt 800 ] ; then
    smaller=$(echo $name | sed 's/.jpg/-800.jpg/')
    convert $name -resize 800 $smaller
    name=$smaller  # caption smaller image, not larger
    echo "(reduced original image $name to 800px wide)"
  fi
  echo "Adding caption to $name, saved as $newname"
  convert $name -mattecolor grey -background grey
   ↪-frame 20x20+0+3 -gravity South -splice 0x15
   ↪-pointsize 33 -annotate 0x0 "$name" -frame 6x6+3+0 $newname
   ↪rm $smaller # we don't need it anymore
done
exit 0
See how that all fits together? It's neat and succinct, thanks to the amazing powers of the ImageMagick suite. And in this case, I'm using only identify to ascertain width and convert to reduce, as needed, and add the annotated frame.
That's it for the journey into ImageMagick. Next month, I'll delve into some other interesting scripting project. Have an idea for something cool? Drop me a note here at the magazine!
