
By running OpenSim on your own server, you can create your own virtual world and even connect it to other virtual worlds.
Last month, I took you on a tour of Second Life and showed you some applications for it besides entertainment. This month, I explain how you can run your own virtual island using the Second Life client and the open-source 3-D application server software called OpenSimulator. OpenSimulator, or OpenSim for short, is a free (as in speech) implementation of a virtual world platform, utilizing the Second Life protocols. From its FAQ: “OpenSim is a platform for operating a virtual world and supports multiple independent regions connecting to a single centralized grid. This is somewhat similar to the Web, where people can run their own Web servers, tied together through the Internet. It can also be used to create a private grid, analogous to a private intranet.” In other words, OpenSim can be like a 3-D Apache server, enabling collaboration, entertainment and business without having to utilize a centralized service.
You don't need a beefy machine to run OpenSim. I've had a Pentium 4 with 1GB of RAM running a basic island for a little while, and it has supported eight concurrent logins without any trouble. If you have a more modern machine, you even can run OpenSim locally on the same machine as your Second Life client. I also have tested this configuration on my Core 2 Duo-equipped laptop, and it ran quite well.
The client is a much more demanding system than the server is. I hardly notice the server process when running this in “all-in-one” mode. As a matter of fact, one machine can support a number of sims (also known as regions). I have tested up to ten regions on a dual-core machine with 2GB of RAM. So long as there isn't crazy activity in one of the regions, they all have acceptable performance. This is similar to what Linden Labs does in its data centers—it runs its “openspace” regions at four regions per CPU core.
The folks over at OpenSim say that the best method for getting and running OpenSim is to build it from source, though they do offer nightly builds. OpenSim is written in C# and runs under Mono on Linux. Due to the high dependency on Mono, I'm assuming you are running Ubuntu 8.04 or 8.10 (to get OpenSim running on other distros, please see the Build Instructions in the Resources section). Versions of Ubuntu earlier than 8.04 need to have Mono upgraded at least to version 1.9.1. (OpenSim will run under the 1.2.6 that ships with Ubuntu 8.04, but 1.9.1 is preferred for its better memory management.) The build process is well documented and straightforward, even for a ham-fisted guy like me.
Before you try it, please check the OpenSimulator Build Instructions link in the Resources section of this article, but here's how you build OpenSim on Ubuntu 8.04. This set of commands installs Mono and the necessary dependencies and libraries, gets the latest source from SVN and builds it:
sudo apt-get install subversion nant mono-gmcs \
             libmono-microsoft8.0-cil \
             libmono-system-runtime2.0-cil \
             libgdiplus libmono-i18n2.0-cil ruby
svn co http://opensimulator.org/svn/opensim/trunk opensim
cd opensim
./runprebuild.sh
nant
Once nant finishes running, that's it. OpenSim is ready to be configured and started. OpenSim can run in two modes: standalone and grid. Standalone OpenSim servers are islands unto themselves—self-contained and not dependent on any separate login managers or services. Grid mode is the more interesting mode, where multiple islands can be linked together into a cohesive virtual world. Second Life itself is an example of a bunch of regions running in grid mode, although there are other third-party grids now, such as OSGrid, DeepGrid and Openlife Grid.
Before you configure your OpenSim, you need to decide on the mode in which you will run. I recommend running your first sim in standalone mode to get the hang of the way things work. Once you understand standalone mode, you can set up another sim or convert your standalone sim to a grid-based sim, and either build your own network of sims or connect your sim to another grid altogether, like OSGrid. Configuring a grid server is beyond the scope of this article, but there is excellent documentation at the OpenSimulator Web site.
Configuring a basic standalone server couldn't be easier, as the server asks you several questions on first startup, and it builds the opensim.ini configuration file from that.
Another decision you need to make prior to configuring OpenSim is what database back end you want to run. For experimentation and light use in standalone mode, the default SQLite database is perfect. There are no special configuration settings to mess with and no external databases to set up. When you decide to graduate to grid mode, however, you probably will want to run the back end on MySQL. Configuring a MySQL back end also is beyond the scope of this article, but again, there is great documentation on this at the OpenSim Web site.
Let's get your first OpenSim up and running. All the compiled binaries will be in the opensim/bin directory. You either can run OpenSim from there or move them to a directory of your choice. If you choose to move them, ensure that you move the files under the opensim/bin directory recursively. Once you've got the binaries in place, you can start OpenSim simply by running mono ./OpenSim.exe from the directory in which you put the binaries. Once that command is executed, OpenSim goes to work, creating a bunch of standard “assets” and populating the SQLite database.
Next, you will see a prompt that asks you about the configuration of your server. It's actually safe to accept all the defaults if you just want to play with an OpenSim on the same machine as the client. Note that OpenSim's default is to listen on loopback (that is, localhost) only. If you don't put the IP address of your machine in the external hostname field, you won't be able to connect to your OpenSim instance from another machine. You definitely will need to deviate from the defaults if you want to have the client and server on different machines. You probably also will want to specify the Master Avatar first and last name as something other than the default. Here's an example:
21:45:34 - [CONFIG]: Calling Configuration Load Function...
DEFAULT REGION CONFIG: Region Name [OpenSim Test]:
Bill's Place
DEFAULT REGION CONFIG: Grid Location (X Axis) [1000]:
1000
DEFAULT REGION CONFIG: Grid Location (Y Axis) [1000]:
1000
DEFAULT REGION CONFIG: Internal IP Address for
        incoming UDP client connections [0.0.0.0]:
0.0.0.0
DEFAULT REGION CONFIG: Internal IP Port for
        incoming UDP client connections [9000]:
9000
DEFAULT REGION CONFIG: External Host Name [127.0.0.1]:
192.168.1.140
DEFAULT REGION CONFIG: First Name of Master Avatar [Test]:
Bill
DEFAULT REGION CONFIG: Last Name of Master Avatar [User]:
Deere
DEFAULT REGION CONFIG: (Sandbox Mode Only)Password for
        Master Avatar account [test]:
password
Once you answer these questions, the OpenSim server finishes its startup sequence and is ready for you to log in when you see a Region (root) # : prompt. The OpenSim console allows you to do some basic management and administration of the server from this prompt, but the real fun stuff begins when you fire up a Second Life viewer. The actual virtual world can be accessed only via the Second Life viewer. Assuming you already have the Second Life viewer and have untarred it into a directory, you can log in to your server by running the following command:
./secondlife -loginuri http://<server IP>:9000/ \
             -loginpage http://<server IP>:9000/?method=login
In my case, I can log in to my server with the following:
./secondlife -loginuri http://192.168.1.140:9000/ \
             -loginpage http://192.168.1.140:9000/?method=login
The client will launch, and you will see a basic HTML screen (Figure 1). Input the first and last name of the Master Avatar that you specified when configuring the server (see above) and the password you specified.
The client then will log in to the server, and you'll be on your own little island! It's not much to look at, just a little hump in an empty sea, but then again, neither is your avatar. Regardless of how you envision your avatar, all avatars in an OpenSim deployment start out as one basic shape—the basic Linden shape known as Ruth. This is because you have no prepopulated inventory, so you get the generic unisex avatar, which just happens to look female. Go figure.
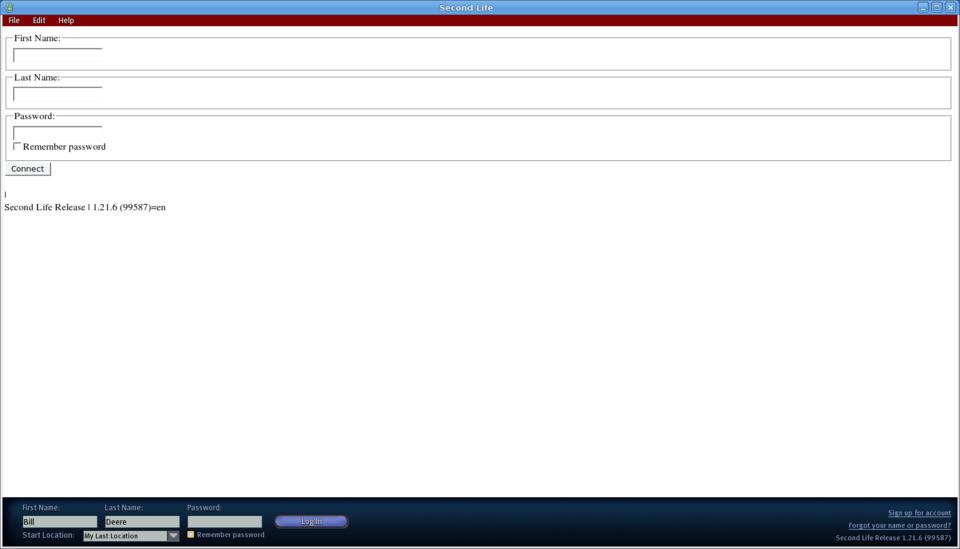
Figure 1. Logging In to My Virtual World
Ruth is sort of ambiguous-looking (Figure 2), but it's not hard to fix that. By going into the inventory window, right-clicking on Body Parts, and then clicking on New Body Part—New Shape, you can create a body shape, then wear it. Once you wear that shape, you can right-click on your avatar, and select Edit Appearance. Then, edit that shape to your liking. Once you get your shape dialed in, you can create basic clothing that's a little better than what's provided with Ruth, and look as fashionable as I do (Figure 3).
Another thing you may want to do to your island is to terraform it. This is done by right-clicking on the ground and selecting Edit Terrain. The terraforming dialog comes up, and from there, you can use the raise land or lower land tools to change the elevation of certain areas of the parcel. I spent about five minutes in the terraforming dialog, and my island went from the basic little round hump to something that vaguely resembles Pac-Man (Figure 4).
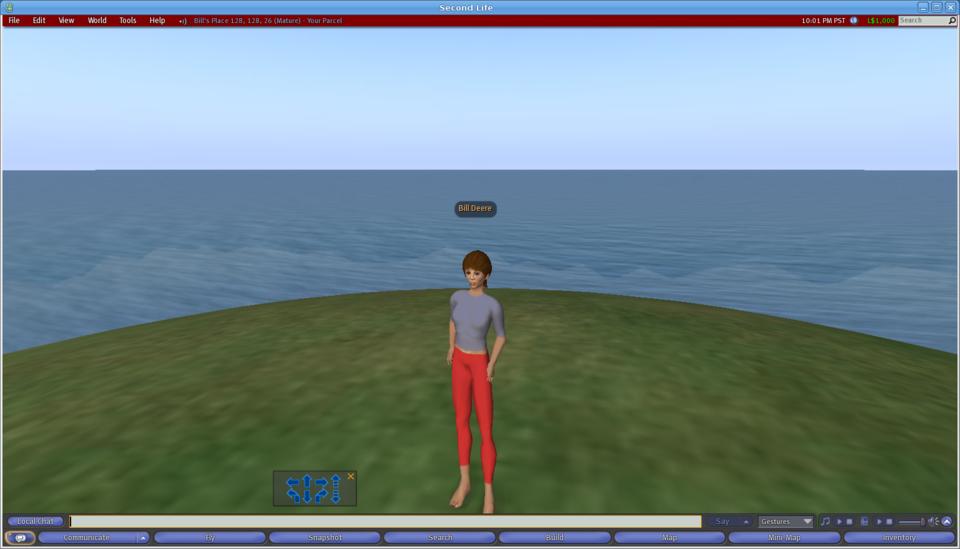
Figure 2. What I Looked Like at First
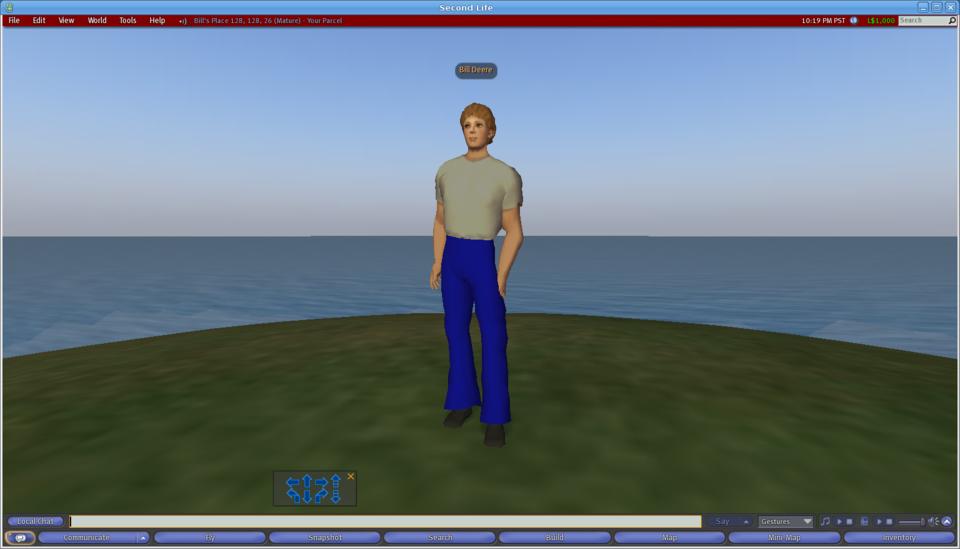
Figure 3. What I Looked Like after a Makeover
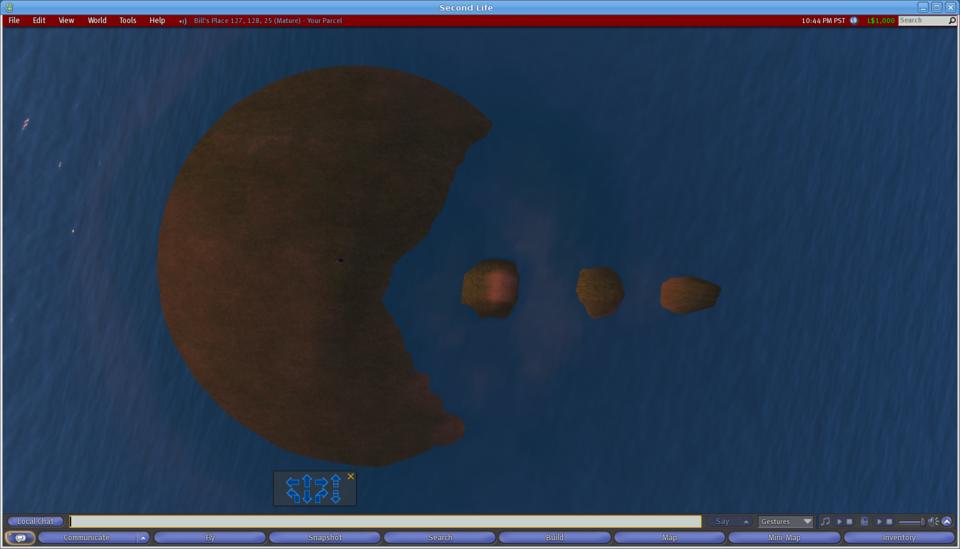
Figure 4. My Island after Its Makeover
If you are a seasoned Second Life user, you may go through a period of shock once you realize there is no prepopulated inventory, nor are there any stores to buy goods on your own private island. Much like Robinson Crusoe, you are going to have to make anything you want to use or wear on your own island. If you do know LSL scripting in Second Life, you'll be glad to know that there is an analog in OpenSimulator as well. The OpenSim folks have implemented about 85% of the LSL scripting language in OpenSim, and they are improving the support for it every day.
Once your island is up and running, for an added challenge, you may want to try connecting your private island to one of the alternative grids that have been set up by virtual reality fans. See the Alternative Grids sidebar for more information on this—it's a great way to jumpstart into a whole new virtual universe. If you can set up the infrastructure, but have a difficult time creating content, you may choose this path.
Once you've hooked your island into a grid, you can start to leverage all the shared inventory and assets of other people who have come before you. Much like Second Life, there are stores on the alternative grids where you can get clothes, vehicles, furniture and other goods—and most of it on the alternative grids is free!
That's the basics on your own island. At this point, you can have friends or colleagues log in to your server using the Second Life client, and you can converse and collaborate. Explore what you can do with the technology, and have fun making your own virtual world!
Alternative Grids
Some of the alternative grids are very interesting places to visit if you're adventurous. One of my favorite places to check out is OSGrid. OSGrid is a loose confederation of independent OpenSim operators who have tied their sims into a cohesive grid. Some of the operators are universities experimenting with virtual worlds, and others are amateur enthusiasts or OpenSim developers. Getting onto OSGrid is easy; simply go to the OSGrid site (see Resources), and register for a free account. Then, start your Second Life client with the following command:
./secondlife -multiple -loginuri http://osgrid.org:8002 \
             -loginpage http://osgrid.org/loginscreen.php \
             -helperuri http://osgrid.org
Once you log in, feel free to wander about (Figure 5). There's lots to see and do, and unlike Second Life, there is no economy, so you either find and utilize freebie items or you create your own content. OSGrid is a great sandbox for builders in Second Life who want to experiment without upload costs as well.
If you want to try running your own OSGrid-enabled server at home, you can find instructions on how to join your own server to OSGrid at the OSGrid Web site. Attaching your own server to OSGrid is much simpler than running your own private grid, because the centralized login and asset servers are maintained by the OSGrid group. Reserve a spot on the OSGrid map for your sim and check it out! It's easier than it looks.
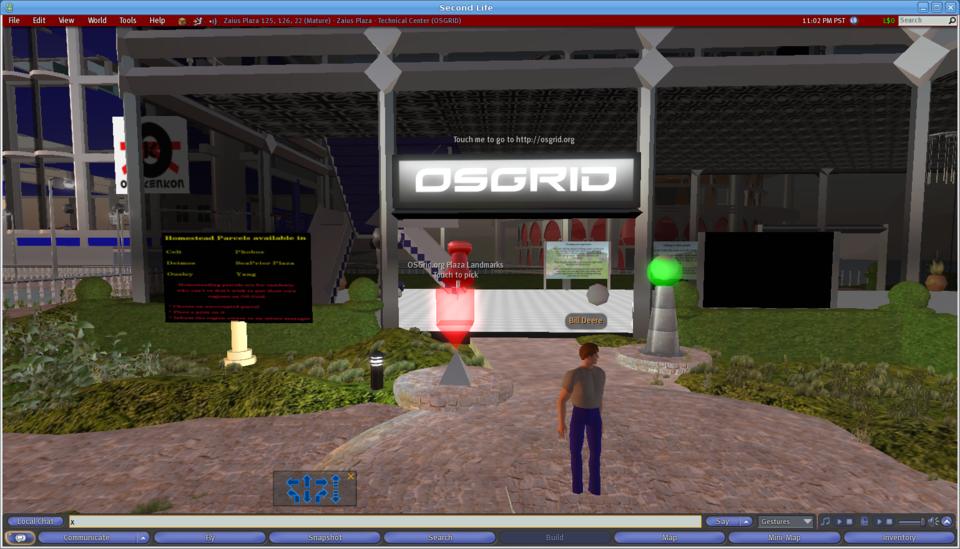
Figure 5. Me Stepping Out to OSGrid
