
Do you want to create more reliable code in less time? Obix may be just what you need. However, I'm guessing this probably looks like just another programming language, but it's actually contained within a philosophy that may be an important evolutionary step in programming methods, called “Fail fast!”
Take note of that term. At first, it may seem bizarre, but on further inspection, the amusing name is actually very logical with a profound approach to programming. I explore this philosophy and its implications following the next section.
To quote some carefully chosen parts of the documentation:
Obix is a high-level, object-oriented, statically-typed, compiled, portable programming language.
The compiler generates Java binary code (.class files). Hence, applications written in Obix can run on any system with a Java Virtual Machine (JVM) installed, such as Linux, Mac OS, Windows and so on.
Obix has been designed from the outset with a very specific main goal in mind, namely to help write more reliable code. In practice, this means that: 1) once your code passes compilation it contains less bugs and 2) remaining bugs are more quickly detected at runtime.
As a result, you can expect to reduce development time and costs.

random_arcs is a cool tutorial that comes with Obix.
Installation
Whether it be in development mode or production mode, Obix is designed around Java, so installing Java on your PC is a prerequisite. If you haven't done so already, install the Java JDK version 6.0 or later. The documentation notes that it's not enough to install the Java Runtime Environment (JRE); you need to have the Java Development Kit (JDK) installed.
If your machine is Debian/Ubuntu-based, the package name is sun-java7-jdk. If your machine is RPM-based, look for jdk-7u1-linux-x64.rpm or jdk-7u1-linux-i586.rpm. Either version 6 or 7 will do, but version 7 of Java is preferable. Other than that, there is nothing else in the way of dependencies.
To install Obix, grab the latest tarball from the Web site, extract it, and open a terminal in the new folder. From there, you now can check the installation with the following command that displays Obix's version number in your terminal:
$ ./obix.sh version
Usage
As these are early days, Obix isn't supported by a graphical environment. All tools for managing projects and compiling, running and testing code are executed from the command line, so get a console and text editor ready.
So what was all the “Fail fast!” stuff about? The idea is this: every coding error should be detected as early as possible, preferably at compile time, or else as early as possible at runtime.
To achieve this, Obix has error-preventing concepts, such as:
Contract programming (design by contract).
Feature re-definition in child types.
Unit testing.
Generic types without type erasure at runtime.
Objects are immutable by default.
Void (null) values are not allowed by default.
Although this may seem like a hassle, Obix designer Christian Neumanns found that a forgiving approach to coding in a language resulted in some horrendous errors in the long run, with some very angry customers. However, start out with a “Fail fast!” approach, and your coding naturally will be tighter and more reliable.
To illustrate one of Obix's unique features for more reliable code, look at the following example source code:
int server_port = 8080
int age_of_my_elephant = server_port
Can you see the error? Of course you can. Can your compiler see the error? No, it can't. Although server_port and age_of_my_elephant obviously are two semantically different values, the compiler can't see an incompatibility, because both values are of type integer. Moreover, no runtime error will be generated, despite the fact that elephants can't be older than about 100 years.
You might say, “No programmer would ever write silly code like this!” This is true (for most programmers). However, look at this code:
int age_of_elephant = utilities.get_initial_value
Now, you can't tell if the assignment is okay just by looking at the source code. You would have to verify manually that utilities.get_initial_value actually returns an “age of elephant” value that can't be negative and can't exceed 100. It would be helpful if the compiler could check all this for you automatically, wouldn't it?
Without digging too deeply into how it works, here is the solution in Obix. You would define a specific type age_of_elephant and declare a positive maximum value of 100. The source code for this type looks like this:
type age_of_elephant

    inherit simple_positive32
        attribute value and_check: i_value <= 100~ end
    end

end
Then, you would declare a variable and assign it a value as follows:
var age_of_elephant age_of_my_elephant = ...
Now, the Obix compiler ensures that the right side of the assignment actually returns an age_of_elephant value (and not a “server port” value). And, it is impossible to assign an invalid value, such as -5 or 8080.
Many applications contain hundreds or thousands of integer variables with semantically different (and, therefore, incompatible) values. Thus, compile-time and runtime checks like the above are very important and effective, because any incompatibilities and illegal values are immediately and automatically reported. The same observation can be made for other data types, such as strings. For example, in Obix, you would define different types with specific validation rules for customer_name, email_address and ISBN_number.
Unfortunately, that's about as much as I can cover here. One area I would like to have highlighted is being able to insert Java script into Obix code (see Chapter 3 of the tutorial), but my favorite part is Chapter 4: “How to develop a standard PC application”. Here you will see how Obix already has tools to develop projects, with their own compilation, tools, directory structures and so on—very cool.
In the end, Obix is built around some fantastic concepts, and I hope that it soon reaches a level of maturity where it's sitting in all major distro repositories. You also can help improve Obix by getting involved in the Open Source community or just by sending feedback to the author. Even outside of Obix, I'm hoping that Christian's “Fail fast!” ethos will take root in future programming languages, creating another evolutionary step in programming methods, and ultimately, more reliable computing.
If you're a photographer dealing with many images at a time, darktable may well strike the perfect compromise between image browsing and picture enhancement.
According to the Web site:
darktable is an open-source photography work-flow application and RAW developer—a virtual lighttable and darkroom for photographers. It manages your digital negatives in a database, lets you view them through a zoomable lighttable and enables you to develop raw images and enhance them.
...darktable tries to fill the gap between the excellent existing free raw converters and image management tools (such as UFRaw, Rawstudio, F-Spot, digiKam and Shotwell). It focuses on the work flow to make it easier for the photographer to handle quickly the thousands of images a day of shooting can produce. It's also one of the very few FOSS projects able to do tethered shooting.
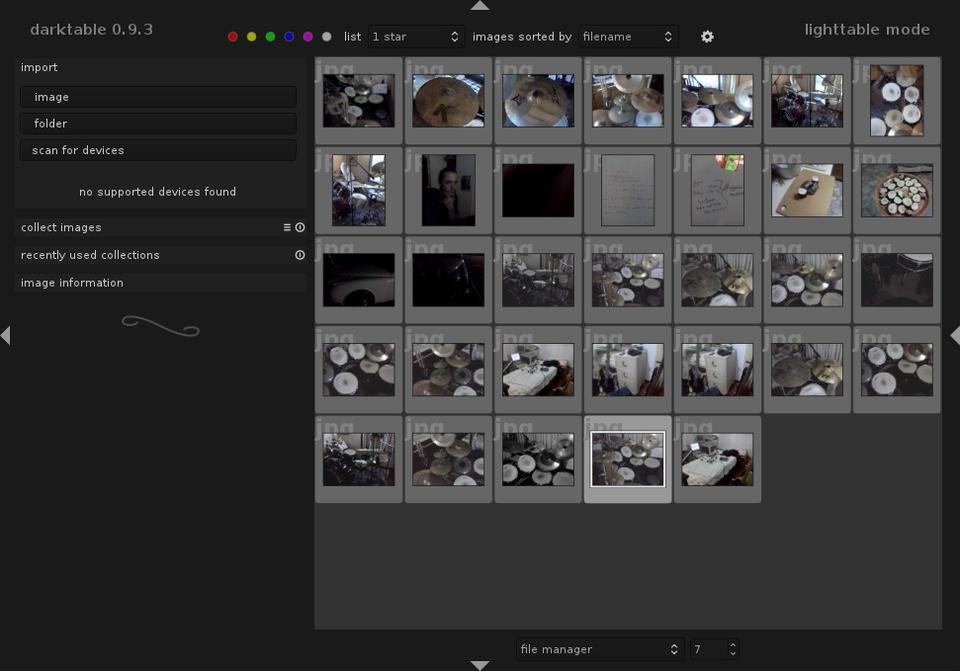
darktable: a mass-photo browser with a strikingly good interface.
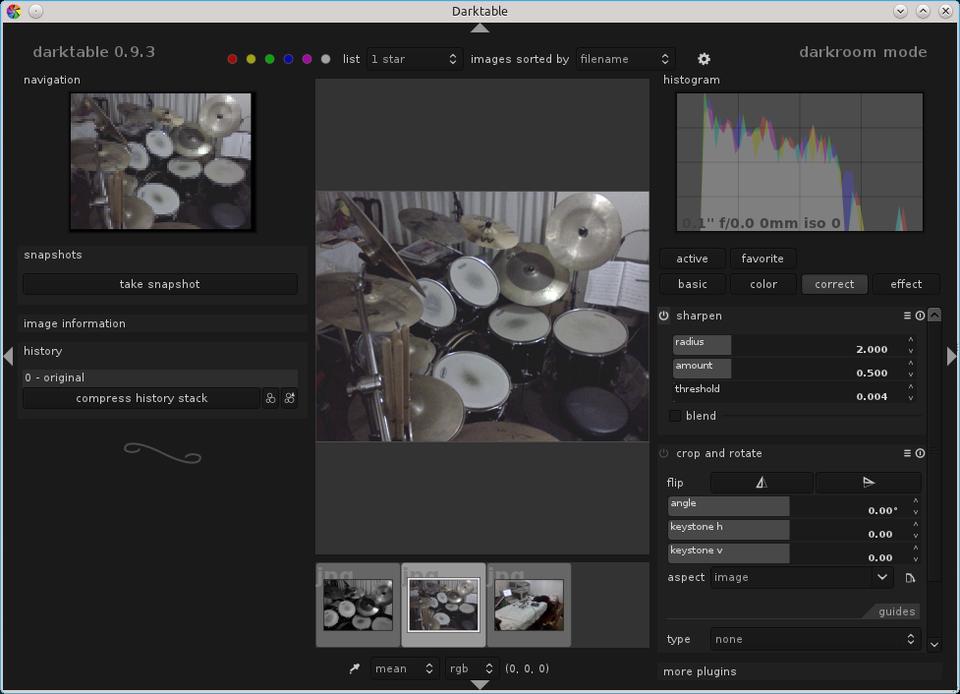
darktable with all the tools visible and ready for editing.
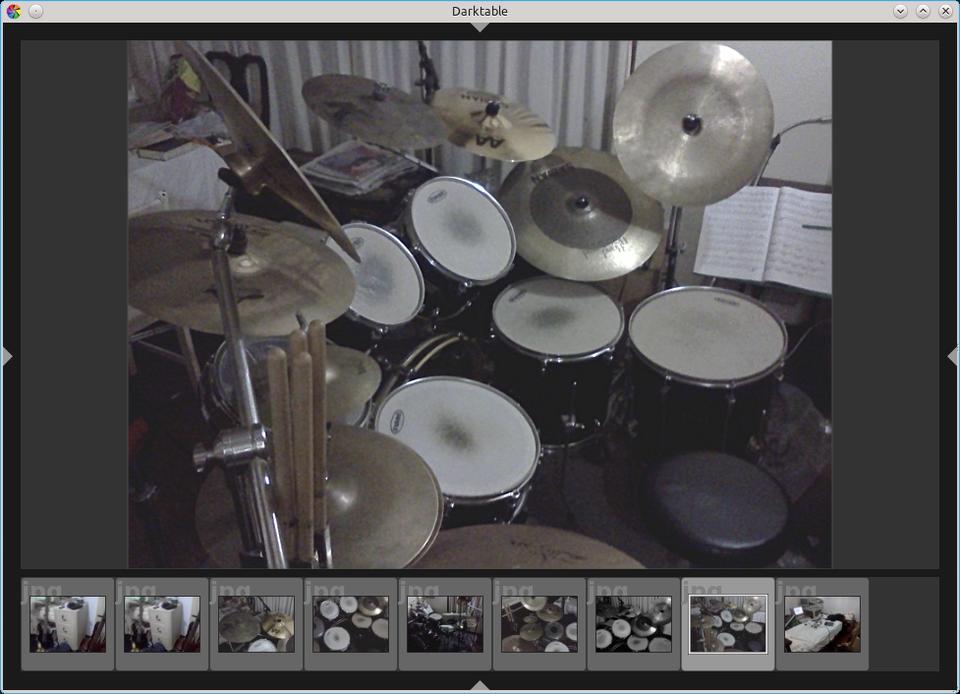
darktable with the tools cleared away to enjoy the picture in peace. Yes, those are my drums.
Installation
Binary packages are provided for Ubuntu, Fedora, SUSE and Arch Linux, as well as a Portage package for Gentoo/Funtoo. There also is an experimental version for Mac OS X, and Windows also is a possibility, but amusingly, the Web site notes that the community for this commercial distribution hasn't made a native version yet, so it recommends installing Ubuntu instead.
In terms of library requirements, the Web site gives the following list of packages: libsqlite3, libjpeg, libpng, libraw (supplied), rawspeed (supplied), gtk+-2, cairo, libglade2, lcms2, exiv2, gconf, tiff, curl, gphoto2, dbus-glib, gnome-keyring, fop and openexr.
If you want to build from source, the Web site is incredibly helpful, with all the instructions you'll need, in great detail. Nevertheless, I include a simplified version here.
Download the latest tarball, extract it, and open a terminal in the new folder. Enter the command:
$ ./build.sh
Once the building has finished, change into the build folder with:
$ cd build
Now, to install darktable, if your distro uses sudo (such as Ubuntu), enter:
$ sudo make install
If your distro uses root, enter:
$ su
# make install
Note that on my machine, it installed darktable to /opt by default, in which case, at the command line, it may be required that you enter:
$ /opt/darktable/bin/darktable
For other users (especially with binaries), you can run the program with this command:
$ darktable
Usage
As soon as you're inside the main window, you'll notice an arrow at each edge: this is for expanding and collapsing panes within the window. You may wonder why I'm starting with something so mundane, but this function actually is incredibly useful (more on that later).
Working within darktable, the interface is split into three view modes: lighttable (browsing), darkroom (editing) and camera tethering (a clever means of interacting with a camera). I don't really have the word space or equipment to explore the tethering mode, so I primarily cover the lighttable view and the darkroom view here.
lighttable
When the program starts, you should find yourself in lighttable view. Here, you manage your images as well as do things like add tags and color labels. Keep in mind that its shortcut key is L, as darktable's design has been based around switching between the lighttable and darkroom views, easily and rapidly.
The first order of business is to import some images with the import field on the left.
Do you see a field? If not, remember the arrows that I mentioned at the start of this section. Click on the left arrow, and the import section will expand and collapse. Collapsing one section can be very useful, as it lets the actual picture section grow much larger. With the import section expanded, import some pictures (you have the choice of a singular image, a folder or to scan for devices), and they will appear in the main section in the middle.
While you're still here, try expanding and collapsing all four arrows, and see how it affects the rest of the window. With all the fields collapsed, the image section gets center stage and takes up the whole window, and with all the fields expanded, you have a great many tools available, but your images are reduced to small, insignificant squashy things. With just a small number of clicks, this clever GUI design allows you to switch between beautiful Zen-like minimalism on one end and ugly but useful functionalism on the other.
darkroom
With that covered, select some of your pictures, and let's move on to the darkroom. Remember that its shortcut key is D. In fact, try alternating between lighttable and darkroom with L and D now. Nice, huh? This darkroom is where you do the editing, and you can do all sorts of things, like toy with the color profile, sharpen the image, apply cropping, rotate and so on.
While you're in the darkroom, you still can change between images with the filmstrip, toggled with Ctrl-F. Chances are that you'll have quite a number of images along the strip, so if you want to scroll along it, hover your mouse pointer over the strip and use your scroll wheel. Double-clicking will open an image.
That's about all the space I have for darktable, but it's been an absolute pleasure to use. The GUI design is one of the best I've ever come across, and I hope to see its design copied in the future. Plus, the aesthetics are great as well, with a really cool light-black color scheme that is such a nice change from the endless beige and grays that make computing so depressing at times.
For mid-level photo management, this probably is the coolest tool I've come across, and whether you like your interface minimal or maximal, it doesn't matter. You can change it around in about two seconds.
