
How does your network stack up to potential security threats? You won't know until you look.
One of the most persistent themes in the past decade of computing has been security. When asked what concerns them most, IT managers consistently list security in their top three answers. It should concern them. In this year alone, we've seen numerous data breaches hit big companies, and we've had the disclosures of the Heartbleed and Shellshock vulnerabilities. Prognosticators say more vulnerabilities are on the way. One way to make sure your house is in order is to perform an internal security review—a multi-pronged process that discovers and documents what is on your network and what is in place to protect your users and your data.
In this article, I walk through performing a very basic security review of a fictitious company and produce a report of the findings and recommendations for any deficiencies discovered. Before starting, let's look at the reasons for performing a review.
For one, a healthy paranoia is a good quality for any security professional to have. You want to know what is on your network, what it does and how it operates. Two, you may be required to do audits or subject to audits based on regulatory requirements (PCI or HIPAA) for your industry. If your company is subject to an outside compliance audit, an internal review is an excellent way to prepare for a real one. It shows potential auditors that you are prepared and proactive against security threats. Finally, it can identify weaknesses in your current defenses so that you can address them prior to an incident. If there is any time to have an honest discussion about your company's approach to security, it is well before an audit, or worse, before a breach takes place.
Let's kick off the process by defining the scope. Start with identifying the drivers behind your review. Are you doing it as a best practice or are there any regulatory requirements you need to satisfy? If the answer to the latter is yes, there may be existing guidance or checklists specific to that standard you will want to consult. If the answer is no, who is your audience? Is it departmental? Is it upper management? Know the answer so you can tailor your report effectively for the best outcome.
If you are presenting the report to decision-makers, you may have influence over budget and personnel decisions. If it is being done for the IT department, you may want to highlight technical issues that affect day-to-day operations.
Next, decide how you want to collect the data needed for the review. Are you limited in scope by time, personnel, expertise or budgeting concerns? How do you take all of the information and craft it into a coherent report? There are a multitude of questions to answer before getting started, and your mileage may vary. Make sure to document your planned scope for the report and come to an agreement with decision-makers before performing any other work.
For my example company, I'm limiting the work to the tools included in this article and the portions of the sample environment that they will test. I have opted to use several industry-standard tools found on the Kali Linux (formerly Backtrack) distribution. My fictional bosses have specified that I perform less-intensive data-gathering tasks (scanning, discovery) during production hours and save the vulnerability scans for overnight due to the traffic generated and possible side effects on client machines. Below is the sample scope that I will follow for the rest of the process.
Sample Scope:
Gather internal documentation regarding network and systems.
Perform host discovery on production networks during normal business hours.
Perform network traffic baseline testing during production and after hours.
Perform an inventory scan of all found hardware and software.
Perform a vulnerability scan on workstations and servers.
If you have multiple people involved in the day-to-day operations of your IT group, the review should be prepared as a team. The review process can be invaluable as a cross-training and knowledge-sharing tool.
After the defining scope, let's move on to the process of data gathering. I want to collect as much existing information about my enterprise to give the most complete picture possible. This information can come from many sources both on-line and off-line. I'm going to collect any network drawings, server build documents, operating procedures, policies and so on that pertain to daily operations or security for analysis with later findings. It may seem odd to include policies, but often security directives can come in the form of non-technical controls. If you aren't sure what constitutes a policy, they are usually in the form of a handbook or written document/memo. Sometimes they are simply a verbal or known policy. If there are such polices, be sure to document them. It's always better to have a policy than not have one. It often happens in the course of the review process that a known or verbal policy becomes a documented policy. I also will want to gather information about any or all hardware, software, network devices and their placement in the enterprise. This will help me identify any unusual and/or unauthorized devices found in the next step.
Now I'm going to move from collecting data to generating it. I do this in order to compare what I find to what actually is on our network as well as to create a list of hosts for our vulnerability scans. Here again I have some decisions to make. What do I want to scan and how deep? The longer you scan, the more information you generate. There are many types of scans you can perform, but you always need to be aware of the cost and labor. Sometimes a penetration test is worth it, but it may have to be done after hours. Scanning tools can break an application or OS with the wrong options selected. How much data are you generating and where do you store it? As has been the pattern, document these decisions for the final report.
To get started, let's generate a listing of the devices on the network. There are multiple tools to do this, but the easiest to get going is netdiscover. Launch your Kali workstation and click on the Applications menu, then Kali Linux→Information Gathering→Network Scanners→netdiscover. This will launch a terminal prompt. Type netdiscover -r YOURIPSEGMENT/SUBNET (for example, 192.168.77.0/24) to scan the local subnet (Figure 1).

Figure 1. netdiscover Searching for IPs
You can scan entire ranges and classes, but to save time let's limit the results to known subnets. You also could use nmap/Zenmap, which also is included in Kali, to discover as well as scan ports and create basic maps. Run netdiscover on each of your subnets and pipe the results to a text file. If you share the same address classes, you could try running the program without any switches, which will look at everything in the class range (for example, 192.168.77.0/16). When you have run netdiscover on each of your subnets, combine and filter the text files into one file that contains all the IP addresses you want to scan for vulnerabilities. Compare your findings with any documents/drawings collected in the previous section to detect systems not included in those items. Note any exceptions found for the report.
Next, you're going to take some sample captures of network traffic to check for any unusual activity. I've found more rogue activity on networks using sniffers and IDS systems than I have with any other tools. You also can use sniffers to troubleshoot faulty or misconfigured applications as unauthorized channels. You will want to take captures at both peak times and off hours to get a feel for what traffic is traversing your network and establish a baseline of normal flow.
In Kali, click on Applications→Kali Linux→Sniffing/Spoofing→Network Sniffers→Wireshark. Wireshark will start with its basic screen (Figure 2). Select the interface you want to listen on and click Start. The default setting on Kali is set to promiscuous mode, but you may need to do further configuration if you want a more thorough capture. Allow the capture to run for as long as you deem necessary. This may depend on the size of your subnet, bandwidth and storage. My rule of thumb is to take samples of 5–10 minutes at peak times (morning, middle of the day).
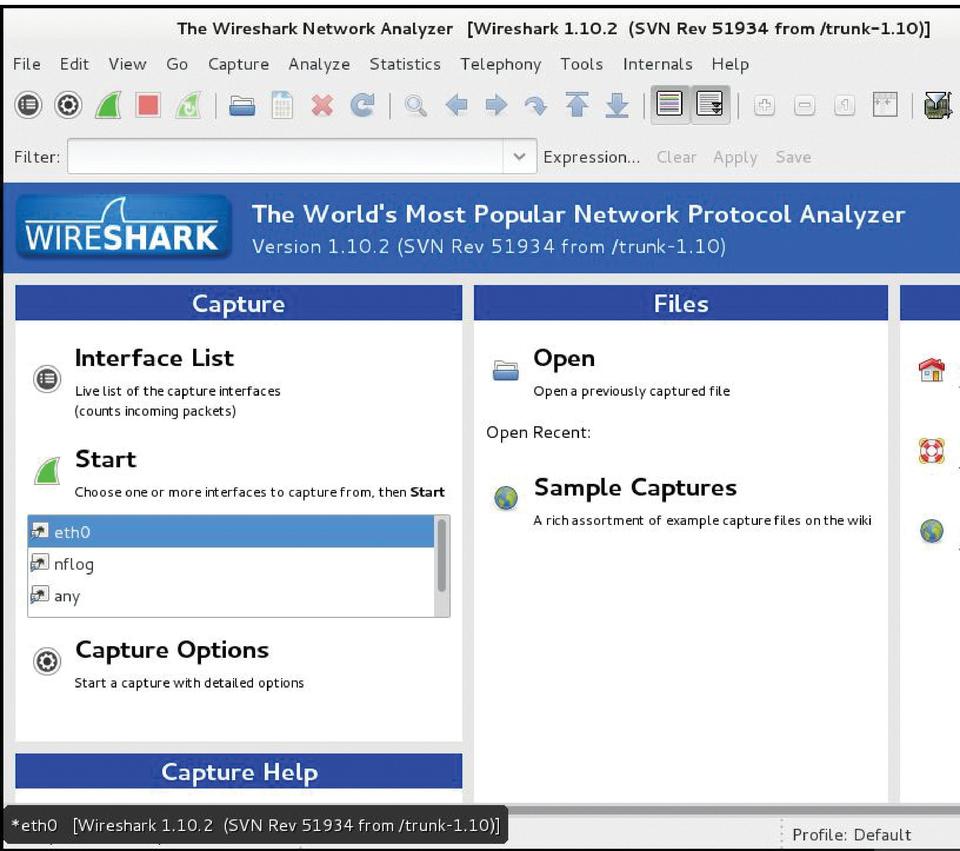
Figure 2. Wireshark Start Screen
Review your captures and look for items of big concern. Are there any protocols being used that you don't recognize or that are unauthorized? Are there any IPs or traffic-related behavior that look out of place? Make sure to note any unusual findings for the final report. In my test capture (Figure 3), I can see an abundance of traffic between one of my Windows clients another external host. As I inspect the packet, I see it is connecting to a Flash-based server. It turns out my test user is using a streaming service from his workstation. This could be allowed or it might not be. Either way, Flash player has plenty of vulnerabilities to exploit. As you review the captures, note any exceptions to normal or expected traffic.

Figure 3. The results of my scan—looks like I found some Flash traffic.
This step may or may not be required for what you need. I consider it a best practice. Just like it is a good idea to know everything that is running on your network, you also should maintain an inventory of your hardware and software. Plenty of software exists that can do this in an automated fashion, but most of it is commercial. Let's use Open-AudiT here, an open-source alternative. Installation is easy, and the program is straightforward to use. I deployed Open-AudiT on a CentOS 6 server, as it unfortunately is not included in Kali.
Once installed, you can use a Web interface to manage the program. You can use some of the automated methods included in the program (SSH, SNMP) to add systems, or you simply can visit the server's Web page and use the “Audit this PC” button from a client machine (Figure 4).
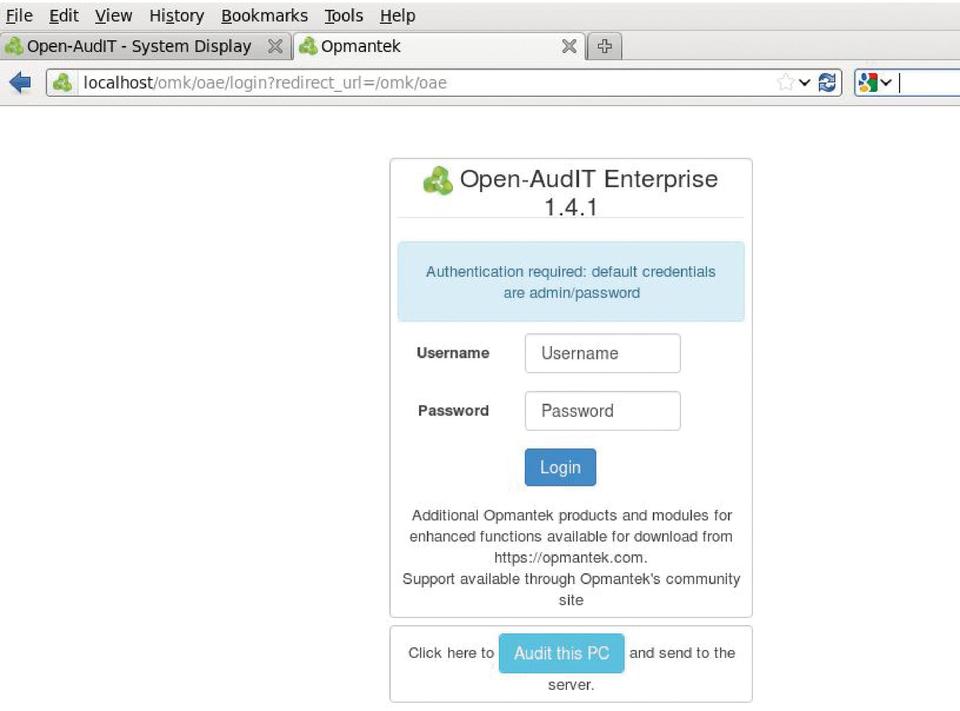
Figure 4. Open-AudiT logon screen—you also can use the “Audit this PC” button to inventory the client.
Once the inventory process is completed, review the findings and look for any unexpected software installations (Figure 5). Some users love to install their own software. This can be a problem, because you can't update or patch what you don't know is there. As before, note any findings of concern related to hardware or software you encounter, specifically those you discover vulnerabilities for in the next section.
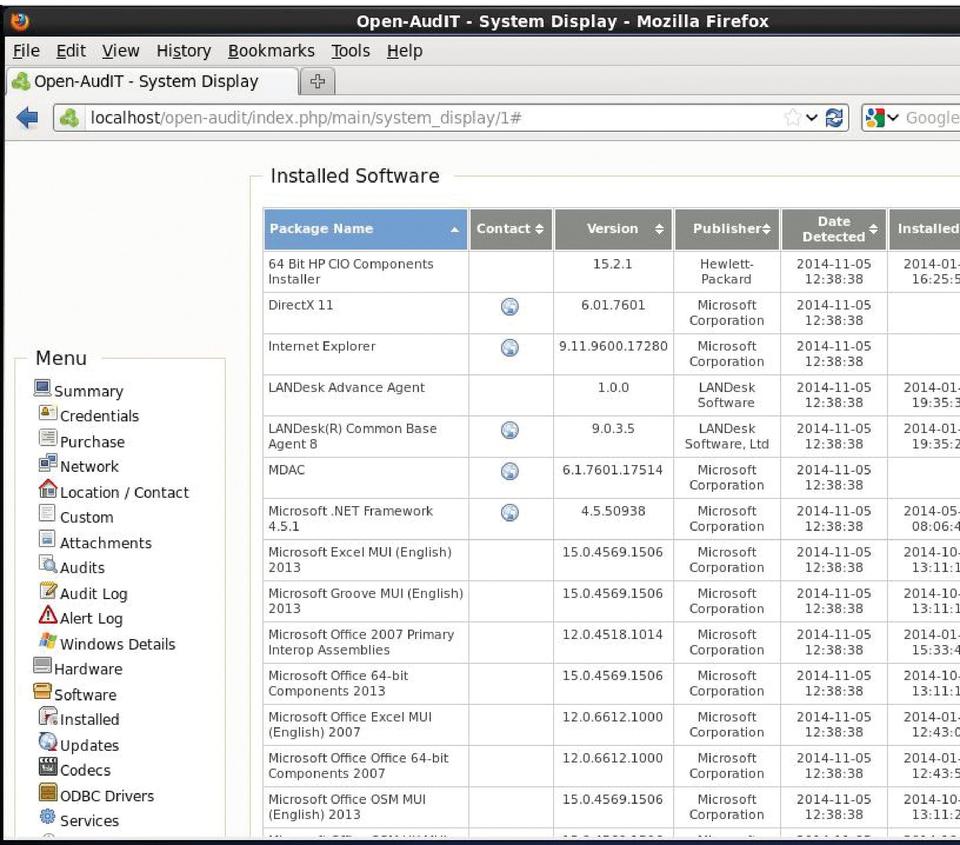
Figure 5. Inventory of Found Software
Now let's move on to the task of vulnerability scanning your systems. Let's use an open-source tool called OpenVAS (Vulnerability Assessment System) for the scans. OpenVAS can be notoriously difficult to install, but on Kali, it is a snap, and should you run into any install issues, there is plenty of information on the Internet.
In Kali, click on the Applications menu, then mouse over Vulnerability Analysis→OpenVAS→“openvas initial setup”. This will start the install process. At the end of the setup, an administrator login and password are displayed. Save these for later use.
After the install is complete, come back to the same section and select “openvas start”. After a few seconds, load a browser and navigate to https://yourkailipaddress:932. Log in with the admin account and the password you recorded during set up. Ignore the welcome screen, as you will save time by performing a bigger scan. Click on the Configuration→Targets link. On the Targets page, click on the white star in the menu bar to create a new target. Enter a name for the Scan and any comments. Click on the browse button to find the text file with the list of hosts generated from netdiscover. Under Port List, select “OpenVAS Default”. In the “Alive Test” drop-down, select Consider Alive. Click Save Target. Now click on the Scan Management link in the menu and then click on Tasks. On the page, click on the star in the menu again to create a new task. Give the scan a name and add any comments. In the “Scan Config” section, select “Full and fast”. Under Targets, select your target. Check the box marked yes next to “Add results to Asset Management”, and click on Create Task. This takes you back to the Task Details page. Click on the green play button in the menu bar to start the task. You can set the refresh rate of the scan status in the drop-down in the middle of the page. I set ours to 60 seconds. This scan will take a while (depending on the number of hosts scanned). When the scan is complete, OpenVAS will generate a report.
If you navigate back to Scan Management→Reports, you should see your report listed (Figure 6). As you can see, the scan found a high severity vulnerability (Figures 7 and 8). This turned out to be a false positive from my test Microsoft Exchange server. However, there still were several medium-level vulnerabilities that should be addressed. Review the rest of the scan results and note any items of concern. Save the report to a separate location when you are done.
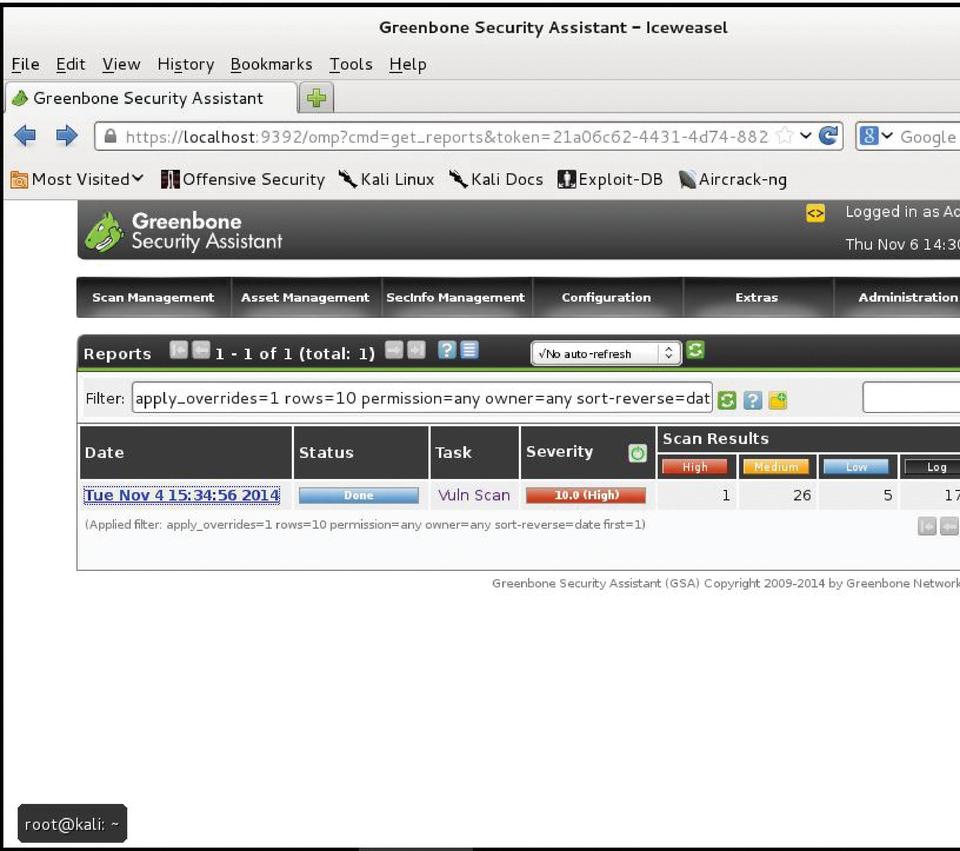
Figure 6. The Results of the OpenVAS Scan
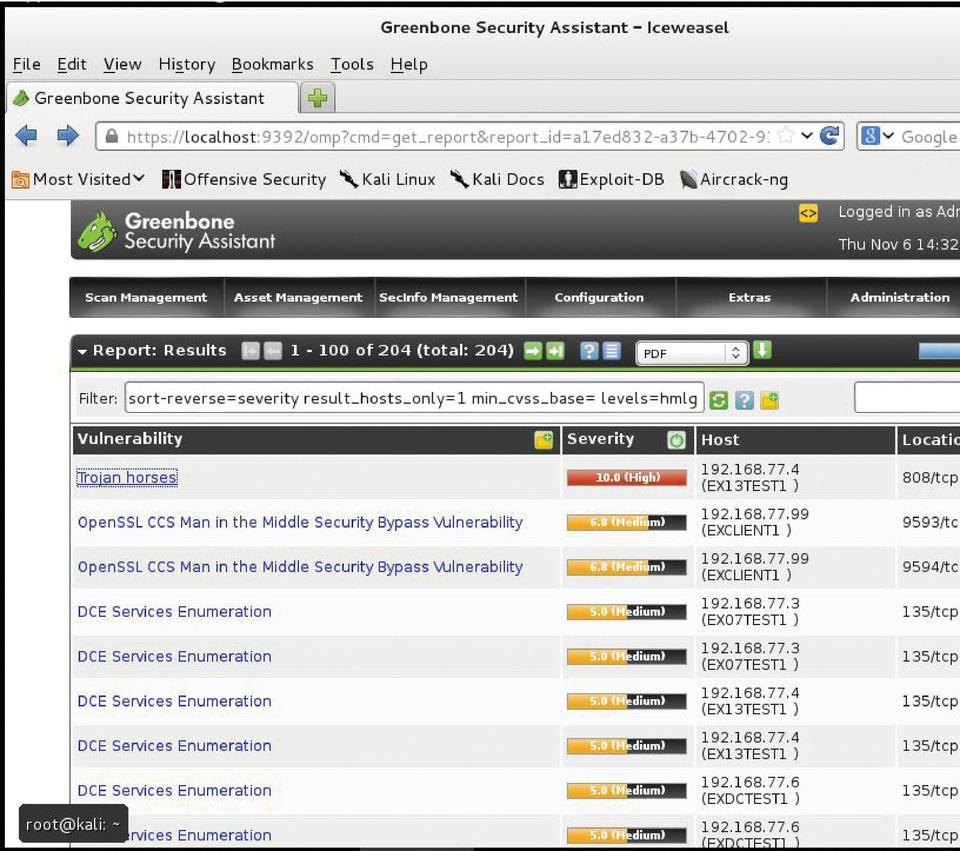
Figure 7. Vulnerabilities Found in the Scan
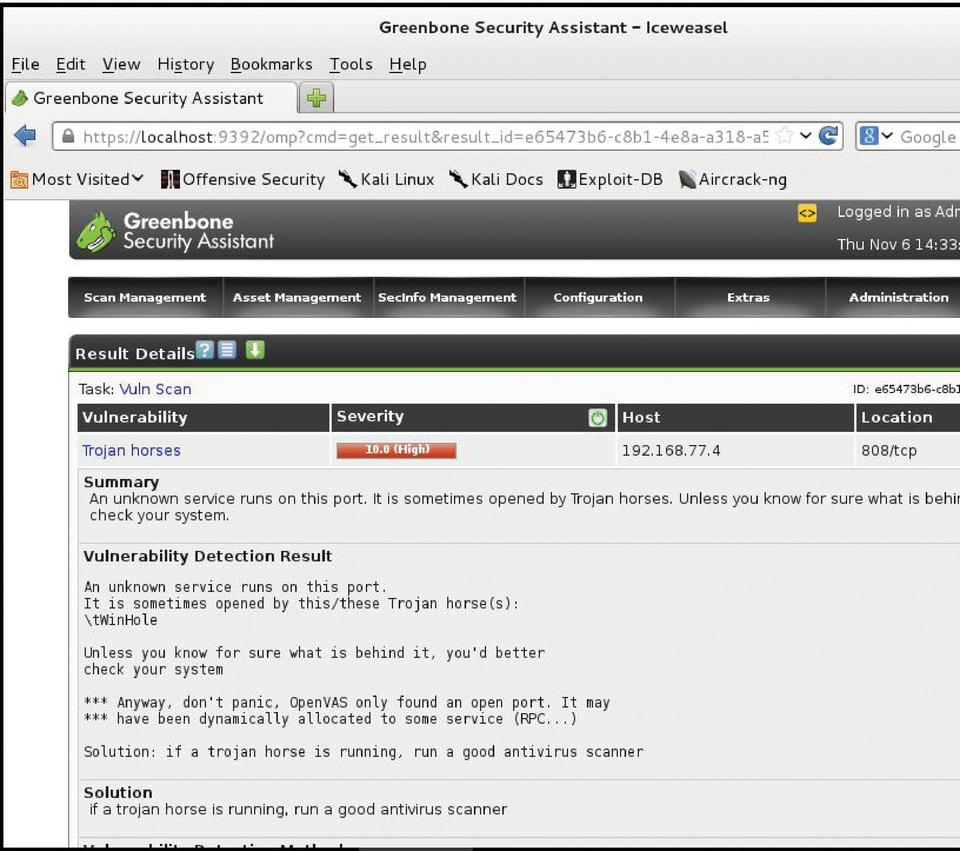
Figure 8. Description of One of the Found Vulnerabilities
OpenVAS does a nice job of exporting formatting reports in .pdf (Figure 9). As you analyze the report, make your own determinations of risk and assign a level you feel is commensurate with the vulnerability. Use labels you feel comfortable with (High, Medium, Low and so on). You know your enterprise better than anyone, so you should feel comfortable assigning risk to any found vulnerabilities on your systems. Although “risk” is an immensely broad topic, if you don't have a lot of experience assigning it, you always can use the commonly accepted risk formula to assign levels: Risk = Threat x Vulnerability x Impact.
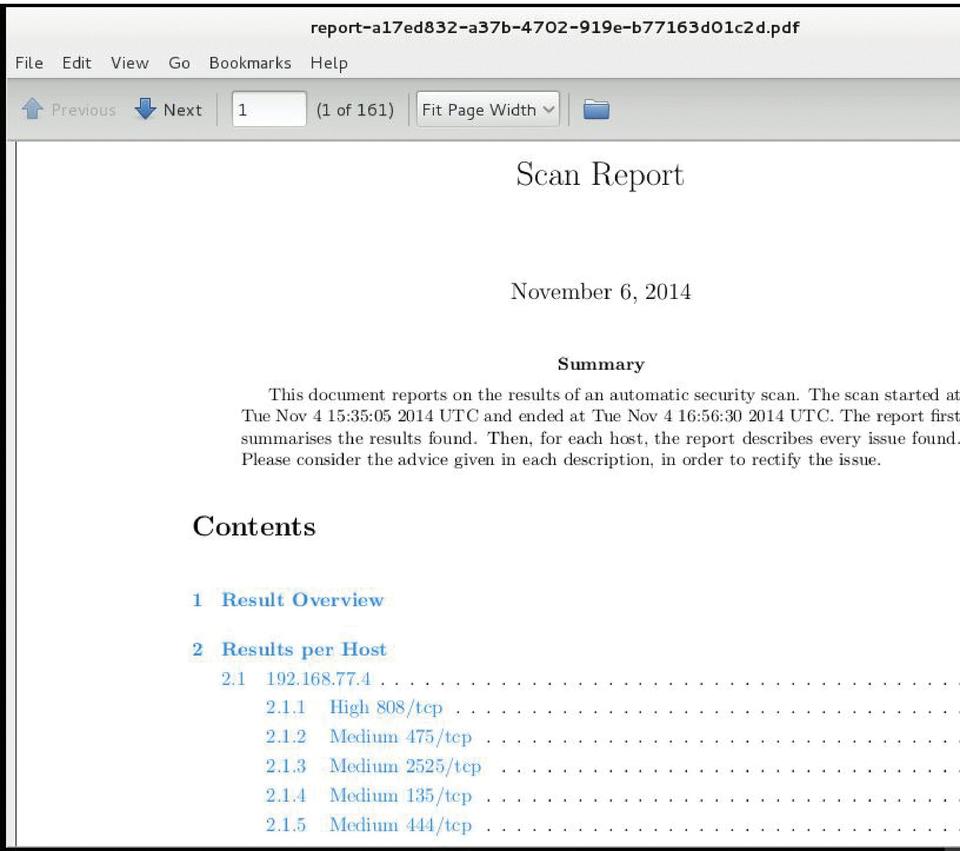
Figure 9. The OpenVAS Scan Report in PDF Format
In a nutshell, the formula breaks down to what is the threat (hackers, malicious employees and so on), times how serious is the vulnerability (high/well known, easy to execute), times the damage done in money, reputation or data loss if the event occurs. Make sure you differentiate between your defined levels of risk and the severity of a vulnerability. For example, if you discovered a medium severity vulnerability on your public-facing Web server, because it is exposed to a public network and your company's reputation would take a hit if the site is defaced, the risk is higher than if this were an internal Web server with the same vulnerability, but accessible only to employees. So you would classify the vulnerability as High to the external Web server and Medium (or low) to an internal server.
Now you've come to the all-important task of organizing the final report. If you've been documenting the review process as you went along, it should be a straightforward task. Take the data you have collected and analyzed, and organize it into a coherent, flowing document. I have provided a basic outline, but I've included links to some on-line sample reports in the Resources section that are broader and far more detailed. Any report you write should include the following sections at a minimum:
Executive summary: defines the purpose of the report and your audience. Explain the drivers behind the review.
Scope and tools used: what did you test and what were the limits of those tests? When were the tests performed and by whom? List all tools used to generate your results.
Findings: include any or all results from your test. What did your tests reveal? Present these in an organized fashion, logically classifying them so they make sense.
Concerns and remediation: your analysis of the findings. Highlight unknown results (unexpected hosts or devices found, over- or under-licensed software, serious vulnerabilities and so on), and discuss any plans of action. Are any of your defined security policies being circumvented? Are your policies and their controls effective?
Remember, your final report should be customized to meet your needs, which may require additional work/tests not included here. That said, once you understand the basic review process, you can add in those required items as you go and build your report to what you need.
