
Deploy an app from the ground up with Linux and open-source software.
Do a quick search of Indeed, Dice or your favorite job site, and you'll quickly discover the massive demand for full stack developers, with salaries on the rise for talented men and women who are equally comfortable with back-end and front-end development. Linux and free, open-source software provide all the tools you need to do your own full stack experimenting, and the project described here will give you a taste of doing it all.
In this project, you'll build a little app for keeping track of all the books you've read and want to read. Think of it as your own digital library tool not tied to Amazon or any other online book shop. You'll start by setting up a LAMP server (on a virtual machine, bare metal or a cloud-based virtual private server); tap into the public Google Books API; take advantage of GitHub; and write a little PHP, jQuery, CSS and SQL. At the end, you'll have a working app and a better understanding of the big-picture thinking of a full stack developer.
For this project, you'll use some common, readily available software that will be familiar to anyone who's tinkered with Linux. For the OS, you'll deploy Ubuntu 16.04 LTS, but feel free to use any flavor you prefer. The rest of the software you'll use is well tested on literally any flavor of Linux you can think of.
You'll install apache2, MySQL, PHP, git (so you can pull and push your project from and to GitHub) and Adminer, a handy browser-based tool for graphically managing databases. If you happen to have a domain name you want to point to your server, that will be helpful, but I won't cover domain configuration in detail. I recommend using a domain because it'll help you dig into the apache2 configuration, an important full stack developer skill.
Once the host is set up (and secured), you'll create accounts on GitHub and Google Cloud Platform. The former isn't strictly necessary if you're just cloning my jtonello/booklist repository, but again, I think a tool like GitHub will serve you well as you begin to grow your code base and start branching out. Google Cloud Platform is required so you can take advantage of Google's massive books database at the heart of this project. Real-time API calls to Google Books will return a flood of data that you can use for this and other projects.
Finally, you'll start writing the application itself, something I've called “My Library”. You can name it what you want and even open it up to multiple users. Just like any software developer, you'll focus on how to make your app work for any number of users, not just as a one-off bit of stuff for yourself. It'll have PHP at its core, and you'll use the JavaScript framework jQuery, create a user-friendly layout with CSS, decode some JSON and do some simple debugging and refactoring.
Before wrapping it all up, I'll offer a few ways you can build out your app and make it your own. You can change the layout; make a mechanism for adding users; link your tool to booksellers like Amazon, Barnes & Noble or AbeBooks.com; or follow your own path.
Of course, it all begins with the host—the server that will become the home for your app. Ironically, many developers who are quite good at software development never really got their hands on setting up a server. Maybe their company has an operations group responsible for that, or maybe they were just given credentials to some server and never had to think about it too much.
To get started setting up the server, download the Ubuntu 16.04 .iso for the architecture you have (32- or 64-bit). If you plan to build this project on a virtual machine—anything from VMware to VirtualBox to Proxmox—you'll use this .iso file to install the OS. If you're using Proxmox or other free KVM-based VM host, you can use a prebuilt Linux container, or LXC. (For more on this, check out my Tiny Internet Project; see Resources for the URLs.)
If you're turning an old PC or laptop into your server, you'll need to burn the .iso to a USB thumbdrive or DVD and boot your system. If all you have is an old 32-bit PC, no matter. It'll work great for this project too. Just make sure to download the right version of the Ubuntu .iso for your platform.
More recently, I've started experimenting with VPS hosts—virtual private servers. Unlike web hosting, VPS offer you very inexpensive full-fledged Linux hosts. You can choose the Linux flavor you like, get root access to the whole server and pay as little as $3 a month. Some good VPS hosts include DigitalOcean, Linode and VirMach.
I've included a bunch of handy links about VPS hosts and more in the Resources section at the end of this article.
If you've never installed Ubuntu (or whatever Linux distro you're using) from scratch, you'll find the process pretty painless these days. When you boot from the .iso, just follow the on-screen instructions. When you get to the screen asking which packages to install, select only ssh-server. If you're short on time, you can select the LAMP stack option too and skip ahead to the Apache configuration.
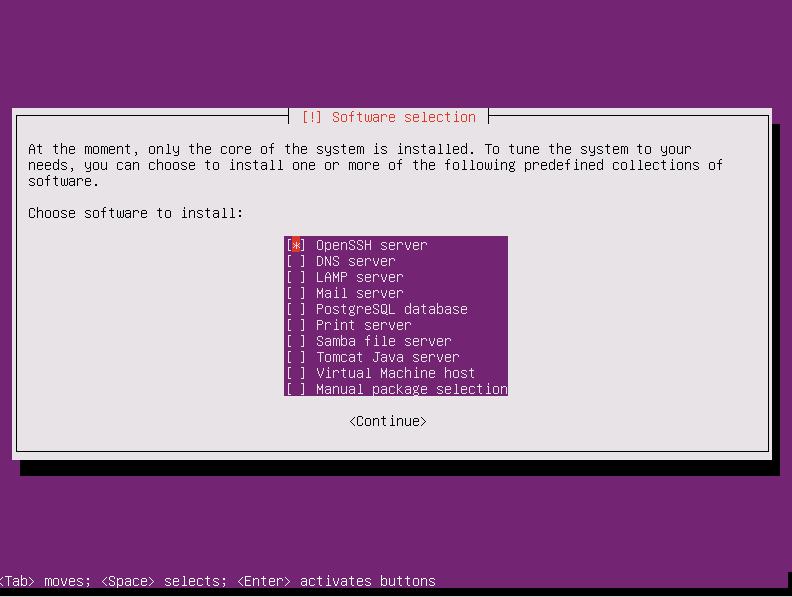
Figure 1. The Ubuntu Package Installation Screen
If you're creating your host on a VM on a computer attached to your home network, the setup probably will grab an IP address from your router's DHCP server. If not, you'll have to assign an address manually. Of course, any hosted solution will provide you with the IP address.
Once the installation is complete, log in as the user you created during setup and check your IP address:
# ifconfig
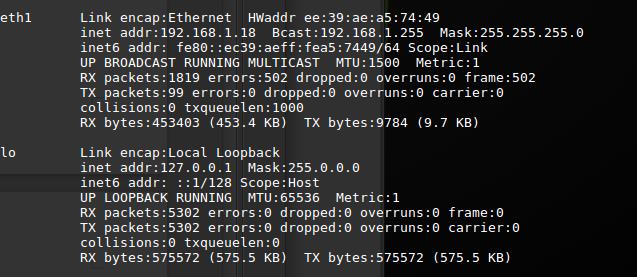
Figure 2. Running ifconfig returns your IP address and active network interface.
Note the IP address of your host and jot it down. Next, test your network connectivity with a quick ping:
# ping google.com
If you don't get results, something's wrong with your networking. Check /etc/network/interfaces and look at the Resources link on how to troubleshoot.
If you haven't already added a user account with root privileges (Ubuntu creates this user during install), go ahead and do that now:
# adduser jjohnson
Answer the on-screen questions, starting with a password. When you're back at the prompt, add your new user to the sudo and www-data groups:
# adduser jjohnson sudo www-data
Log out of the root shell and log in with your new user account. From now on, you'll prefix your commands with sudo instead of operating in the more hazardous superuser account.
Test your sudo privileges by making sure openssh-server is installed. If you selected it during install, it'll be there. If not, simply run:
$ sudo apt install openssh-server
Next, run updates:
$ sudo apt update && sudo apt upgrade -y
Now that your system is up to date, install iptables-persistent so you can set up firewall rules. iptables is a very common and robust way to manage network access to your host. If you're toying around in a lab on your home network, setting up iptables isn't strictly necessary, but anywhere else, it's important to protect your system from intrusion:
$ sudo apt install iptables-persistent
The default iptables rules are set to make your host wide open, accepting traffic from anywhere to any port on your machine. That's dangerous. You'll want to prevent access to your host from outside, so you'll create iptables INPUT rules. So, let's say you want to allow traffic on port 80 (http) from everywhere, and all traffic, regardless of port, to the host from your private network, which might be any machine with an IP address in the range of 192.168.1.1 to 192.168.1.255. You'd add rules like this:
$ sudo iptables -A INPUT -p tcp --dport 80 -j ACCEPT
And then add:
$ sudo iptables -A INPUT -p tcp -s 192.168.1.0/24 -j ACCEPT
The rules are saved in /etc/iptables/rules.v4. To apply them, you can use iptables' save command, but for now, just reboot to make these rules permanent.
Of course, these are very basic iptables examples, but enough to get you started. Adding similar rules in /etc/iptables/rules.v6 will protect your host from unwanted IPv6 traffic too. Check the Resources section at the end of this article for links to other good references.
If you selected the LAMP software package during installation, you can skip this next part. If not, manually install the apache2 web server, the MySQL database and PHP with the following commands:
$ sudo apt install apache2ctl
$ sudo apt install mysql-server
$ sudo apt-get install php libapache2-mod-php php-mcrypt
 ↪php-mysql
The last command installs PHP and gives it hooks into both Apache and MySQL so it serves up pages properly.
Apache configuration files live in /etc/apache2/. The key files are apache2.conf and /etc/apache2/sites-available/000-default.conf. Also, look in /etc/apache2/sites-enabled and see how the 000-default.conf file there is just a link to the file in sites-available:
$ ls -la /etc/apache2/sites-enabled
Open and look at each of these files, which contain default settings for a single default website (see Resources for more details).
Before going on to the next step, you should test to make sure that you have network access to your host machine, that your web server is running, that you can shell in from another machine and that PHP is working properly.
First, test the web server. When you installed apache2, it set up a default website and enabled it for you. If your host is 192.168.1.18, you can point your browser to http://192.168.1.18, and you should see the default “It works!” page.
Next, shell in to your host. If you're coming from another Linux machine or a Mac, use the built-in terminal application. If you're on Windows, download PuTTY and use that to shell in (see Resources for more on PuTTY):
$ ssh 192.169.1.18
To test PHP, shell in to your new web server and create a small info.php file in /var/www/html that contains the simple phpinfo function.
Use vi or nano, built-in Linux text editors, to create and edit the file:
$ sudo vi /var/www/html/info.php

<?php

    phpinfo();

?>
Save and exit, and point your browser to http://your-host/info.php. You should see the welcoming purple PHP configuration page. The fact that it shows up is all you need to know that PHP is installed and ready to go. Best to delete the info.php file before proceeding.
Now you're ready to install Adminer, a handy browser-based tool for managing databases and tables, and git, the document repository you'll use to pull down the My Library app itself:
$ sudo apt install adminer
$ sudo apt install git
The package that installs Adminer places it in /usr/share/adminer, so you have to do a couple things to make it available from your web server. First set up the configuration file:
$ sudo echo "Alias /adminer.php /usr/share/adminer/adminer.php"
 ↪| sudo tee /etc/apache2/conf-available/adminer.conf
This copies the Adminer configuration to your Apache configuration directory. Enable it with:
$ sudo a2enconf adminer.conf
Create a symbolic link from the adminer directory to your website:
$ sudo ln -s /usr/share/adminer/adminer/ /var/www/html/adminer
If all goes well, you can point your browser to http://your-host/adminer and log in with the user name root and the password you created when you installed mysql-server above.
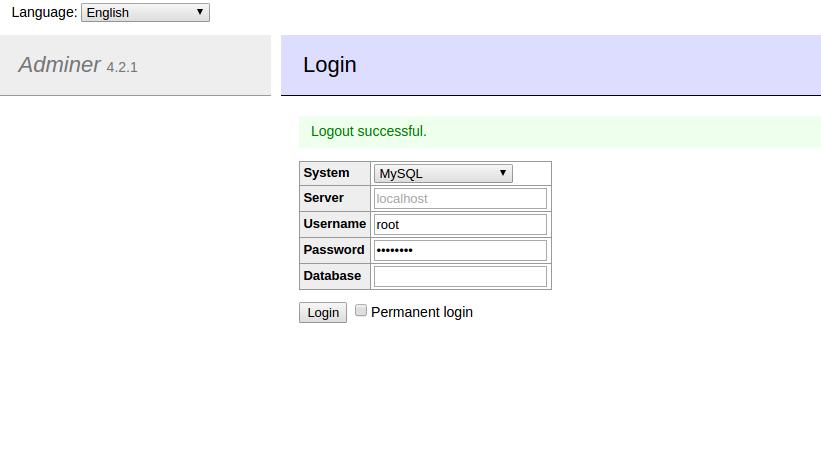
Figure 3. Use the credentials you created during the mysql-server installation to log in to Adminer.
At the heart of the My Library app you're about to deploy is Google's booklist database, and in order to use it, you need a Google Cloud Platform account. If you have a Gmail account, adding a cloud account is free and simple. Just go to https://console.cloud.google.com and set yourself up.
You'll notice that this account gives you a lot more than just access to Google APIs, including Google's cloud solution, Compute Engine. For now though, you just want to enable and manage the book API. On the main dashboard page, look for the link under “Use Google APIs”.
Click “Library” in the left-hand column or the “Enable API” link at the top of the page to see the full list of available APIs. Search for “book”, and click the “Google Books API” link. At the top of the page, click the “Enable” button.
The API is almost ready to use, but first you need to create credentials. Click the “Create credentials” button and answer the questions. You'll be calling the API from a “Web server” and using “Public data”.
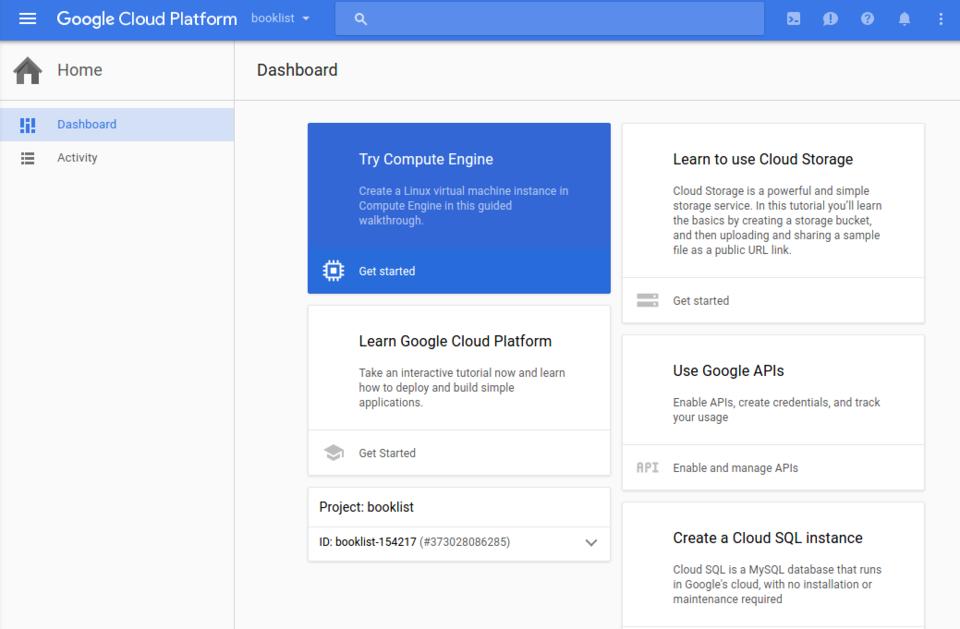
Figure 4. The Google Cloud Platform API Dashboard
When you click “What credentials do I need”, you'll be taken to a screen and shown your new API key. Copy that down; you'll need it later in your app. Check the Quotas tab to look at your daily limits for this API. The free version gives you 1,000 queries a day. That should be plenty, but if you accidentally build a loop function that makes dozens of calls to the API each second, you'll use up your day's worth in a hurry.
With these pieces in place, I recommend you create a GitHub account, although an account isn't required for this project, only git is. As public repositories go, it's a good one, and it will get you in the habit of thinking about the code you create in versions that can be branched and shared. Keep in mind though that the default for GitHub is public. Your projects will be freely available—and seen—by anyone. If you want your code to be private, you have to pay for that.
So far, you've set up a host, installed the core applications you need to serve up your web app and prepared a public API source for use. It's now time to deploy the code.
Start by setting up the MySQL database and the three tables you'll need to run the application. You can do this from the command line by ssh-ing in to your host and logging in to MySQL using the credentials you created:
$ mysql -u root -p
If you've never done this before though, it can be a little taxing to manage the database and tables from the command line. Instead, use your MySQL credentials to log in to the Adminer tool (http://your-host/adminer).
On Adminer's main dashboard, select “Create new database”, give it the name “booklist”, and set collation to “utf8_general_ci”. Of course, you can call the database whatever you want, but I'll be referencing “booklist” in the PHP code.
Create a new user for the booklist database by clicking the “Privileges” link in the “Server” view. Set “Server” to “localhost” and “Username” to “webuser”. Add a password. I like to give a user like this just the privileges it needs, so under the 'booklist '.* column, check the “Select, Update and Insert” boxes under Table and Column, and “Delete” under Table. Click save.
With the database created, you need to create three tables: one to hold information about each book; one to hold information about your library, and one for users.
The books table will hold the core information about each book, and the library table will hold each user's information about that book—namely, whether it's been read or wishlisted.
The books table has the following fields, types and sizes, with the ISBN used as the unique ID field and primary key:
isbn	varchar(40)
title	varchar(120)
author	varchar(120)
selfLink	varchar(255)
publishddate	year(4)
saveddate	timestamp[CURRENT_TIMESTAMP]
thumbnail	varchar(255)
description	mediumtext
Most of these fields are self-explanatory, but it's worth describing selfLink and thumbnail. The Google API offers up these fields and it's nice to save them locally. selfLink is a URL that points to the book in the Google database, which displays details, bibliographic information and more. The thumbnail field is a URL that points to the image the Google API has associated with the book. The thumbnail URLs will give you a good way to dress up your library app and make it more user-friendly.
Next, create the “library” table and its five fields:
isbn    varchar(40)
user_id varchar(50)
readit  tinyint(1)
wishlist    tinyint(1)
saveddate   timestamp[CURRENT_TIMESTAMP]
The user_id field is large enough to store an email address, which will be each user's unique ID. The primary key though, will be a composite of isbn and user_id. That's so different users can tag the same book. To create the composite key, click “SQL command” in the “Table: library” view and execute the following SQL:
ALTER TABLE library DROP PRIMARY KEY, ADD PRIMARY
 ↪KEY(isbn,user_id);
The readit and wishlist fields will contain either a 1 or 0, integers set when users add books to their libraries.
Finally, create the users table, which sets the user_id field as the primary key:
user_id	varchar(50)
first_name    varchar(30)
last_name     varchar(30)
After you've created the users table, click the “New item” link to create your first entry. Use your own email and name. Set the password type to “password” so you can use the MySQL PASSWORD() function to parse it later in your PHP. I don't fully implement a password look-up function in this app, but you can add that on your own to allow users to log in securely.
With the database and tables set, you can start using them to store data. In order to do that, you'll need to make some calls to the Google API and store the results in the database.
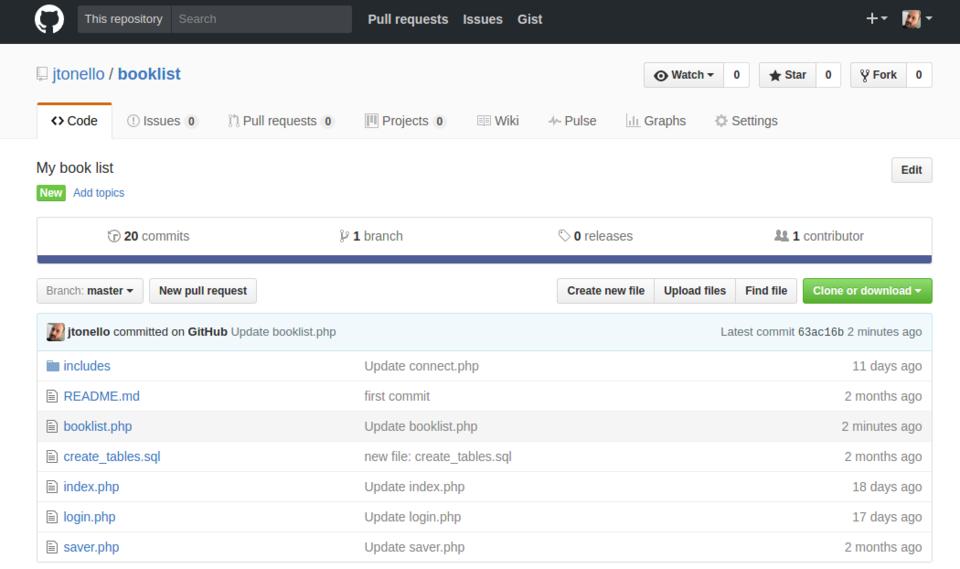
Figure 5. The Complete File List, Available in GitHub Repository jtonello/booklist.
Move to the root of your Web server (cd /var/www/html), and use git to clone my booklist repository:
$ sudo git clone https://github.com/jtonello/booklist
This should create a folder with all the files in /var/www/html/booklist. If not, move the contents to that path and then change the ownership to www-data and give it permissions so you can edit it:
$ sudo chown www-data:www-data /var/www/html/booklist -R
$ sudo chmod 775 /var/www/html/booklist -R
By changing the permissions to 775, you'll be able to edit the files as you, not as sudo, since you added yourself to the www-data group earlier.
Take some time and look over the files, either on the GitHub page or in your newly created directory. Each page includes documentation that I won't repeat here, but here's some of the logic behind it all:
/includes — contains a common connection script (connect.php) and a functions.php file that holds function code used on other pages. Edit connect.php to add your MySQL credentials.
booklist.php — this is the API page, which features the book search that connects to the Google book database. Edit this to add the Google API key you set up earlier.
delete.php — this page executes queries to delete database entries.
index.php — the main page, which features tabs for Search, Read and Wishlist.
login.php — the login form page.
saver.php — this page executes queries to save data to the MySQL database.
create_tables.sql — SQL that can be used to create the MySQL database tables.
When users go to http://yourhost.com/booklist, they're greeted by a login screen. When the form is submitted, the app checks the value of the user name field against a static value saved in /var/www/html/booklist/login.php. Later, you might attempt to make this database-driven so more people can use it. This will get you started though.

Figure 6. The initial login screen determines the user.
Successful login takes the user to the main My Library view, which includes three tabs generated by jQuery UI: Search, Read and Wishlist. The Search page features the author and title search, and the search results. The Read and Wishlist pages show previously saved books. Search results appear on the Search tab through an AJAX function; clicking the buttons in each book block will save the result in the MySQL database and simultaneously change its color.
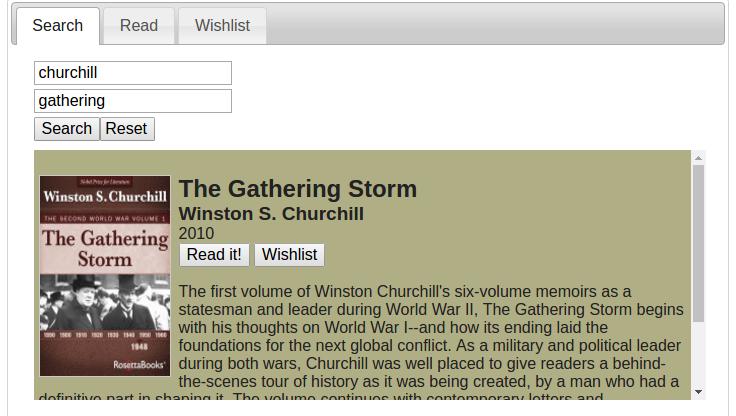
Figure 7. A simple search returns books from the Google database via the Google API.
Once saved, these books now appear under the appropriate tabs: Read or Wishlist.
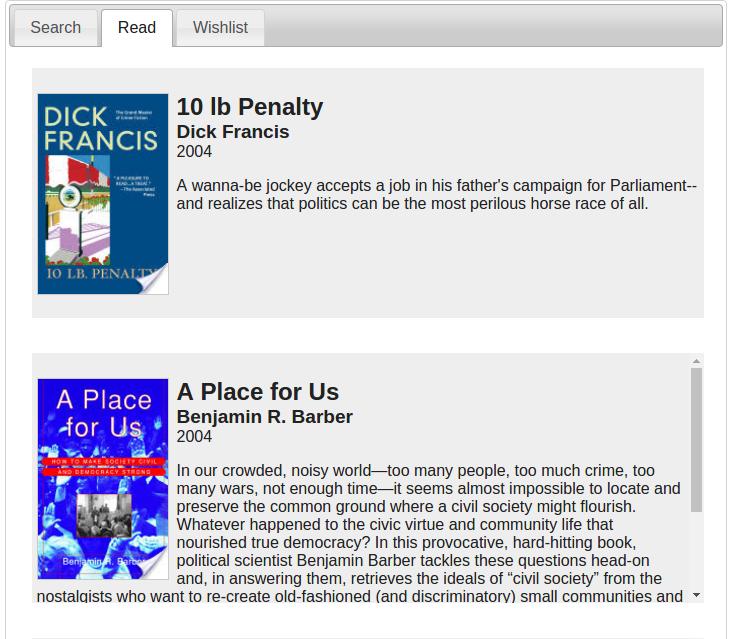
Figure 8. Previously saved items appear in the Read tab.
Each time a user clicks the Read and Wishlist buttons, behind the scenes, two database queries are executed. One saves the book's ISBN, title, author, description and other information to the MySQL table called books, and one saves the ISBN, the user's ID, the Read or Wishlist flag, and the date to the table called library.
The information stored in the books table could be limited to just the ISBN, which could then be used to pull the title and other information from the Google database, but doing it that way is slow and makes for an awkward user experience. By saving key elements from the Google database locally, you can see the key information for each book in fast-loading tabs.
The database tables are normalized, meaning the only overlapping data they contain is the shared ISBN key. Queries that show Read or Wishlist books perform a join to link the data in the separate tables together. That also means that no matter how many users you have, you'll only ever need to store a single copy of a book's details. You also can have unlimited saved information for each user.
You now have a working application, created from the ground up. You've installed a Linux distro from scratch, configured the firewall and packages, and finally deployed the application. By building everything, you've hopefully gotten a taste of how a full stack developer thinks—and works.
Of course, the My Library application is far from perfect and there's plenty of opportunity for you to make it better. For example, you might create a better login function that makes the tool usable to any number of users. You also could change the page layouts by tweaking the CSS, or you could improve how the contents of the Read and Wishlist tabs load behind the scenes. Maybe you'll try to branch the app and make a different version available in your own GitHub repository. The point is, don't be afraid to experiment and make it your own.
