I'm a big fan of DIY projects and think that there is a lot of value in doing something yourself instead of relying on some third party. I mow my own lawn, change my own oil and do most of my own home repairs, and because of my background in system administration, you'll find all sorts of DIY servers at my house too. In the old days, geeks like me would have stacks of loud power-hungry desktop computers around and use them to learn about Linux and networking, but these days, VMs and cloud services have taken their place for most people. I still like running my own servers though, and thanks to the advent of these tiny, cheap computers like the Raspberry Pi series, I've been able to replace all of my home services with a lot of different small, cheap, low-power computers.
Occasionally, I'll hear people talk about how they have a Raspberry Pi or some other small computer lying around, but they haven't figured out quite what to do with it yet. And it always shocks me, because I have a house full of those small computers doing all sorts of things, so in this article, I describe my personal "Piventory"—an inventory of all of the little low-power computers that stay running around my house. So if you're struggling to figure out what to do with your own Raspberry Pi, maybe this article will give you some inspiration.
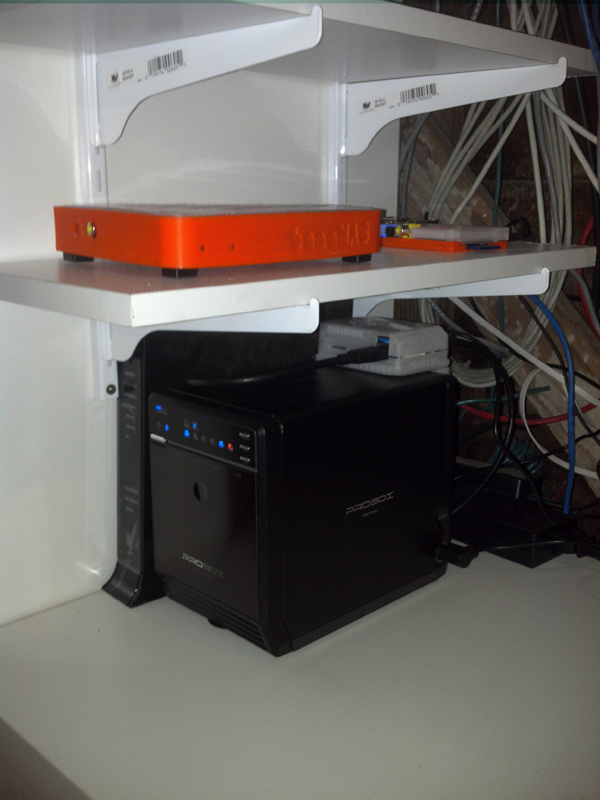
In "Papa's Got a Brand New NAS" I wrote about my search for a replacement for my rackmount server that acted as a Network-Attached Storage (NAS) for my house, along with a bunch of other services. Ultimately, I found that I could replace the whole thing with an ODroid XU4. Because of its octo-core ARM CPU, gigabit networking and high-speed USB3 port, I was able to move my hard drives over to a Mediasonic Probox USB3 disk array and set up a new low-power NAS that paid for itself in electricity costs.
In addition to a NAS, this server provides a number of backup services for my main server that sits in a data center. It acts as a backup mail server, authoritative DNS, and it also provides a VPN so I can connect to my home network from anywhere in the world—not bad for a little $75 ARM board.

Figure 1. Papa's New NAS
Although my primary NAS runs fine, the four drive bays in my Mediasonic Probox limited my storage expansion options. I also didn't like the idea of the Odroid XU4 failing somehow and having my NAS be offline for days. So, I decided to set up a backup NAS with a duplicate USB3 disk array, with the idea that if either computer failed, I could move its disk array to the remaining machine. Although I liked the Odroid XU4, I had heard good things about the Espressobin board—in particular that it was able to get more performance out of its gigabit ports compared to other low-power computers. I ordered one, and although it was a bit more complicated to set up with its Armbian distribution compared to the Odroid XU4, when it did come on the network, I noticed a significant improvement in its file transfer speeds.
The Espressobin isn't a perfect solution though. Unfortunately, so far I've noticed some stability issues with the Espressobin hardware—sometimes it just drops off the network, is unresponsive and requires a full power-cycle to bring it back online. I'm hoping that future firmware updates will help with the stability issues. If not, I may have to fall back to a second Odroid XU4.
In "Papa's Got a Brand New NAS", I also talked about my process of evaluating different boards to replace my old 1U home server. Before I decided on the ODroid XU4, I also considered the Banana Pi. It has a similar set of specifications and price as a Raspberry Pi of the same era with two important differences: onboard gigabit networking and a SATA2 port. When I decided to go with the ODroid XU4 for my NAS, I ended up with two Banana Pis sitting around with nothing to do. I decided to put them to work, and the first one became my new BackupPC server.
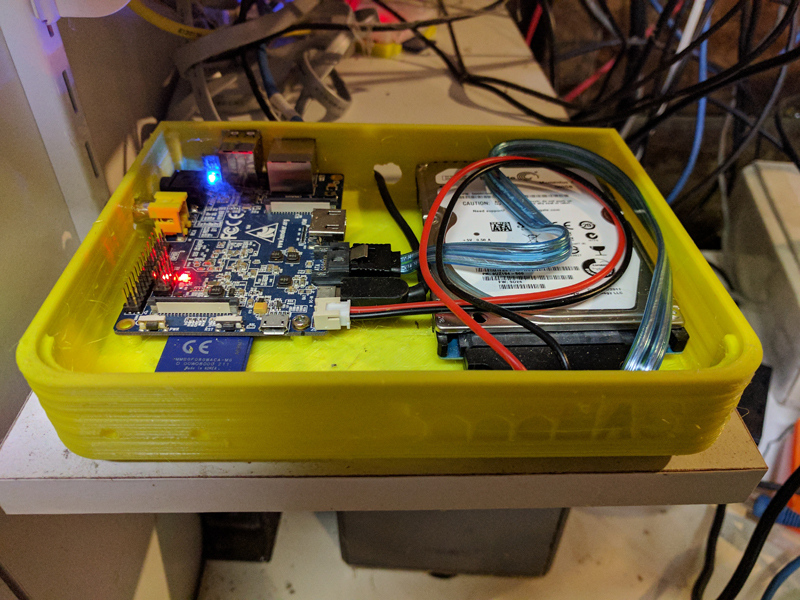
In "Banana Backups", I elaborate on how I added a spare laptop hard drive to the Banana Pi's SATA2 port, used my 3D printer to print out a nice case for it, and then set up BackupPC, so I now have a completely standalone backup server that's keeping a separate copy of important files and settings in case I need to do a bare-metal restore of a different server.

Figure 2. Banana Backup Server
My BackupPC server accounts for one Banana Pi, but what about the other one? I didn't want it to go to waste, and around the time I was doing my primary NAS migration, I realized that the specific image gallery software I was using was no longer being maintained. What's worse, I couldn't even get the software to run on a modern distribution. When faced with this problem, some people would resort to a container, others a VM, and others probably would tell me to use a cloud service. What did I do? I installed an older but compatible Linux distribution on my spare Banana Pi so I could keep the same image gallery. Yes, from a security standpoint, this isn't ideal, but the server is pretty isolated, and I use strict access control to try to work around that risk.
Along with my computer-related DIY projects, I also brew my own beer. I wanted to have better temperature control of my fermenting beer, but instead of buying one of those limited analog temperature controllers, I decided to build my own. In "Temper Pi", I describe the final iteration of that project when I migrate my temperature controller from a laptop to an original Raspberry Pi B. This system stays on all the time and uses a USB temperature probe and a series of X10 appliances to make sure that my fermentation fridge is the right temperature. If it's too hot, it turns the fridge on. If it's too cold, it turns the fridge off and turns on a small heating pad at the bottom of the fridge.
I use my NAS to store music, videos, photos and other media. To play that media back requires—you guessed it—another Raspberry Pi. In this case, I use a Raspberry Pi 2 B running the OSMC distribution that provides a nice integrated Kodi system on top of Raspbian. The media center computer is connected to an HDMI port on my TV and uses its gigabit port to access media from my central NAS. I just use a standard media center IR remote to control everything from the comfort of my couch.
All of my DIY projects don't leave that much time for gaming, but it's just as well, because I don't game much anyway, and the gaming I do tends to be retro gaming. In "Super Pi Brothers", I talked about the RetroPie Linux distribution—a distribution that provides a joystick-friendly interface to a bunch of different retro-gaming emulators. In my own home, I repurposed a Raspberry Pi B that used to be my original media center and 3D printed a NES-style case for it. I connected it to another HDMI port on my TV, bought a couple USB SNES joysticks for it, and whenever I do get that retro-gaming itch, I just switch TV inputs and go.
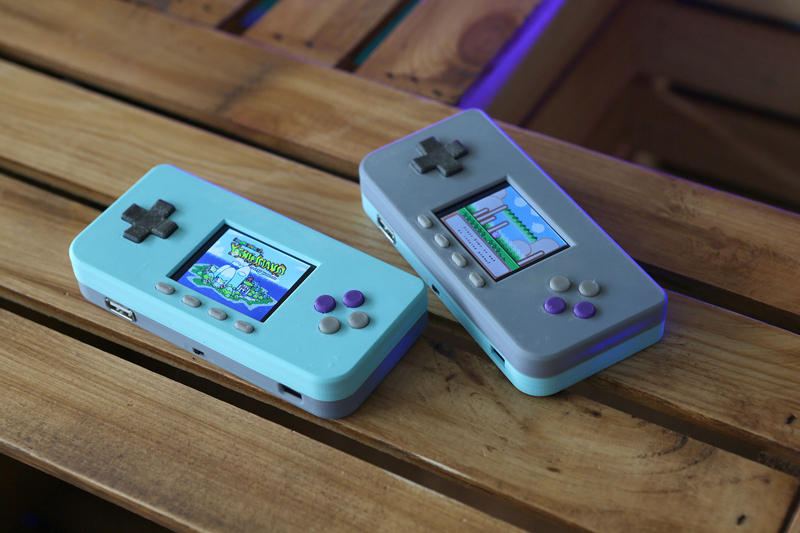
In addition to retro gaming at home, I like being able to bring my retro games with me when I travel. It's true that you can buy a lot of ready-made systems for this, but I decided to build my own. I used Adafruit's "PiGrrl Zero" kit that combines a Raspberry Pi Zero along with a lot of electronics components, a battery and a small screen. You provide the 3D-printed case. At the end, you have a tiny RetroPie computer that fits in your pocket.

Figure 3. PiGrrl Zero
Another DIY hobby of mine involves 3D printing. I love the ability to make my own custom plastic objects at home, and I've made everything from toys for my son, replacement dishwasher parts, and even all of the cases for these various single-board computers lying around my house. I wrote a four-part series on 3D printing in Linux Journal called "What's New in 3D Printing", and in part four, I talk about the custom 3D printer control software called Octoprint. Octoprint includes a specific image just for Raspberry Pis, so I have another Raspberry Pi 2 B connected to my Printrbot Plus. The Octoprint server is connected to my 3D printer and also has a Raspberry Pi webcam aimed at the print bed. This means I can talk to the Octoprint Server over the network, send it print jobs and watch the results anywhere in my house (or if I connect to my VPN, anywhere with a network connection).
The newest edition to my DIY server family is a new media center and "offsite" file backup server that sits in my RV running on a new Raspberry Pi 3 B+. (That server is the subject of a DIY Deep Dive article in this issue, so I won't elaborate on it much here.) In summary, it is mounted to the back of a 12V RV TV, runs OSMC and is connected to a large external hard drive. My home NAS keeps it synced up with a copy of all of my important personal and media files while it's in the driveway, so I not only have an extra off-site backup, I also have a copy of my favorite media for when I'm on the road.
Wow, I don't think I realized just how many single-board computers I have around the house until I wrote up this inventory. It's a good thing these are low-power computers, or my electricity bill would be crazy! If any of you have a single-board computer sitting around but you aren't sure what to do with it, I hope this article inspires you to put it to work.