If you enjoy retro gaming, there are so many options, it can be tough to know what to get. The choices range from officially sanctioned systems from Nintendo all the way to homemade RetroPie projects like I've covered in Linux Journal in the past. Of course, those systems are designed to be permanently attached to a TV.
But, what if you want to play retro games on the road? Although it's true that you could just connect a gamepad to a laptop and use an emulator, there's something to be said for a console that fits in your pocket like the original Nintendo Game Boy. In this article, I describe two different portable DIY retro gaming projects I've built and compare and contrast their features.
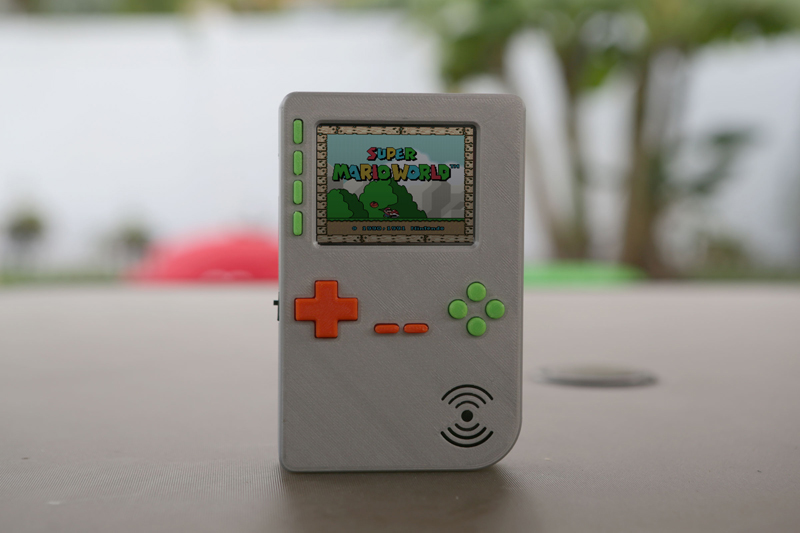
The RetroPie project spawned an incredible number of DIY retro consoles due to how easy and cheap the project made it to build a console out of the widely available and popular Raspberry Pi. Although most of the projects were aimed at home consoles, Adafruit took things a step further and created the PiGRRL project series that combines Raspberry Pis with LCD screens, buttons, batteries and other electronics into a portable RetroPie system that has a similar form factor to the original Game Boy. You buy the kit, print the case and buttons yourself with a 3D printer, and after some soldering, you have a portable console.
The original PiGRRL was based off the Raspberry Pi and was similar in size and shape to the original Game Boy. In the original kit, you also took apart an SNES gamepad, cut the electronics and used it for gamepad electronics. Although you got the benefit of a real SNES gamepad's button feedback, due to that Game Boy form factor, there were no L and R shoulder buttons, and only A and B buttons on the front, so it was aimed at NES and Game Boy games.
The PiGRRL 2 took the original PiGRRL and offered a number of upgrades. First, it was based on the faster Raspberry Pi 2, which could emulate newer systems like the SNES. It also incorporated its own custom gamepad electronics, so you could get A, B, X and Y buttons in the front, plus L and R buttons in the back, while still maintaining the similar Game Boy form factor.

Figure 1. PiGRRL 2
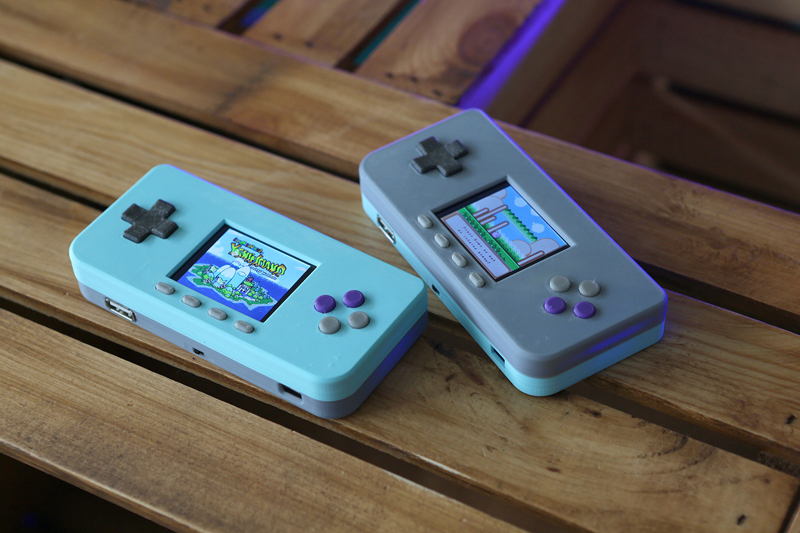
The issue with the PiGRRL series up to this point for me was form factor and price. The Raspberry Pi B series was large, and most of its components weren't needed for the console and just took up space. Also, the $60 kit did not include the $30–$40 Raspberry Pi itself, so all told, the project ended up running closer to $100. Then the Raspberry Pi Zero came out—a much smaller and much cheaper no-frills Raspberry Pi that still had enough horsepower to emulate games. Shortly after the Raspberry Pi Zero release, Adafruit launched the next revision of its PiGRRL series called the PiGRRL Zero.

Figure 2. PiGRRL Zero
The PiGRRL Zero, to me, was the perfect compromise. First, the kit itself was cheaper at $55, and it included the Raspberry Pi Zero. Second, the form factor was smaller than the regular PiGRRL series—closer to the size of a large gamepad—and due to the smaller form factor, the shoulder buttons could be placed more conveniently at the top of the case.
After I ordered the kit, I fired up my 3D printer and printed out the case and buttons while I waited for everything to arrive. Overall, the case and buttons aren't difficult to print, and they fit together well if your printer is well calibrated. Note: if you want nice rubbery buttons, you'll need a 3D printer that can handle flexible filament like Ninjaflex.
On the project page, Adafruit advises that this is a somewhat advanced electronics project, and I'm inclined to agree. Part of the point of the project is to learn about electronics, and you certainly do. A lot of soldering is involved, with quite a few small headers to solder on in particular. This means you shouldn't plan on removing the Raspberry Pi Zero from the project and re-using it later unless you are willing to desolder quite a bit.
I had a friend with more experience and better equipment come over to make sure I didn't end up with a $55 brick, and although it took most of an afternoon that ran late into the evening, in the end I had a working portable game console. The console itself seemed to perform well, and the Pi Zero can play most SNES games without serious lag. The major issue I had was due to the regular button switches that came with the project. Although Adafruit offers soft-touch buttons switches as well (and I ordered them), they don't actually line up properly with the gamepad board that comes with the project, so you are forced to bend the feet on each soft-touch button, and the overall fit of everything suffers as a result. After trying to set up one, we just fell back to the normal buttons that were provided. Although I like clicky keyboards, clicky buttons aren't that great. For some games, you might not notice much, but for fighting games or precision side-scrollers, you definitely do. You also need to make sure to clean up the case around the shoulder buttons, as they have a tendency to want to stick.
The end result after all of the work involved is that although I found myself playing the console quite a bit when I took it on a vacation, after the vacation, it mostly stayed in a drawer. The relatively long boot time meant I wasn't as apt to power it on for a quick game, and the poor button switches meant that when I did decide to use it, I found myself skipping a lot of my favorite games just because I knew they would be frustrating to play.
At first the friend who came over to help me with my PiGRRL Zero was going to order and assemble his own—I even offered to print out a case for him when he did. After he helped with mine though, I could see that his enthusiasm dropped a bit. Months later, I got a message from him with a picture of an NES game playing on this Game Boy-like device with a clear case. It was a new kit he just bought called an ODROID-GO. Since I already had spent time and money on an alternative (even though I didn't use it much), I wasn't exactly ready to solder together yet another kit, but when I looked into it, I changed my mind.
I'm not completely unfamiliar with Hardkernel's ODROID product line. In fact, I use the ODROID-XU4 board for the home NAS server I mentioned in my "Papa's Got a Brand New NAS" article. In addition to the XU4, Hardkernel has released quite a few other boards, and as part of its 10th anniversary, the company decided to create a console kit called ODROID-GO that I found compelling for a few reasons.

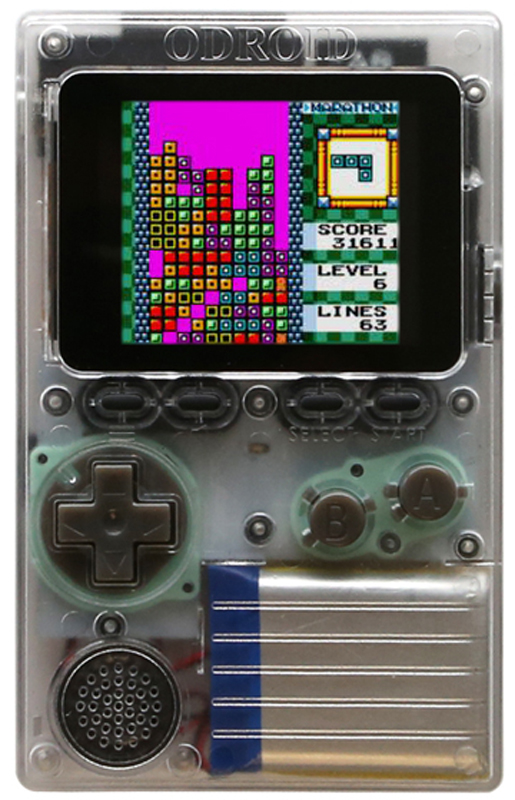
Figure 3. ODROID-GO
The first thing I found compelling was the cost. The entire kit costs $32, and it has everything you need, including a case. The second thing was the fact that it seemed to have good gamepad buttons like you'd see in a regular gamepad controller instead of those odd clicky switches. The next thing was that because this kit is purpose-built to be a game console, the case is a nice quality hard plastic and thin enough to fit in your pocket comfortably. Finally, when I read through the instructions, it looked like although assembly was required, soldering wasn't. In many ways, the ODROID-GO seems to be competing against the Pocket C.H.I.P. project, and it has guides online for how to use it to write your own games and build your own Arduino projects where you can take advantage of the hardware, like its included WiFi module that otherwise you wouldn't use.
I figured for $32, why not? Although it's true that the ODROID-GO comes to you as a kit and needs assembly, the assembly is very simple and just requires that you do things like place the screen on the board and plug it in, place that in the case, put the buttons in place, and plug in the battery and speaker. The whole thing took me about 10–15 minutes.
The ODROID-GO uses a custom RetroPie build that boots fast and has a couple additional useful features. The nicest is how well the ODROID-GO integrates save states into the console. Whenever you press the menu button to exit a game back to the main menu, it automatically saves the game state. You then can press the B button to return to the game immediately. When you turn off the console, it still remembers this state, so if you are playing a long game, it's easy to play for a bit, exit to the menu and turn the console off. Then when you are ready to play a bit more, you can turn it back on and press B to pick up where you left off.
Overall, the case is solid, battery life is good, and the gamepad buttons are pretty close to an original Game Boy. Of course, there is one big downside to the ODROID-GO compared to the PiGRRL Zero, and that's the much more sluggish processor. The ODROID-GO can emulate only older consoles, such as the NES, Game Boy, Game Boy Color, Game Boy Advance and Sega Master System. The PiGRRL Zero added SNES, Genesis and even MAME to that list among others, and overall it acted more like a standard RetroPie build.
The other downside to the ODROID-GO has to do with loading ROMs. Like with other console projects, this project uses a microSD card that contains a directory for each console it can emulate. You copy ROMs over to the appropriate directory, and then RetroPie can pick them up. Unfortunately, the board is somewhat picky about the microSD cards you use for it. I had to try a few different cards I had lying around until I found one that it worked well with. Second, I noticed that if you had a large number of files in a particular directory (measured in the hundreds), that it would fail to load (or in reality, it was probably just very slow to read), so if you are used to loading thousands of ROMs for a particular emulator, you will need to prune down your collection for this device.
So, which portable console should you choose? So far, I've found myself using the ODROID-GO far more than I ever used the PiGRRL Zero, due to the better gamepad, more comfortable and smaller case, and most important, how quickly it boots and resumes a save state. Even though it can play only older consoles compared to the PiGRRL Zero, of the two, I likely will take the ODROID-GO with me when I travel.