
I'm a professional photographer based out of Miami, Florida. I learned photography on my own, starting at age 12, with a Yashica TL Electro 35mm film SLR. In college, I discovered I also had quite an affinity for computers and programming, so I got my degrees in that field. I landed an IT job in county government, and photography took a back seat in my life until two things happened: I became a father, and the digital revolution came to the world of photography.
I dove into digital photography as it made practicing my art economical in the extreme. Having a child meant plenty of opportunities to take photos. All of my photographer friends suddenly needed someone who could understand both computers and photography, and I was conveniently placed to help them.
I turned pro in 2008, when a local ballet troupe asked me to photograph their performance of The Nutcracker. Other performances followed, and my skills were further honed. I later was asked by the late Pedro Pablo Peña to photograph his International Ballet Festival, which I did for two years.
Fast-forward to 2014 when I started a photography club at my day job and offered free photography lessons, once a month, to any fellow employees willing to listen.
In 2017, at the behest of my club members, I was asked to assemble a low-cost photography laptop configuration, as many of my students wanted to expand their photographic skills in the post-processing side of digital photography. I completed my task, assembling a reasonable portable digital darkroom for less than $700 USD that included all necessary photo-editing software with no recurring monthly fees, an upgraded hard drive and a colorimeter.
The laptop turned out so well, I decided to take the plunge myself and converted my Windows 10 workstation (custom-built by me) to a dedicated FOSS photography workstation.
Everyone knows that if you want to get into digital photography, you're going to have to invest in Adobe products. At least, that's what the marketing department at Adobe wants you to think. I'll be honest and say that I cut my teeth on post-processing with Adobe products. For a long time, Adobe products were coveted by many but were very, very expensive, so piracy was rampant. In an effort to curb the software pirates, Adobe re-bundled its product line as the Adobe Creative Cloud, a pseudo-SAAS (Software As A Service) offering with monthly/annual subscriptions. I use the prefix "pseudo", because Creative Cloud has you install your products locally on your machine and radios the mothership to see if you are paid up this month. Upgrading no longer involved paying for new versions, and the latest updates continuously were rolled out to subscribers. Many hailed this as a revolution, bringing professional-grade software to the masses for a low, monthly rate. Others called it extortion.
As one grows older, one (hopefully) grows wiser. I came to realize that the monthly prices of Creative Cloud and many other things were beginning to pile up, and that if I wanted to have some kind of savings going on, I needed to cut costs where I could. I'd been following various open-source photography projects for a number of years, and the aforementioned laptop project gave me the excuse to dive in and really see if I could make this work.
Let me break this down into three parts:
First, a word about workflows: a workflow is a set of procedures one uses to accomplish a task, such as making a peanut butter sandwich, processing a photograph or putting a Tesla in orbit. How you do it is a very personal thing, and how I do it may not suit your needs. That said, your mileage may vary.
One other note: I shoot raw. For the uninitiated, raw is the native format of the camera. Any digital camera that spits out a JPG file is handing you the digital equivalent of a Polaroid. The camera does all of the processing and conversion. Some cameras are very, very good at that. By setting your camera to record in raw, you record the equivalent of a digital negative, and any JPGs (or PNGs, TIFFs or pretty much any other format you can think of) always will be first generation and of the highest quality. Plus, you get complete control over the conversion process.
As far as cameras are concerned, I have used pretty much every brand out there. Canon, Nikon, Sony, Fuji, Olympus, Pentax, Hassleblad and even an old Mamiya 645AF. I currently use an Olympus OM-D E-M1 Mk II for my studio work and a Fuji X-Pro2 for my street/everyday carry. Both cameras and lenses are fully supported by the software I use.
I use two systems for my photography: a desktop workstation and a portable laptop. The specifications of those two systems are vastly different. The workstation currently sports an AMD Threadripper 1900X processor with eight cores/16 threads, 32GB RAM, AMD Radeon RX580, 512GB NVMe PCI SSD boot drive, 4TB home drive and a 9TB locally attached RAID-5 Array. Hopefully next year, I can upgrade to Threadripper 2.
Why so beefy?
The software I mostly work with, Rawtherapee, is heavily multithreaded. The more threads, the merrier. The difference is noticeable, especially if you are batch-processing a large number of images. From some un-scientific testing that I personally did, I found that raw conversion performance scales almost linearly with core/thread count (at least with Rawtherapee). My 2C/4T laptop is about 1/4 the speed of my 8C/16T workstation. I don't know what kind of a performance boost to expect from the Threadripper 2, but I am eager to try it out.
On top of all that horsepower sits an AMD Radeon RX580 card for GPU rendering goodness (in Darktable and Open Broadcast Studio once the new AMDGPUPro drivers are available), a Datacolor Spyder5 colorimeter, a USB 3.0 card reader and a Wacom Intuos4 medium-sized drawing tablet. A Dell U3417W UHD Ultrawide monitor crowns this system. I used to have dual 24-inch monitors, but it was a hassle to keep them calibrated. The ultrawide (21:9) aspect ratio gives me plenty of screen real estate with only one color profile to worry about.
My printer is an Epson SureColor P5000 17-inch 12-color printer. This is a wide-format photo printer, and although I have printed to it directly from Linux, setting up the printer drivers is a bit tedious. In this case, I have a 2010 Mac Mini dedicated as print host with up-to-date printer drivers and a Software RIP (Raster Image Processor). By adding a $20 dongle to the Mac Mini, I converted it to a headless workstation accessed via Remmina.
As far as my OS is concerned, I use KDE Neon on my desktop and on my laptop. I chose this distribution after quite a bit of distro-hopping.
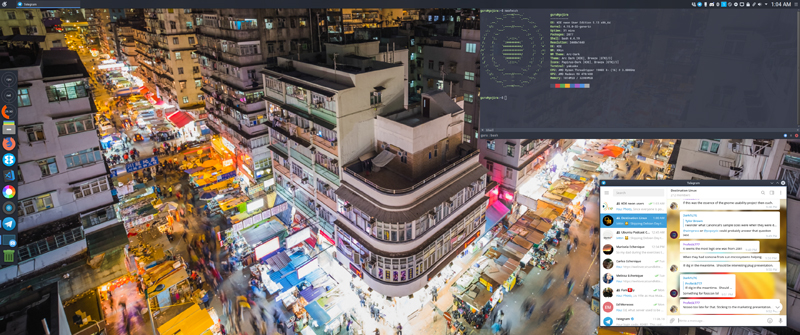
Figure 1. Desktop
The Open Source community has done quite an excellent job with producing professional-grade photography applications. Here is the list of what I regularly use.
Rawtherapee is an open-source raw conversion software that is a veritable Swiss Army knife of graphic functionality. Although it uses a light-table metaphor similar to Adobe Lightroom, its interface is far more technical and requires a little getting used to. After working with several hundred photos, I can quite easily get my signature look and have it recorded as presets. The only thing missing is the ability to watermark my images and upload them to online galleries.
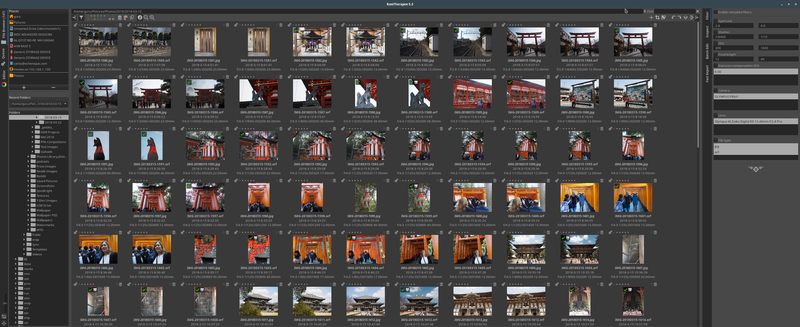
Figure 2. Rawtherapee
digiKam is an advanced open-source digital photo management application that runs on Linux, Windows and macOS. The application provides a comprehensive set of tools for importing, managing, editing and sharing photos and raw files. I use digiKam to watermark my images and upload them to online galleries. digiKam is based on the Qt libraries used by the KDE desktop environment. If it's not available for your distribution, you can download the AppImage.
Note: I recently discovered a bug in the AppImage that prevents digiKam from uploading to online galleries in the KDE desktop environment (which is highly ironic as digiKam is a native KDE application). I have spoken with the developers after having filed a bug report, and they promise me the issue will be resolved in version 6.0.0, which will be released "Real Soon".

Figure 3. digiKam
Darktable is another piece of open-source raw conversion software. Unlike Rawtherapee, which gives you every tool imaginable, Darktable takes its design cues from Adobe Lightroom, and although it's not a clone, it definitely looks very familiar. Why do I use Darktable if I have Rawtherapee? Well, it depends on what kind of look I am going for in my images. I've found that Rawtherapee is very good with skin tones, while I can easily achieve my preferred landscape look in Darktable—right tool for the right job.
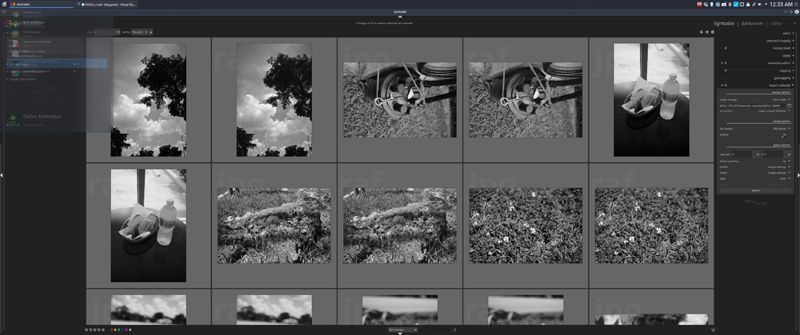
Figure 4. Darktable
Lensfun
Lensfun is a library and not an end-user application per
se. It's used in all three of the aforementioned applications to handle
camera/lens corrections (distortion, chromatic aberration and so on) to great
effect. However, it requires a tiny bit of massaging to make it truly
useful. As it comes with the applications, it contains a rather dated
version of the library. The way you fix this is to install the package
liblensfun-bin, and then run the command
lensfun-update-data,
which will download the latest version of the library. If your
camera/lens combo is not present, you can submit test images to Lensfun
coverage managed by
Wilson Bronger.
DisplayCal is a FOSS color calibration system. In short, this software, in combination with a colorimeter, allows you to map the color profile of your computer display accurately. Why is this important? Because cameras, displays and printers all operate in their own color spaces, and not all of them are consistent. By profiling your display, you can convert the colors rendered by your camera to the display accurately, which, in turn, allows you to map it to the printer's ink/paper color profiles. (Printer manufacturers go to great lengths to create accurate color profiles for their printers and paper. You are completely free to go "off the reservation" and use third-party inks and papers, but you do so at your own peril.)
Qimage One is a software Raster Image Processor (RIP), which allows you to print on large format printers with greater control and provides the ability to "nest" images so as to cut down on paper/ink waste. Why is this a big deal? Professional photo printers are not cheap to maintain. My Epson P5000 sports 12 ink cartridges, and each cartridge will set you back ~$75 USD. A roll of 16-inch Premium Lustre paper will cost ~$75 USD as well. A complete restocking of the printer costs ~$975 USD. I run this on the retasked Mac Mini I mentioned in the hardware section. Qimage One is available for Mac OS X and Windows.
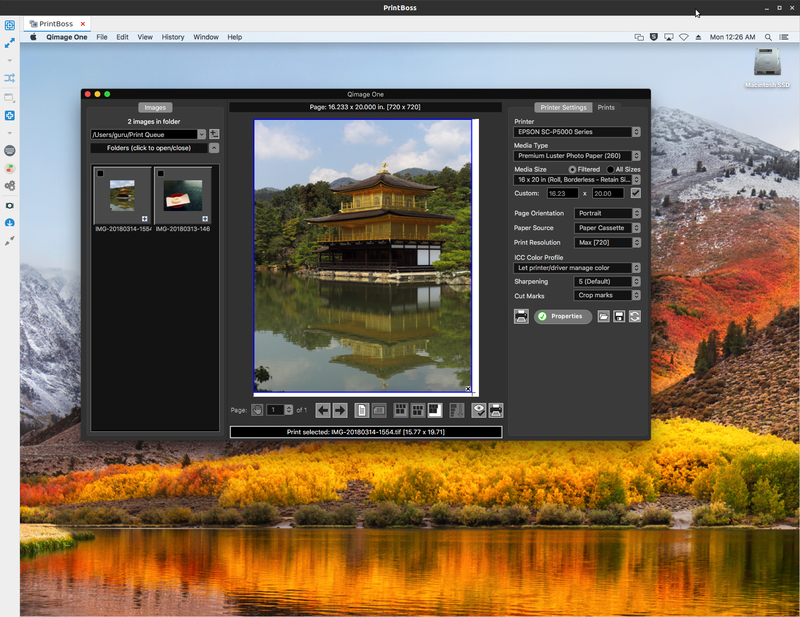
Figure 5. Qimage One
This little application is the first step in my workflow, ingesting photos from my camera's memory card, organizing, renaming, sorting and making a backup copy all in one shot. It truly makes my work much, much easier.
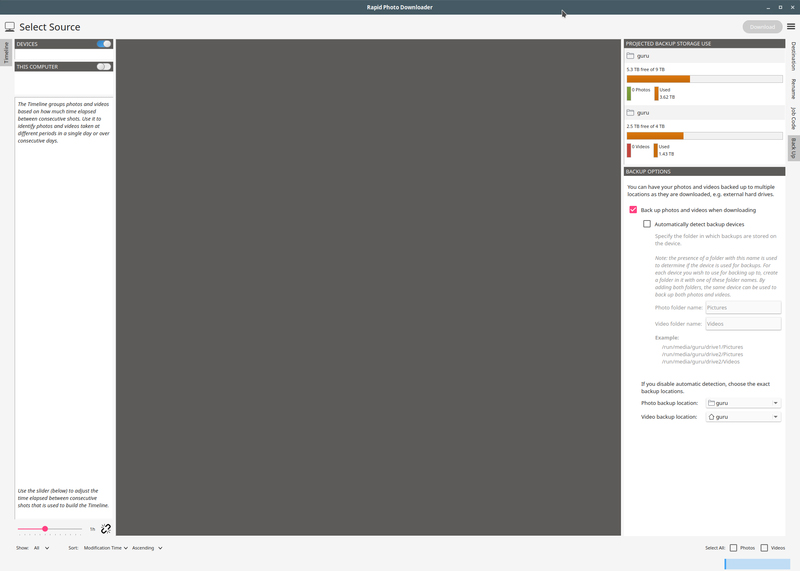
Figure 6. Rapid Photo Downloader
Last, but not least, is the GNU Image Manipulation Program lovingly referred to as GIMP. GIMP is basically the FOSS equivalent of Photoshop. It's not exactly Photoshop, but you can accomplish many amazing things with it as well. I use GIMP on those rare occasions when I need to manipulate an image far beyond simple adjustments and filters or if I am trying to create digital artwork.
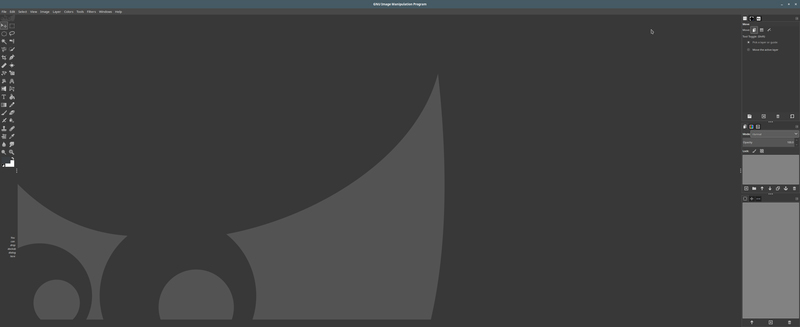
Figure 7. Gimp
Some other very excellent programs exist that I've not mentioned here, such as Lightzone, Krita and Polarr among others. If any of these are one of your favorites, please don't send me flame mail/death threats; there are lot of choices out there, and all of them are good.
So if this FOSS photography software is so great, why isn't everyone using it? Well, for one thing, commercial applications have companies investing large amounts of time and money to the development of their products. Many camera companies work with large commercial application developers by providing them early access to new and upcoming gear. FOSS applications depend on volunteers who are dedicated and talented and photographers who buy the gear and submit image samples for them to work on. Commercial applications have large advertising budgets that allow them to get in front of a lot of eyeballs. When was the last time you saw an ad for Darktable, GIMP or digiKam? FOSS applications rely mostly on word of mouth. Training materials is another area where FOSS lags behind commercial offerings. Because commercial applications are so prevalent, there is a large ecosystem of third-party training materials, plugins and accessories. It also helps that some large companies initially paid a lot of folks to produce those materials.
All is not doom for FOSS photography, however. Many new photographers (and those of us who are older and have seen the light) realize that camera gear is expensive, and that the added cost of software would make the art financially prohibitive for beginners. The quality of FOSS applications now rivals (and sometimes exceeds) that of commercial offerings. Services like Patreon allow these projects to be funded on an ongoing basis, and in turn, they are able to innovate much faster than their commercial counterparts. With more input from actual photographers, FOSS applications can continue to evolve as photographic needs change. Plus, since most FOSS offerings are free, you aren't limited to just one set of applications. Also, many of these FOSS applications are available on Windows and Mac as well as Linux.
So, how do I process my photos? Let me say that I prefer to get the shot right in the camera. Call me old-school if you like, but I prefer to be taking photos rather than processing them. Don't get me wrong; I'm not afraid to get my hands "dirty" with post processing. I just like going places and taking photos better than being holed up in front of my computer processing them.
As I previously mentioned, I shoot raw, but this method works for JPEG shooters too. Also, my workflow is what works for me, and it may not work for you.
The first step is to get the images out of the camera and into my computer in an organized fashion. This is called ingestion. This is a critical step, because you can create a great deal of work for yourself in the future if you don't stay organized from the beginning. The first tool that comes into play here is Rapid Photo Downloader. When installed, RPD becomes one of the actions that can be invoked when you insert the memory card into the card reader. Can't I just plug in the camera and read directly from it? Yes, but that might involve drivers depending on your camera, and a card reader is driverless and universal. Once the card is inserted into the reader, I fire up RPD and, using my preset profile, import my photos, renaming them in the process based on their metadata into folders based on the shot date. A copy is made at the same time to my RAID array, and Syncthing copies it to my NAS for offsite backup later that evening. (My backup system could be the subject of an entire article all by itself.)
The second step is called culling. Here I open Rawtherapee or Darktable and use the light table function to select the photos I'm going to work on. I usually mark them with a colored flag, and once I am done culling, I apply a filter for the red flag in the app, which narrows my view down to the selected images. At this point, I move to the third step.
The third step, adjustment, sees me applying general adjustments to exposure, contrast, highlight/shadow recovery, maybe adding a film style (I did say I was old-school) and generally tweaking the images to taste. Both Rawtherapee and Darktable are very powerful in this respect. I will admit that Rawtherapee's interface can be a bit daunting, but with research and experimentation, you can learn to manage it and achieve your desired look.
The fourth step, culling, round 2, has me going over the images and removing the ones that don't fit the set or just couldn't be massaged into something I would consider presentable. Your image sets should try to be cohesive or tell a story. One other tip is to be ruthless in your culling. Show only your absolute best, as anything else would not showcase your photographic skills.
And, next comes step five: exporting. Raw files are amazing in their depth and flexibility. However, they are big, and not everyone can see them the way you do. So now comes the time to export your images into a more universal format and prepare them for their ultimate destination. If you are going to post them on the web, JPEG images in the sRGB colorspace is the most common format. For printing, I export to 16-bit TIFF images in a printer-appropriate colorspace. These are much larger than JPEGs but do not alter the images due to compression.
Step six can be watermarking and uploading or printing, depending
on the image's ultimate destination. For the former, I use digiKam
and its powerful batch engine to add my text watermark and then upload
to my online galleries. For printing, I copy the TIFF images to a shared
folder on my Mac Mini and then start up remmina to log in to the
Mac's graphical interface remotely. From there, I open the images in
Qimage One and process them for printing.
So, as you can see, except for the printing step, pretty much the whole workflow is handled very easily by Linux and open-source photography software. Could I have done the whole thing in Linux? Yes and no. Depending on your printing needs, you could forego the printer entirely and use a local professional printing service. Many of those shops use the ROES system for the uploading and management of images to be printed. The ROES client is written in Java and is compatible with Linux. If you invest in a large format printer, you may have to investigate using a solution similar to what I have set up. Open-source software RIPs exist, but they have not been updated for more than a decade. Some commercial Linux solutions are available, but they are prohibitively expensive.
All of the following images have been processed using the aforementioned workflow.

Figure 8. Abstract 1
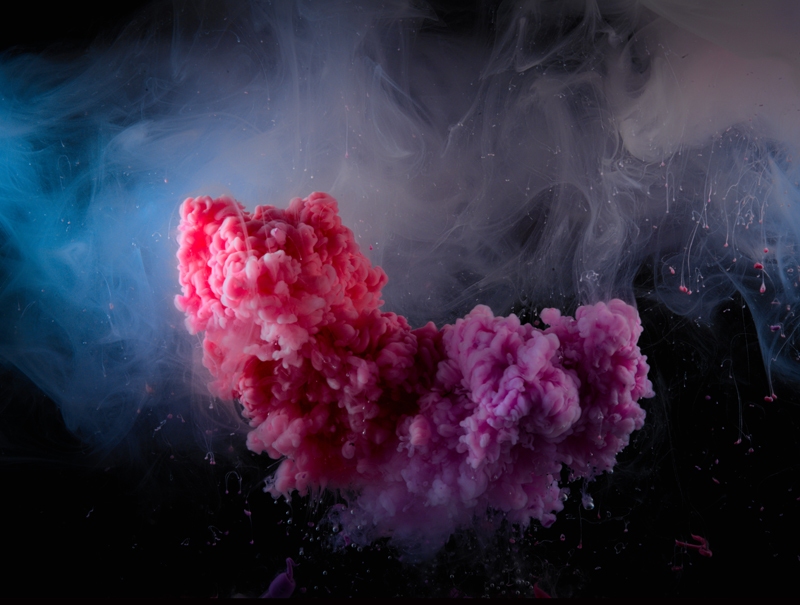
Figure 9. Abstract 2
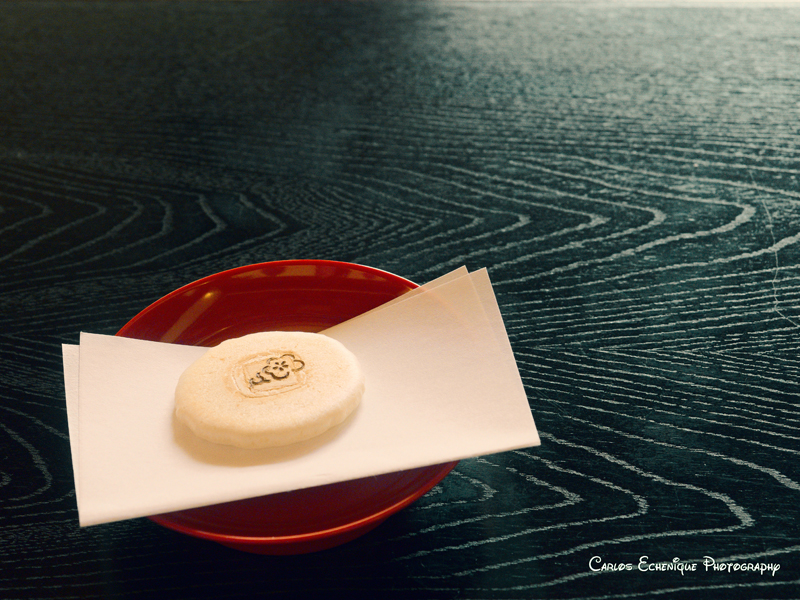
Figure 10. Rice Cake
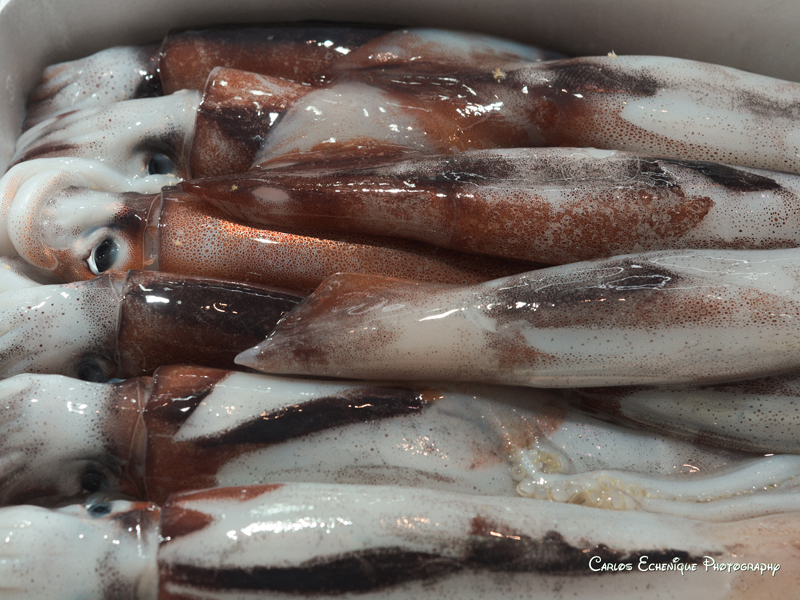
Figure 11. Squid
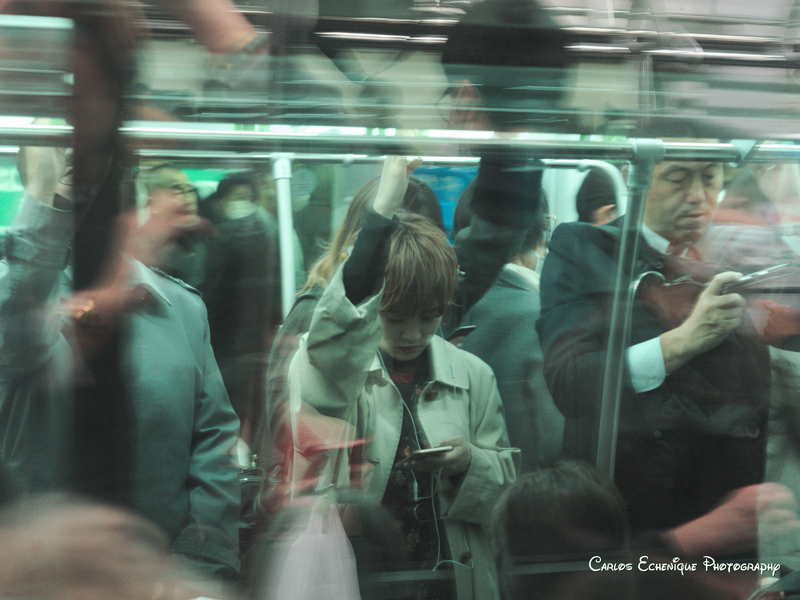
Figure 12. On the Tokyo Subway
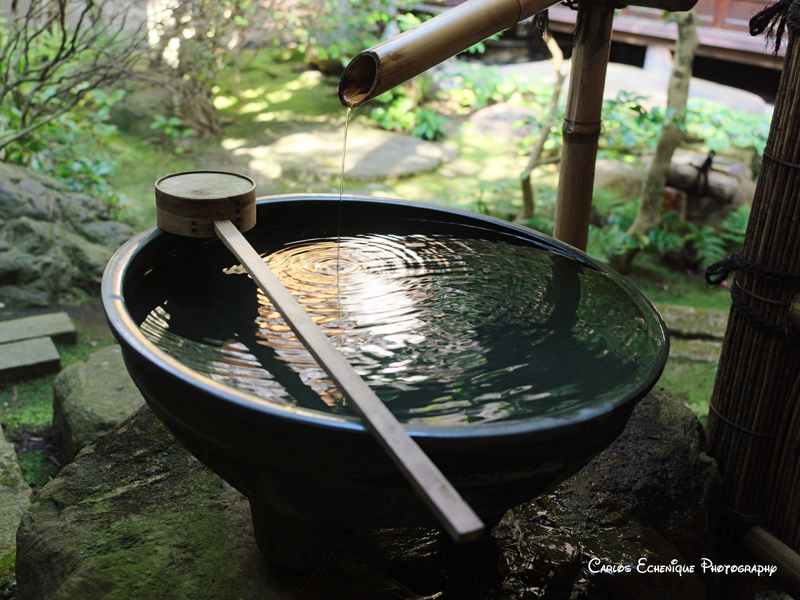
Figure 13. Tranquility
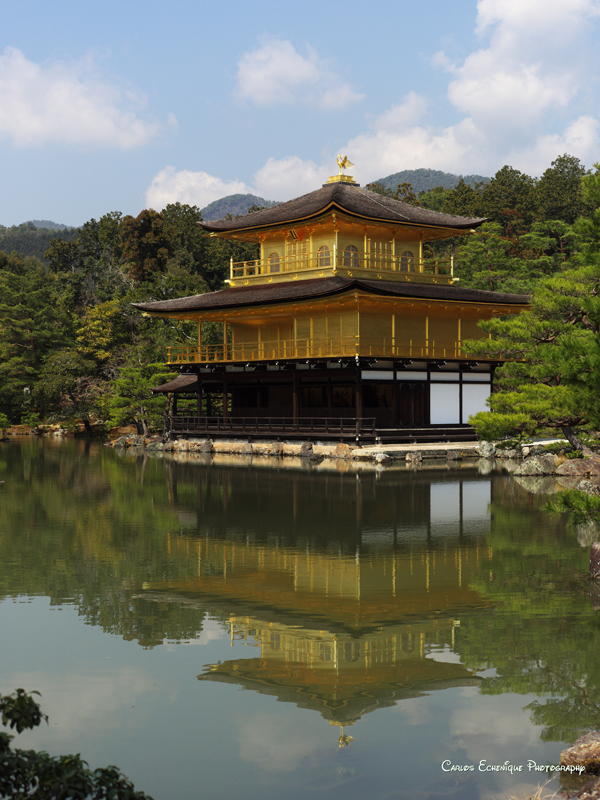
Figure 14. The Golden Pavilion
At the start of this article, I posited the question of whether a professional photographer could work effectively using a FOSS-based workflow. In my personal opinion, the answer is "yes". Like their Windows/Mac counterparts, Linux/FOSS workflows require dedication, study and lots of practice in order to become proficient. Windows/Mac solutions have large bodies of commercially prepared training materials and are taught in most institutions of higher learning. The FOSS community has done an admirable job of producing quality software, and the online training materials are starting to see some real improvements, as artists begin to embrace software they can afford during their "starving" phase. A cursory search on YouTube will reveal hundreds of tutorial videos on all aspects of the photographic process using FOSS applications. Even Hollywood has begun to embrace open source. FOSS photography software, like Linux itself, is quietly making in-roads in the professional photo industry.
Carlos Echenique is a Miami, Florida-based photographer specializing in fine art photography and travel photography. He established his career photographing professional ballet performances and portrait work. Later, he branched into travel photography, street photography and abstract photography. He has curated several local exhibitions and is currently a Guest Artist with the group 7 Plus 1, a collective of abstract artists. He recently converted most of his workflow to free open-source software and is an advocate for FOSS photography.
